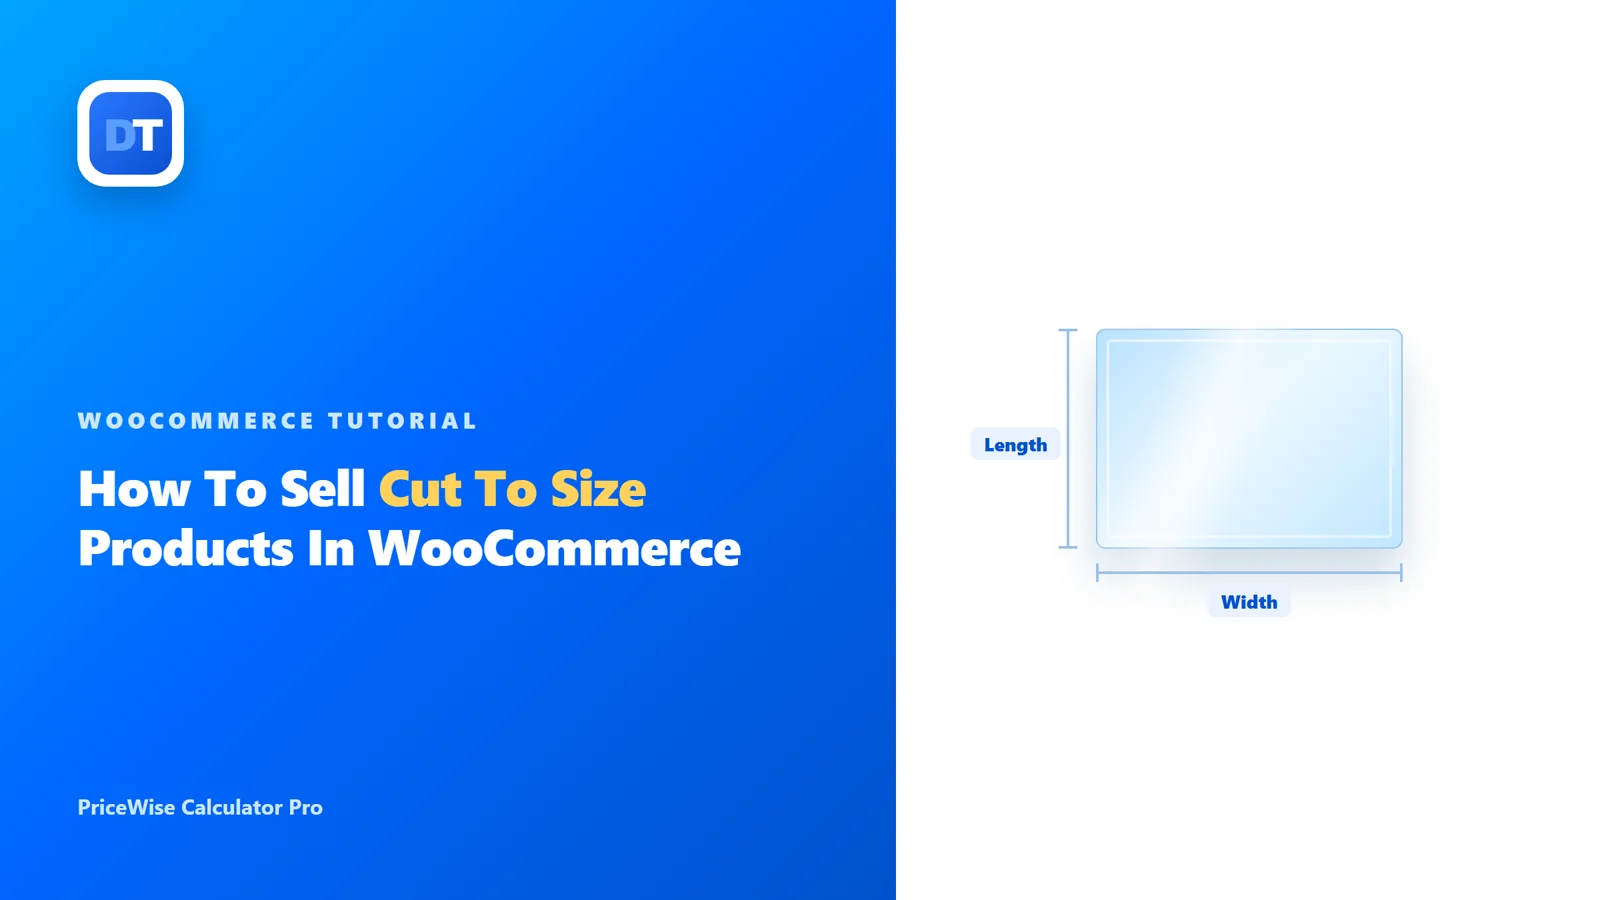
Picture the last quote you sent for a cut piece. Say it was 6mm toughened glass, 742 by 519. You worked out the price, typed it into an email, hit send, and waited.
Some of those people reply. A lot don’t, because by the time you got back to them they had found a shop that showed a price on the spot. That is the quiet way cut-to-size businesses bleed money online. Not on quality. On the wait.
WooCommerce doesn’t help. Out of the box it sells one product at one price. There is nowhere to type a size, and nothing that turns a size into money. So people force it two ways. They bolt on a “request a quote” form, which is just the inbox again with extra clicks. Or they reach for variations and give up somewhere around the 400th combination, when it sinks in that they would need a separate one for every width and every length a customer might ever ask for.
What you actually want is boring for the buyer, and boring is the goal here. Two boxes, width and length. A price that moves while they type. And the size saved onto the order, so whoever is on the saw isn’t texting you to ask what “that one” was.
I’ll build exactly that below with PriceWise, the calculator plugin I make. I’m using glass for the example on purpose. Glass is the fussiest thing to price because of the unit conversions, so once it’s right, plywood and acrylic are easy.
Setting it up (I’ll use glass)
In the WordPress menu, open Calculator Pro and click Add New. Name it something you’ll still recognize in six months, like “Cut To Size Glass”. On the Basic Information tab, set it to a whole category so it shows on every glass product at once, instead of wiring it up one product at a time.
Then save it. Do that before you touch anything else, because the fields stay locked until the calculator exists, and that one detail trips up almost everybody the first time.
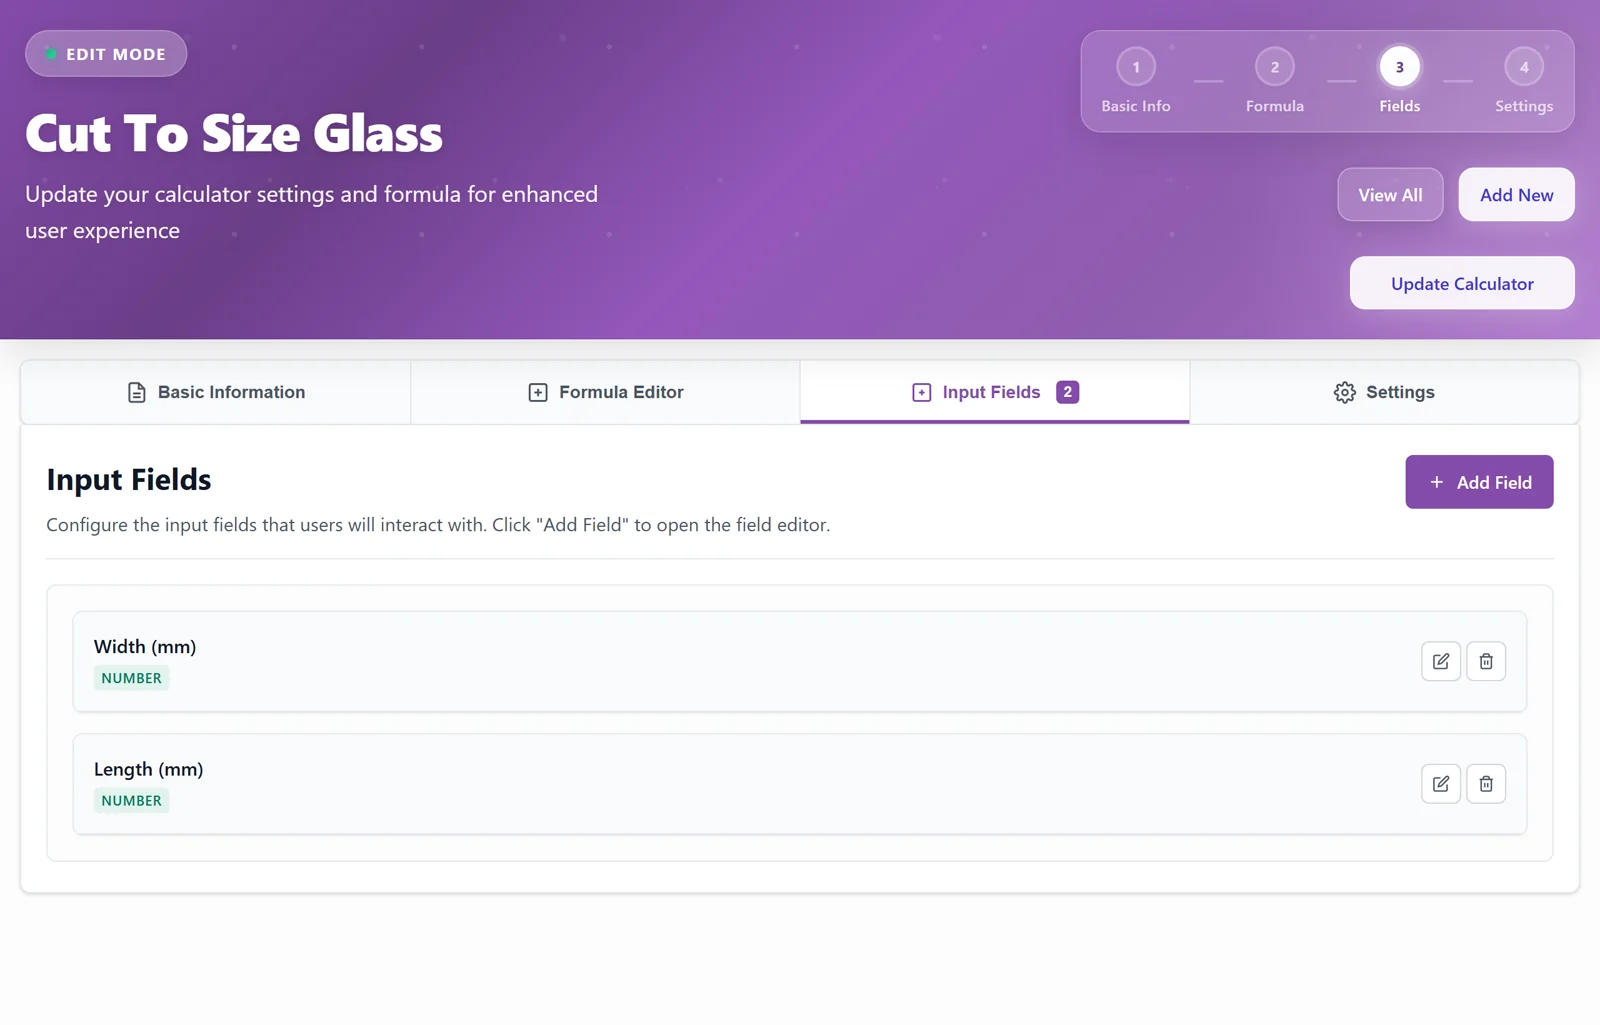
Now add the two boxes the customer fills in. On the Input Fields tab, add a Number field called Width (mm), then a second called Length (mm). Put the unit right there in the label. It looks obvious to you, but it quietly kills a lot of “did you mean cm?” emails.
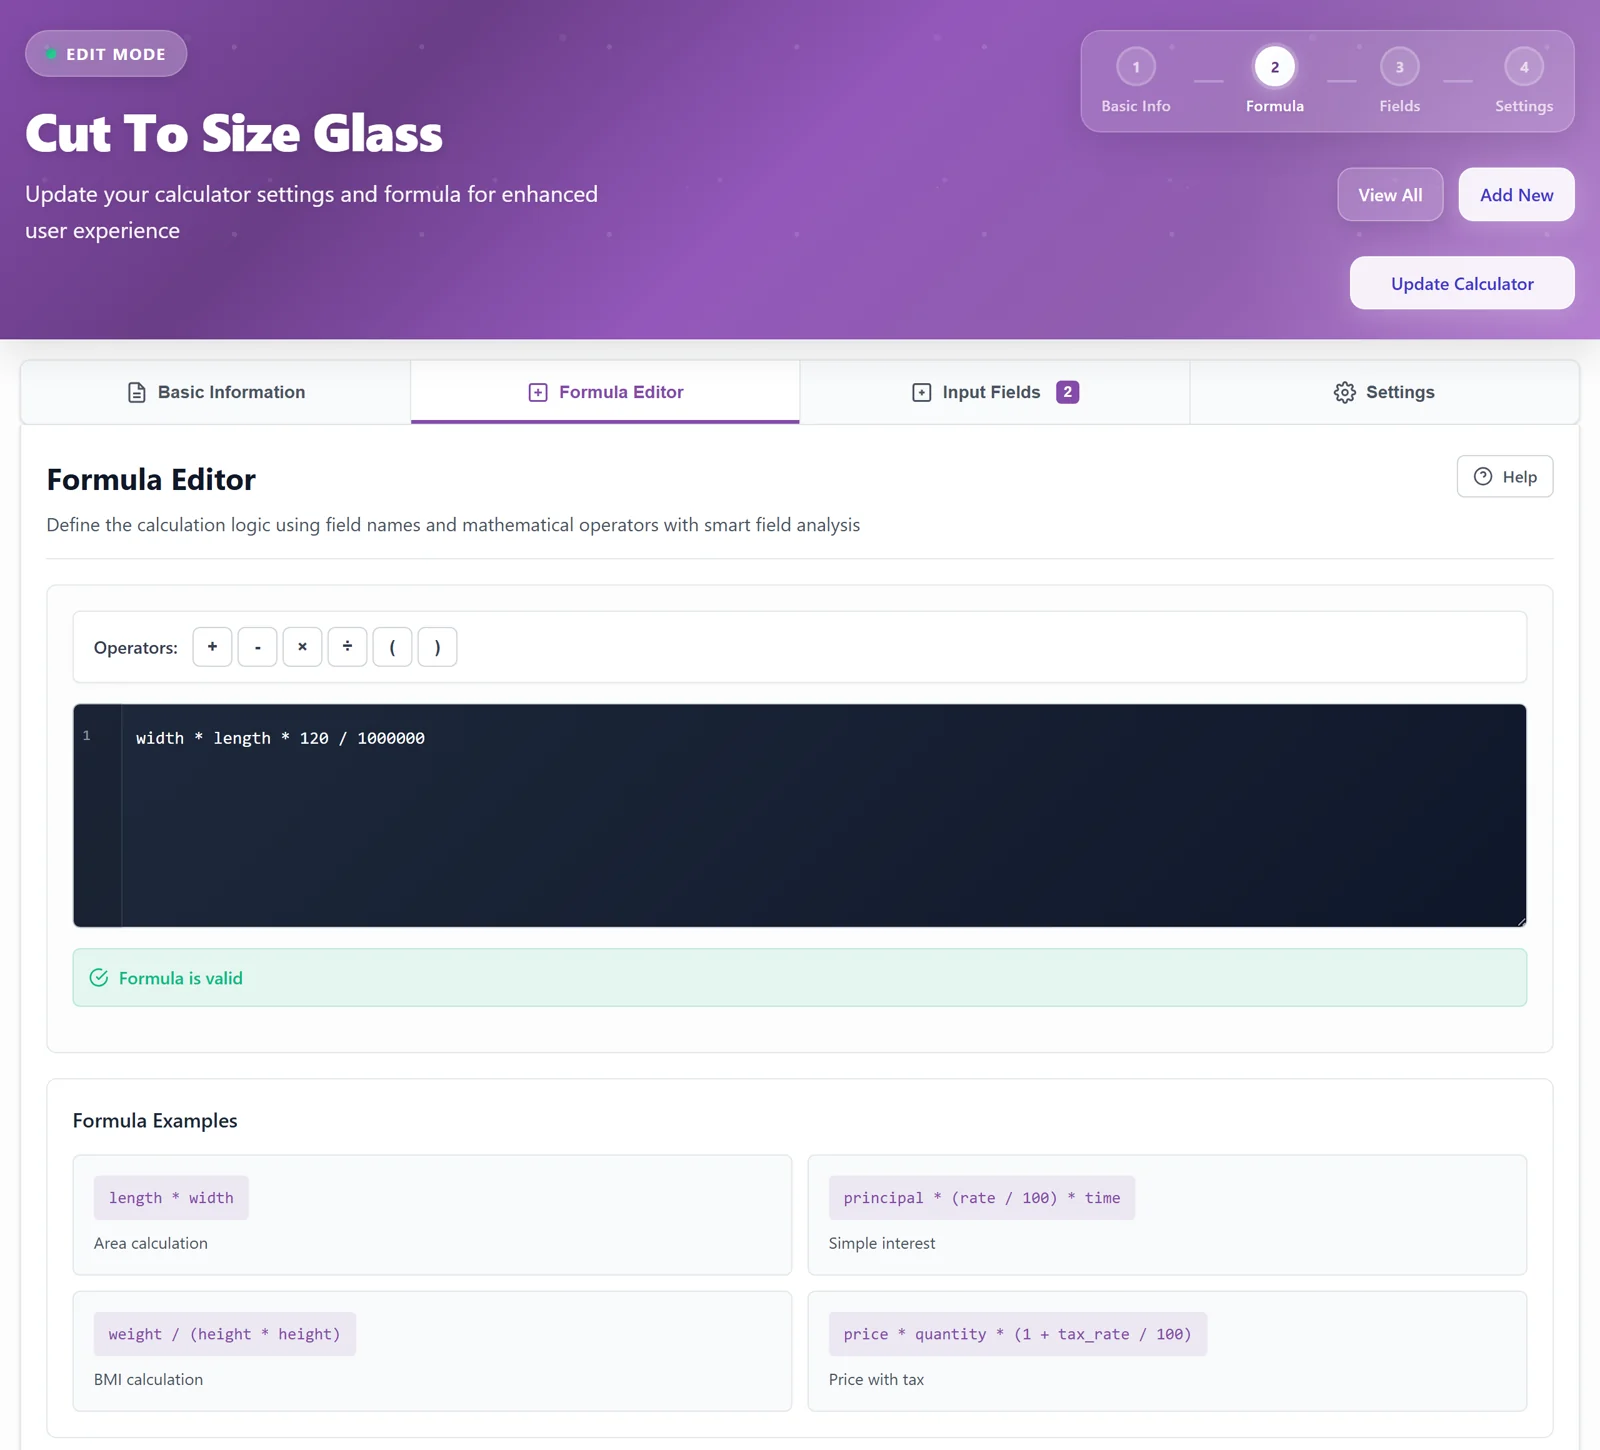
The formula, and the part everyone gets wrong
Here is where it actually matters. Open the Formula Editor and, for glass at $120 a square meter with sizes typed in millimeters, write this:
width * length * 120 / 1000000Width times length gives you the area in square millimeters. Someone types 600 and 400, that is 240,000 square mm, and dividing by a million turns it into 0.24 square meters. Multiply by 120 and the price reads $28.80, before they have clicked a thing.
That divide-by-a-million is the bit people get wrong, and it is always units. Your formula has to speak the same units as your boxes. Ask for millimeters, divide by 1,000,000. Prefer centimeters, divide by 10,000. Ask for meters, don’t divide at all. The big number is only ever how many of your little squares fit inside a square meter, nothing clever. Pick one unit, match it, move on. Get it wrong and your prices are out by a factor of a hundred, which you will notice quickly.
PriceWise shows “Formula is valid” once it reads cleanly, so you are not guessing whether you typed it right.
One last thing before you test it. On the Settings tab, turn on Hide Quantity Selector. A cut piece is one specific piece. You don’t want someone ordering “3” of a sheet cut to their alcove. Save, open a glass product that has a regular price set, and try a size. If the calculator doesn’t appear at all, it is nearly always one of two things: no fields yet, or no regular price on the product. Check those first.
Real pricing is never just length times width
If you have done this a while, you are already thinking “yeah, but I charge for cutting,” or “I have a minimum,” or “6mm and 10mm are not the same price.” Fair. Here is how each of those goes.
A flat fee for cutting or handling is the easy one. Add it on the end:
width * length * 120 / 1000000 + 8Every cut now carries eight dollars on top.
A minimum charge is trickier, because the formula does straight sums and has no idea of “never go below this.” So don’t try to do it in the formula. Set the product’s regular price to your floor, say 15, and let the calculator handle anything above that. Then write the minimum into the product description in plain words so nobody is surprised. Not elegant, but it works, and customers get it instantly.
Different thicknesses and materials are where it gets good. Instead of a separate product per thickness, add a dropdown. Give it the key rate and feed it options as label then price, one per line:
4mm Clear|90
6mm Clear|120
10mm Toughened|220
Then point the formula at whatever they chose:
width * length * rate / 1000000The customer picks the glass, the rate follows, the price updates. One product now covers your whole range. The same trick handles an edge finish, polished against raw, or any extra you offer: another dropdown, added on the end.
And if some of what you sell goes by the running length instead of by area, like bar or trim or rod, drop the width entirely. One Length field and:
length * rateWhy the order needs the size, not just the price
This is the part that quietly makes the whole thing work, and it is easy to miss because it happens after the sale.
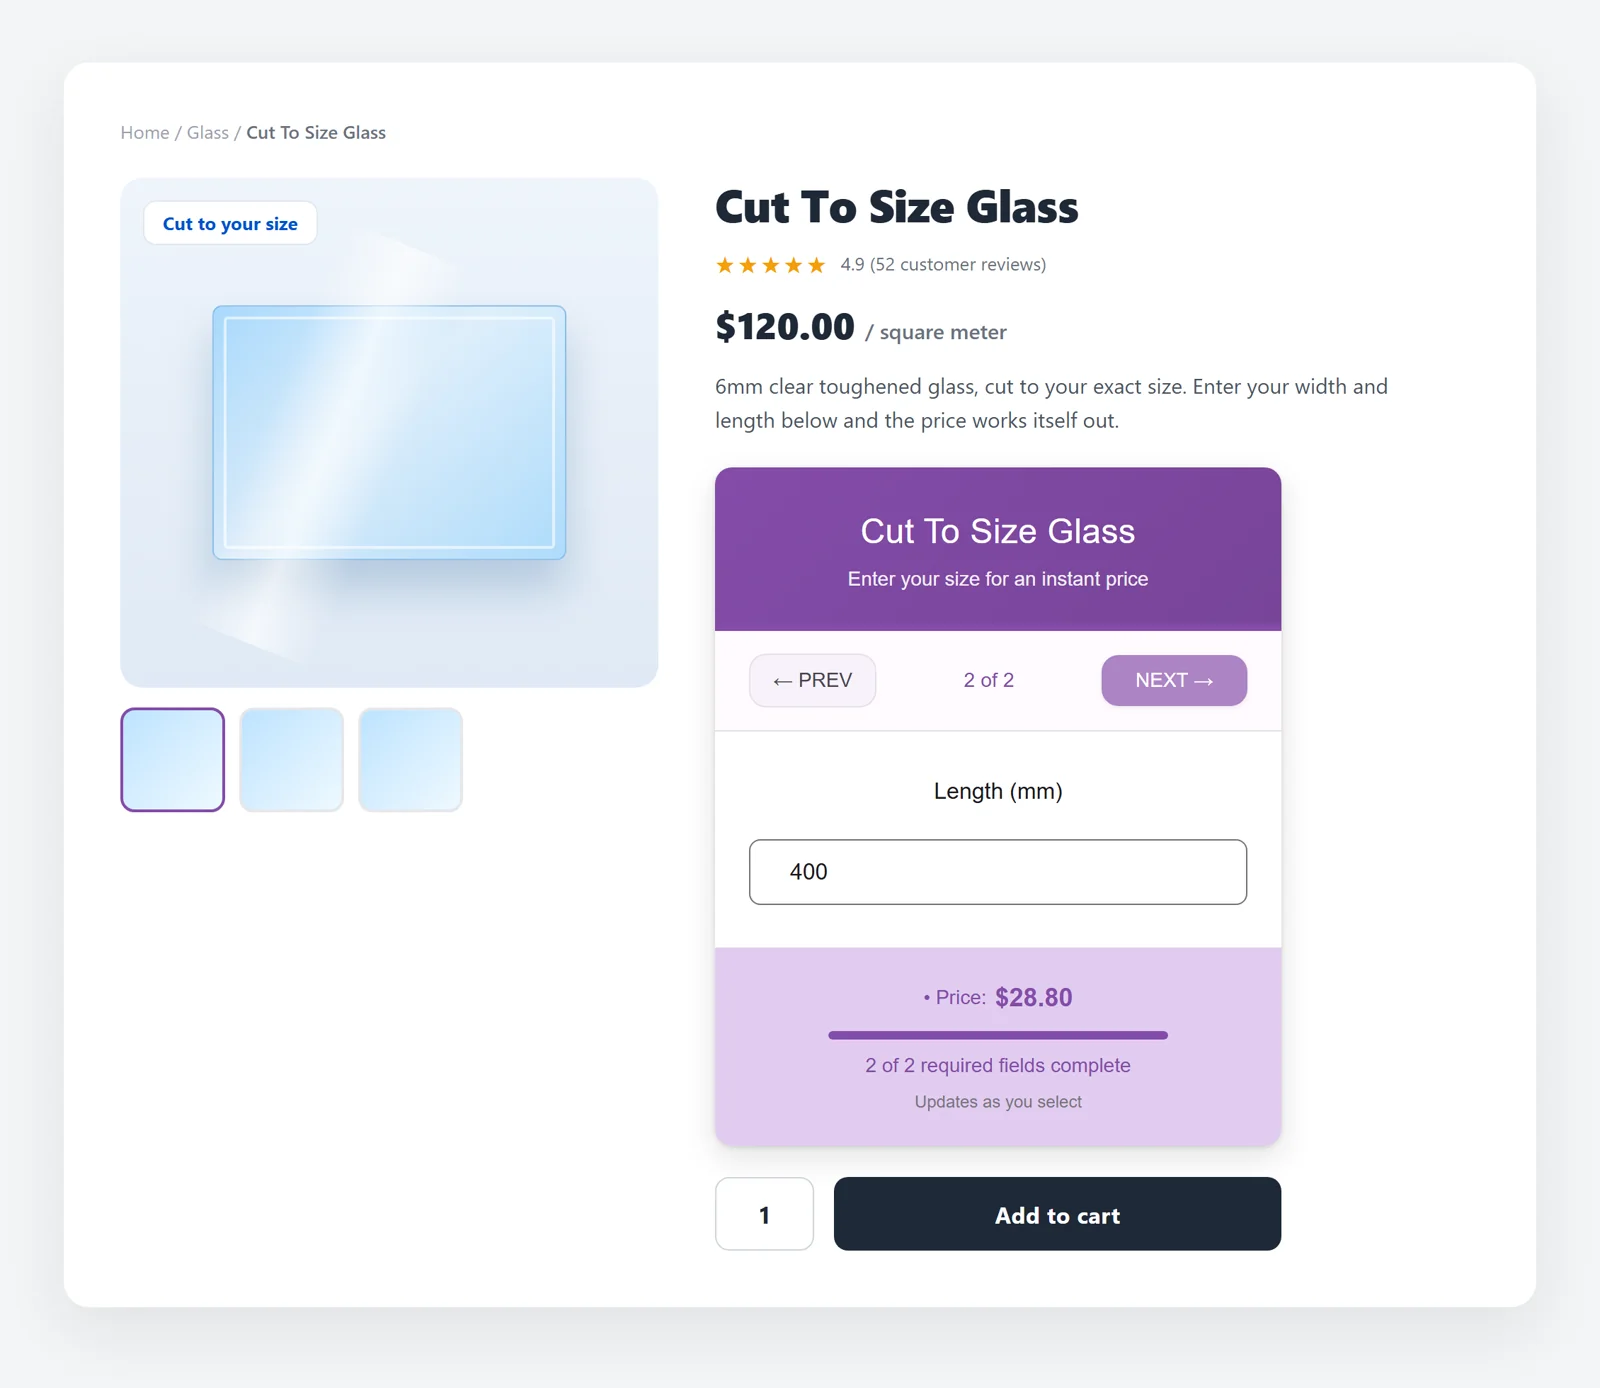
When the customer adds their cut to the basket, the width and length they typed travel with it. The numbers show in the cart, and they save onto the order. So the order that lands in your dashboard already reads 742 by 519, 6mm toughened, the lot. Whoever is cutting reads it straight off the order. No one emails anyone to confirm a measurement.
That is the line between a real shop system and a quote form wearing a costume. A quote form takes a message. This takes an order you can cut from.
Where this runs out of road
I would rather tell you the edges now than let you hit them halfway through a build.
The formula is simple on purpose. It does + - * / ( ) and numbers, full stop. No “if this then that”, no rounding, no minimum baked in. For most cut-to-size shops that really is all you need, and the workarounds above cover the rest. But if your pricing leans on genuine conditional rules, know that going in.
Prices won’t always land on neat money either. You might see $28.83. If that nags at you, choose rates that divide cleanly rather than fighting the calculator over a few cents.
And it prices the cut, not the courier. Shipping a 2-meter sheet of glass is its own headache, so handle that with WooCommerce shipping and most likely a flat rate for the big, fragile stuff. If you quietly add a few millimeters of cutting tolerance, say so on the page. The calculator charges for exactly what the customer types.
None of that is a wall. It is just the stuff worth knowing before you tell a customer a number is final.
Getting it live
Strip it back and it is short: two number fields with the unit in the label, a formula with the right divisor for that unit, a dropdown if you sell more than one material, a minimum set through the regular price, and Hide Quantity Selector switched on so every order is one real piece. That is a working cut-to-size product.
That is the job I built PriceWise Calculator Pro to do, and it starts at $39. When you want the settings this article skips over, the documentation goes deeper.
If what you are really selling is a finished thing made to a size, curtains, blinds, that kind of work, that is a slightly different setup and I wrote it up separately: made to measure products. Selling flat material by the square meter is over here. And for loose material sold by the load, soil, gravel, bark, there is sell by volume.


 ``` --- ## Image 3: Provider comparison chart **Filename:** `lemon-squeezy-fees-vs-stripe-paddle-gumroad-comparison.png` **Where in article:** Inside `## How Lemon Squeezy compares to Stripe and others` section, right BEFORE the comparison table **Alt text:** ``` Lemon Squeezy fee comparison versus Stripe, Stripe Tax, Paddle, Stripe Managed Payments, and Gumroad calculated for a 49 dollar sale to a European customer paying by card ``` **Markdown to paste in WP body:** ```  ``` --- ## Image 4: Revenue breakeven chart **Filename:** `lemon-squeezy-fees-by-revenue-breakeven-chart.png` **Where in article:** Inside `## When LS fees stop making sense` section, right BEFORE the bullet list of revenue thresholds **Alt text:** ``` Monthly Lemon Squeezy fees at different revenue levels showing the breakeven point around 50000 dollars per month where hiring a tax team becomes cheaper than paying LS fees ``` **Markdown to paste in WP body:** ```  ``` --- ## Visual map of where images go ``` [Featured Image 1 → sidebar only] Opening paragraph ## The base fee everyone sees (text) ## Every Lemon Squeezy fee in one table (intro sentence) [Image 2 here] (fee table) (payout fees table) ## Real cost for different scenarios (5 scenarios) ## Payout fees: the part most sellers miss (text) ## How Lemon Squeezy compares to Stripe and others (intro sentence) [Image 3 here] (comparison table) ## When LS fees stop making sense (intro sentence) [Image 4 here] (bullet list) ## Ways to actually pay less in LS fees ## Questions people keep asking me about LS fees ## Putting it all together ## Related resources ``` That's everything. When you've placed all 4 images and published, tell me and we move to Week 9.](https://devtonicstudios.com/wp-content/uploads/2026/05/lemon-squeezy-fees-explained-real-cost-300x167.webp)