A customer wants 20 t-shirts for their five-a-side team. Bella Canvas, black, their logo on the front and a number on the back, direct-to-garment print. In a normal WooCommerce store they cannot buy that. There is one price box, and their order is nothing like “one price”. So they email you, you work it out by hand, you email back, and half the time they have already gone somewhere that just showed them the number.
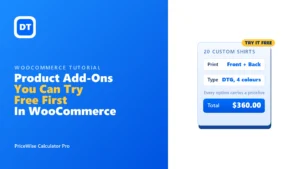
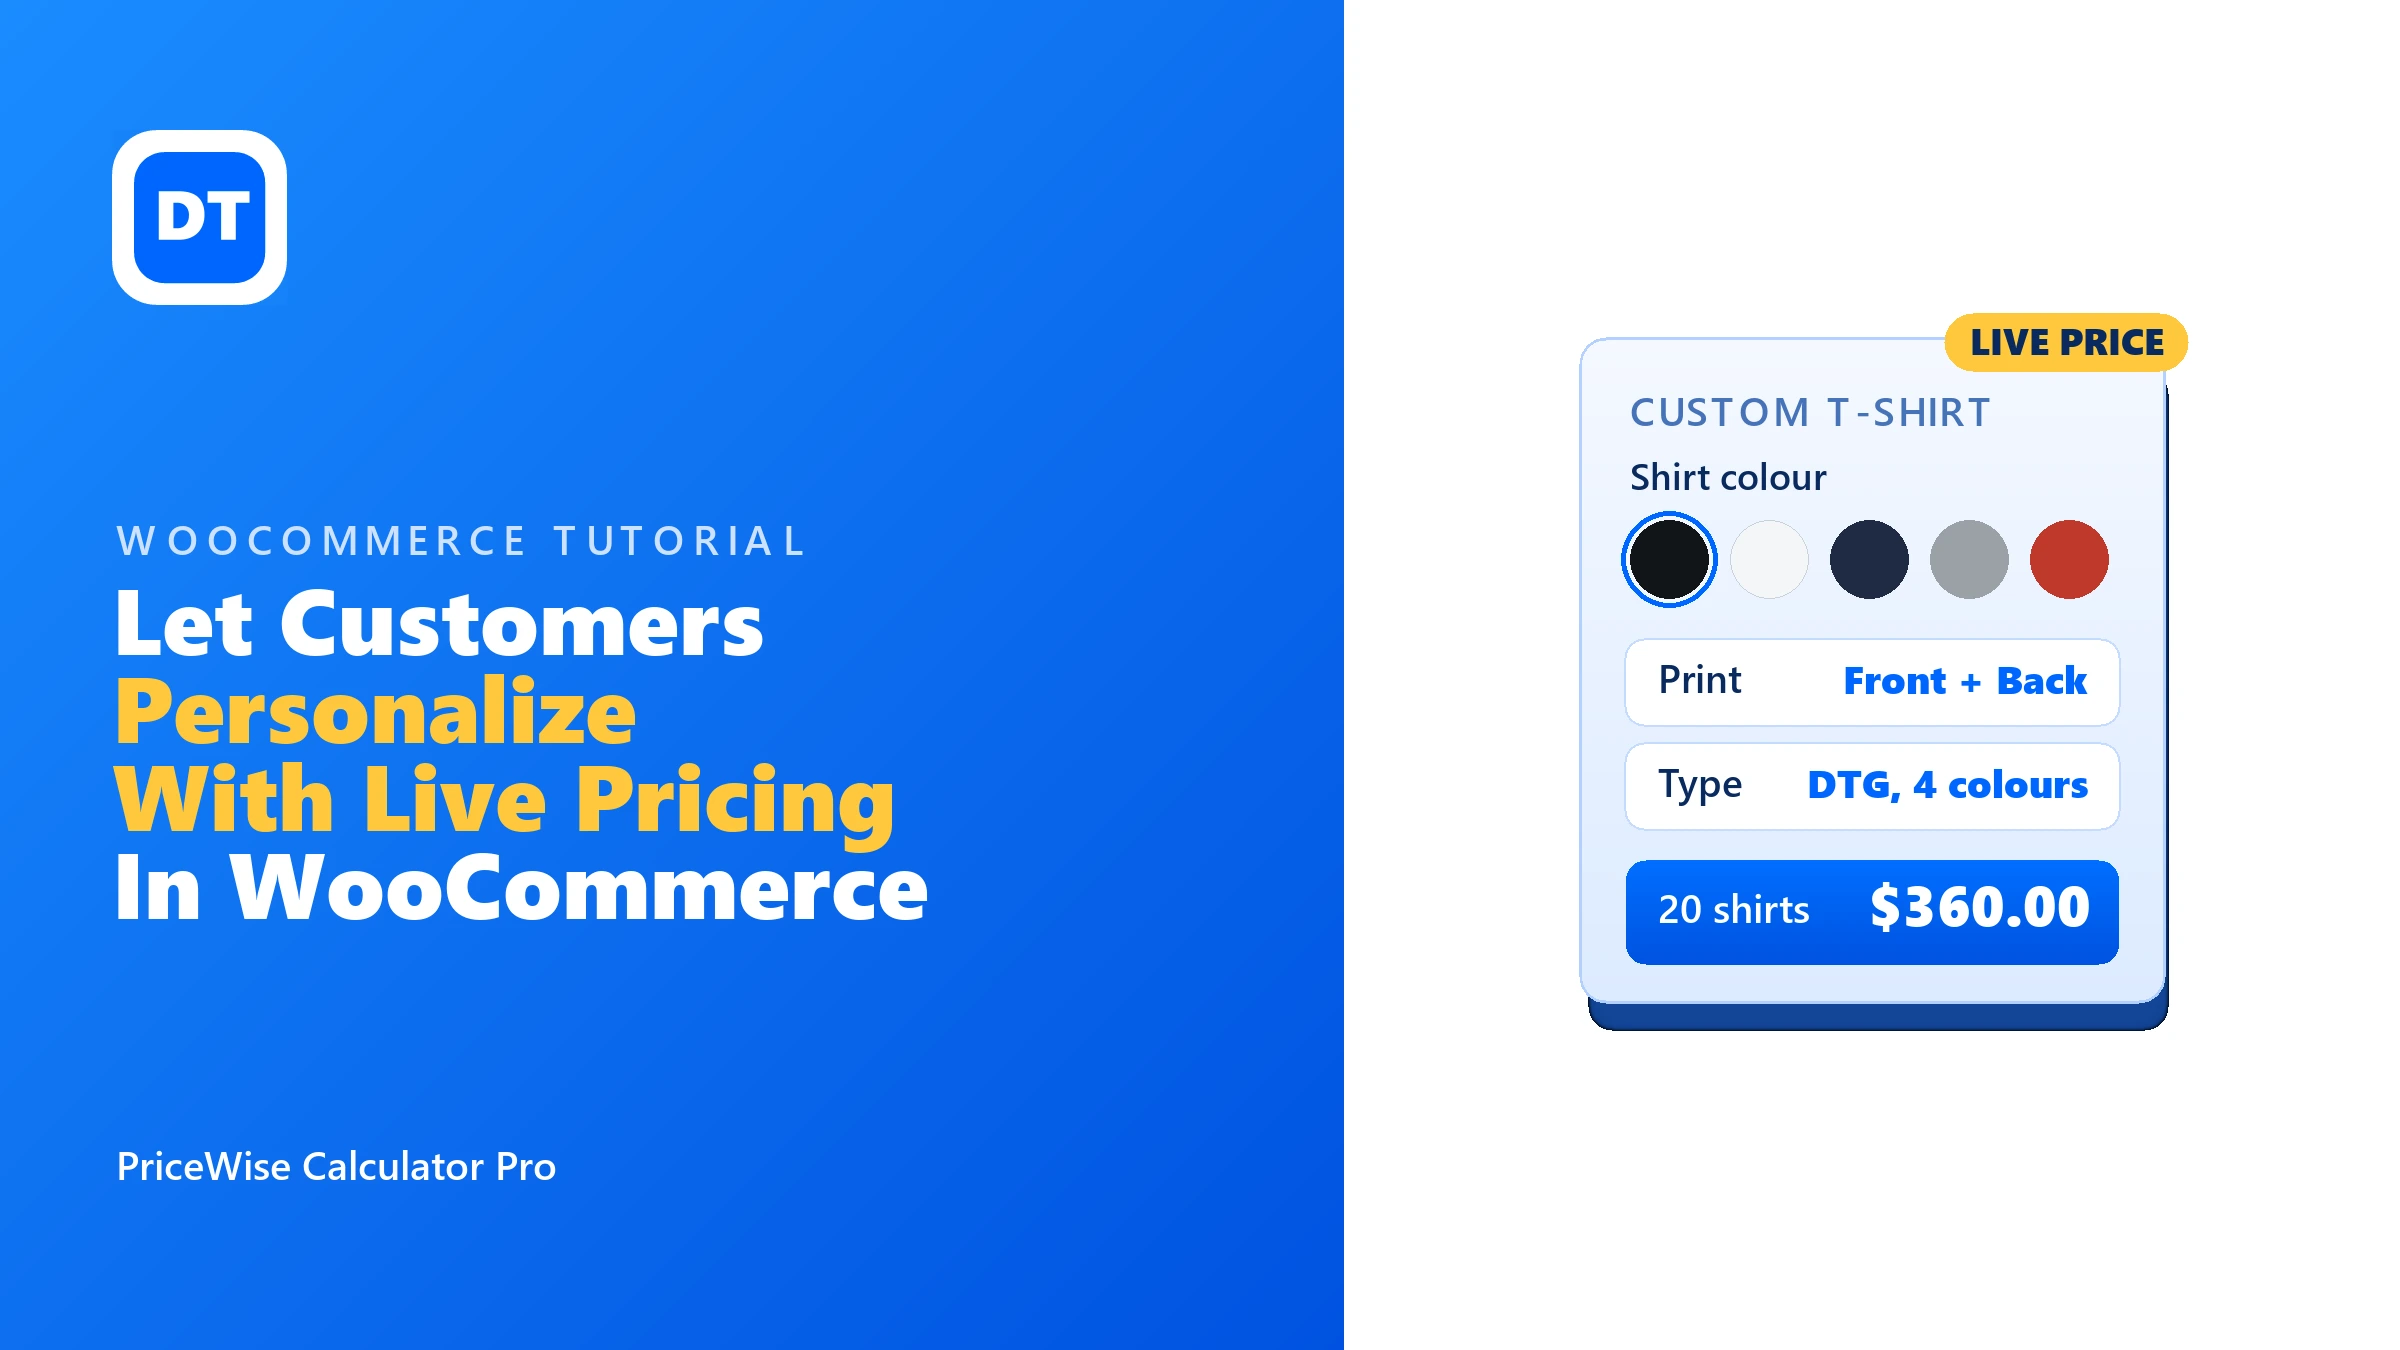
Here is that exact order priced on the page, live: 20 shirts, premium blank, front and back print, DTG, four colours. $360, before they even add to cart. Building WooCommerce plugins is what I do all day, alone, and orders like that one are the reason mine exists. What follows is how to let customers personalize a product and watch the price change as they choose, including where a different kind of tool would serve you better.
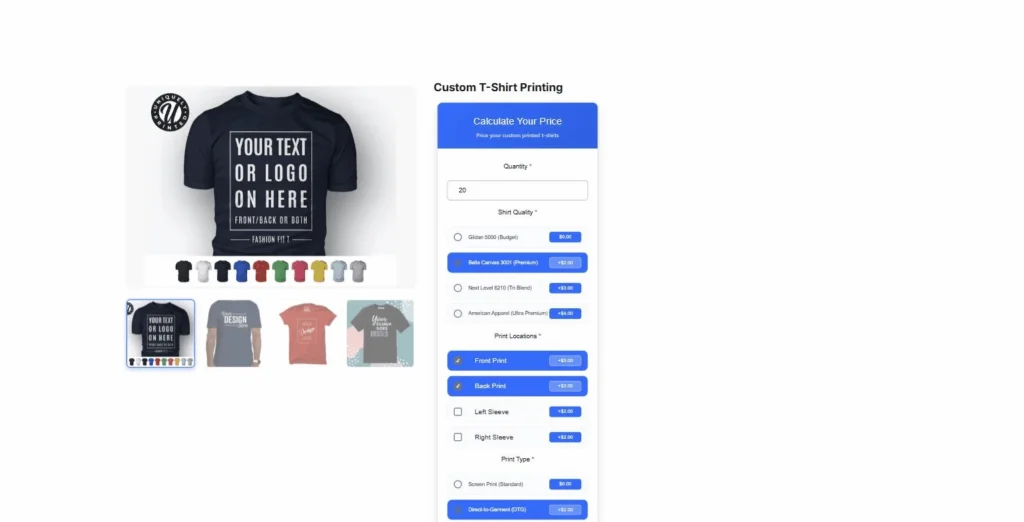
Quick answer: Add a price calculator to the product with option fields: colour swatches, buttons, a slider, a file upload for the artwork. Give each choice a value, write one formula, and the total updates live as the customer personalizes. It is saved to the order with every choice they made. That is what PriceWise Pro does.
“Personalize” is two different jobs. Pick the right one first
This is the part most guides skip, and it will save you money, so read it before you buy anything.
Job one: design the artwork. The customer drags their text and images onto a live mockup, moves it, recolours it, and you get a ready-to-print file at the end. This is a design studio, and it is a real, separate kind of software. If that is what you need, you want a web-to-print tool, not a price calculator. I name the good ones further down.
Job two: price the personalized order. The customer chooses options (size run, blank quality, print type, how many print locations, how many colours, a rush) and needs to see the price for THEIR combination, then order it. The artwork itself is handled another way: they upload their file, or email it, or you set it up after. This is a pricing job, and it is what most “custom product” stores actually need day to day.
The stores that email me usually think they need job one and really need job two. A full design studio is lovely, but it is heavier, pricier, and total overkill if your customer just uploads a logo and you print it. So the rest of this guide is job two, done simply.
What the personalizer looks like to the customer
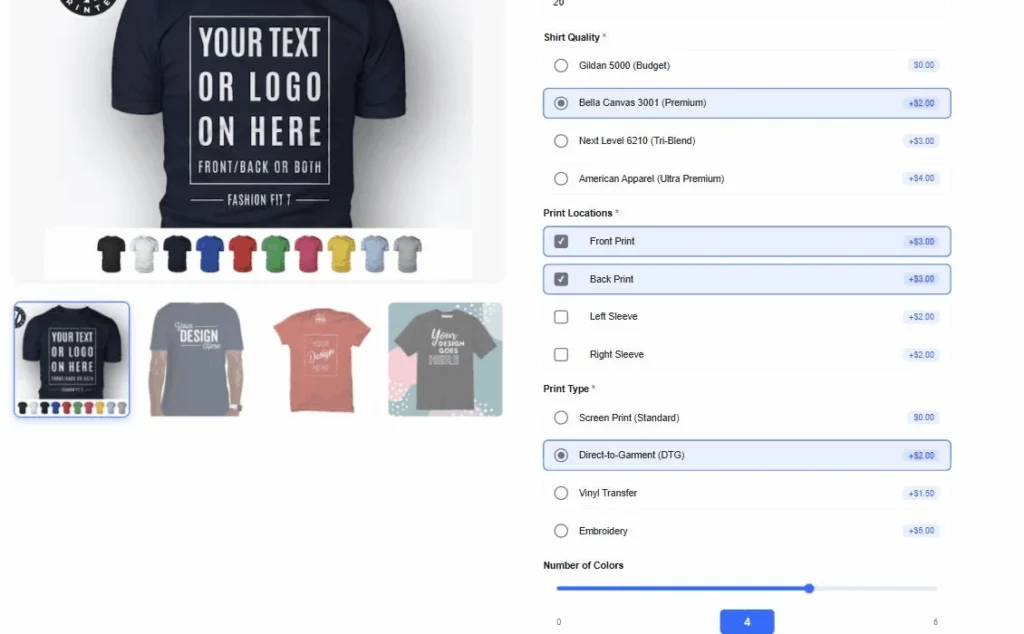
On the product page, the customer works down a set of fields. Every field can carry a price, and the total moves the second they touch it:
- Colour swatches for the shirt colour, clickable, not a boring dropdown.
- Option buttons for blank quality and print type, each showing its own added price (+$2 for the premium blank, +$2 for DTG).
- Checkboxes for print locations, so front + back adds more than front alone.
- A slider for the number of ink colours.
- A file upload so they attach their logo or design right there.
- A message box for notes, and add-ons like folding or names-and-numbers.
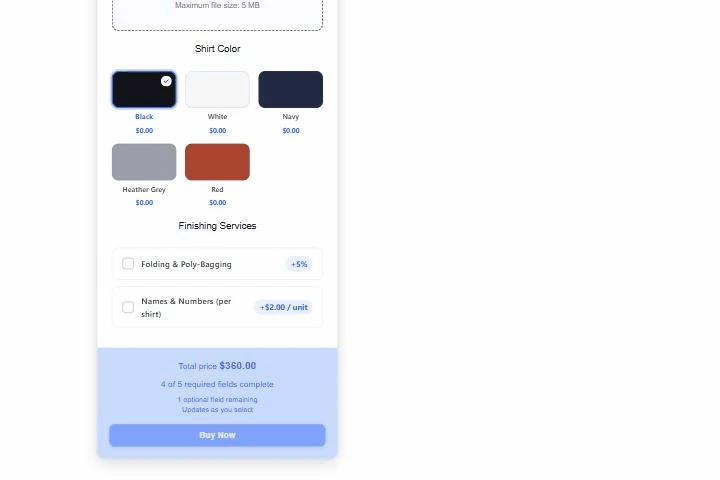
Pick black, front and back, DTG, four colours, and the total reads $360 for 20 shirts. Change any choice and it moves. The price is worked out again on your server when they add to cart, so nobody can edit it in the browser, and every choice lands on the order so you know exactly what to print.
Want to play with it before you build anything? Try the t-shirt demo, a live product on my own store, and click around until the number convinces you. There are more live demos here.
Building the t-shirt configurator
This is the t-shirt calculator from that demo. You build it once in Calculator Pro > Add New, then assign it to your product.
Step 1: Add the fields. On the Input Fields tab, add one field per choice. Give each option a price value. So for “Print Type” you add radio buttons: Screen Print 0, DTG 2, Vinyl 1.5, Embroidery 5. For “Shirt Colour” you add a radio field and turn on colour swatches. For the artwork, add a File Upload field.
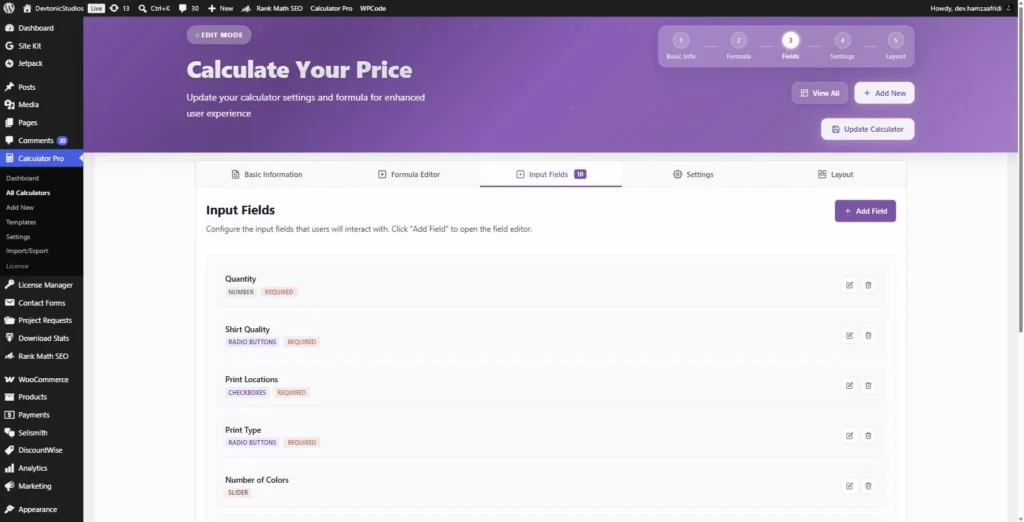
Step 2: Write the formula. On the Formula Editor tab, tie the choices together. The demo uses this:
(quantity * (6 + shirt_quality + print_type + (colors * 0.5) + print_locations)) + rush
In plain words: start with $6 a shirt, add the blank upgrade, the print type, 50 cents per ink colour, and the print locations. Multiply that by the quantity. Then add a flat rush fee if they picked one. Every field name in the formula is just a field you added in step 1.
Step 3: Assign and test. Assign the calculator to your t-shirt product (it needs a regular price set), open the page, and try it. The total should move as you click.
That is the same idea as adding multiple options to one product, with one difference that matters here: every option feeds a live price instead of just sitting there as a note.
The same fields, three layouts
A personalizer can get long. That is why the layout matters, and you switch it with one dropdown on the Layout tab. No code.
All-in-one shows every field together in a card. That is the first screenshot near the top of this guide, good when you want the customer to see all the choices at once.
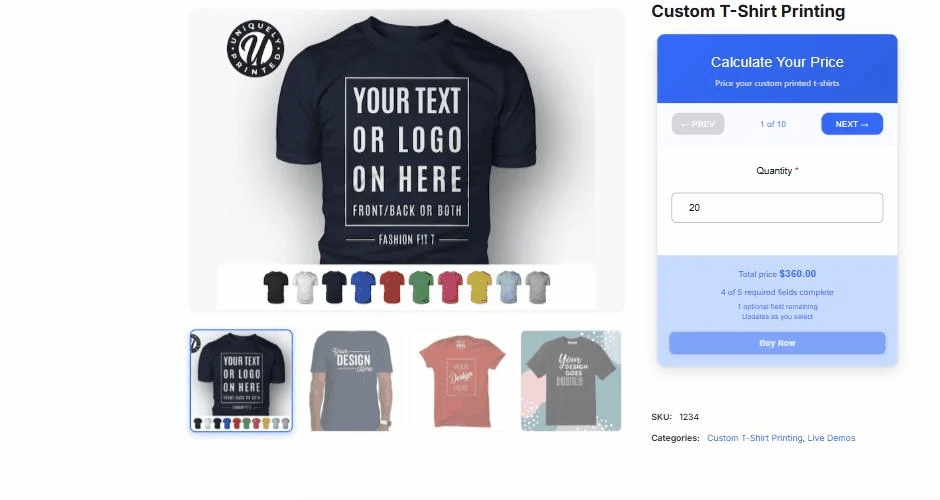
Step-by-step asks one thing at a time with a progress bar. For a ten-field personalizer this stops the form feeling like a wall. The running total is always in view:
Inline drops the card completely, so the fields sit on the page as if your theme built them:
Same calculator, same $360, three different looks. Pick the one that suits the product.
See it end to end
Here is the whole thing running on a real product, if you would rather watch than read:
Which tool for which job
I checked these on their own pages on 14 July 2026. Prices and features change, so click through before you decide.
- You need a visual design studio where the customer designs the artwork on a live mockup and you get a print-ready file (often wired to print-on-demand): Customily and Fancy Product Designer are the well-known ones. They do real design work and can charge for design elements too. If that is your business, they earn their keep.
- You want simple paid options from the makers of WooCommerce: the official Product Add-Ons extension ($79 a year on its page, 14 July 2026) adds fields with prices. Solid, but no live-updating formula and no swatch-and-slider builder.
- You want options that change a live price, with swatches, a slider, a file upload, and one formula tying it together: that is PriceWise, and it is lighter and cheaper than a full design studio.
Honestly: if your customers must SEE their design on the shirt before buying, get a design studio. If they choose options, upload a file, and need the right price, you do not need all that weight.
Can you do it for free?
Partly, and I will be straight about the line. The free version of PriceWise gives you number fields and a formula, so it can price a personalized order if the customer types numbers (how many, how many colours, how many locations). What is Pro is the nice personalizer itself: the colour swatches, the option buttons, the slider, the file upload, and the step-by-step layout. Those extra field types are the Pro part.
So free proves the pricing works. Pro makes it the clickable, swatch-and-upload experience customers expect. Pro is $49 a year, or $99 once. I compared what the free version covers in detail separately.
FAQ
Can customers upload their own logo or design? Yes. Add a File Upload field and it sits with the other options. The file arrives on the order so you have their artwork to print.
Do the colour swatches cost extra, or are they just for show? Your call. A swatch can add nothing (just a colour choice) or carry a price, like any other option. In the t-shirt demo the colours are free and the blank quality costs more.
Does the price update live, or only in the cart? Live, as they choose. Then it is checked again on your server at add-to-cart, so the price cannot be faked in the browser.
Will every choice show on the order? Yes. The colour, the print type, the locations, the uploaded file, the message: all saved on the cart line and the order, so you print the right thing.
Is this a design tool where they drag text onto a mockup? No, and I would not pretend otherwise. For that, use a design studio (see above). This prices the options and takes their file.
Before you build
- Decide the job: do customers design artwork on screen (studio), or choose options and upload a file (this)?
- List your choices and put a price on each one.
- Add the fields, write one formula, assign it to the product, test the live total.
That is what I built PriceWise Calculator Pro for: options that change a live price, with swatches, uploads, and a clean layout, from $49 a year. Start with the t-shirt demo or the free version, and the documentation has the rest. Your customers already know what they want. Let the page tell them what it costs.