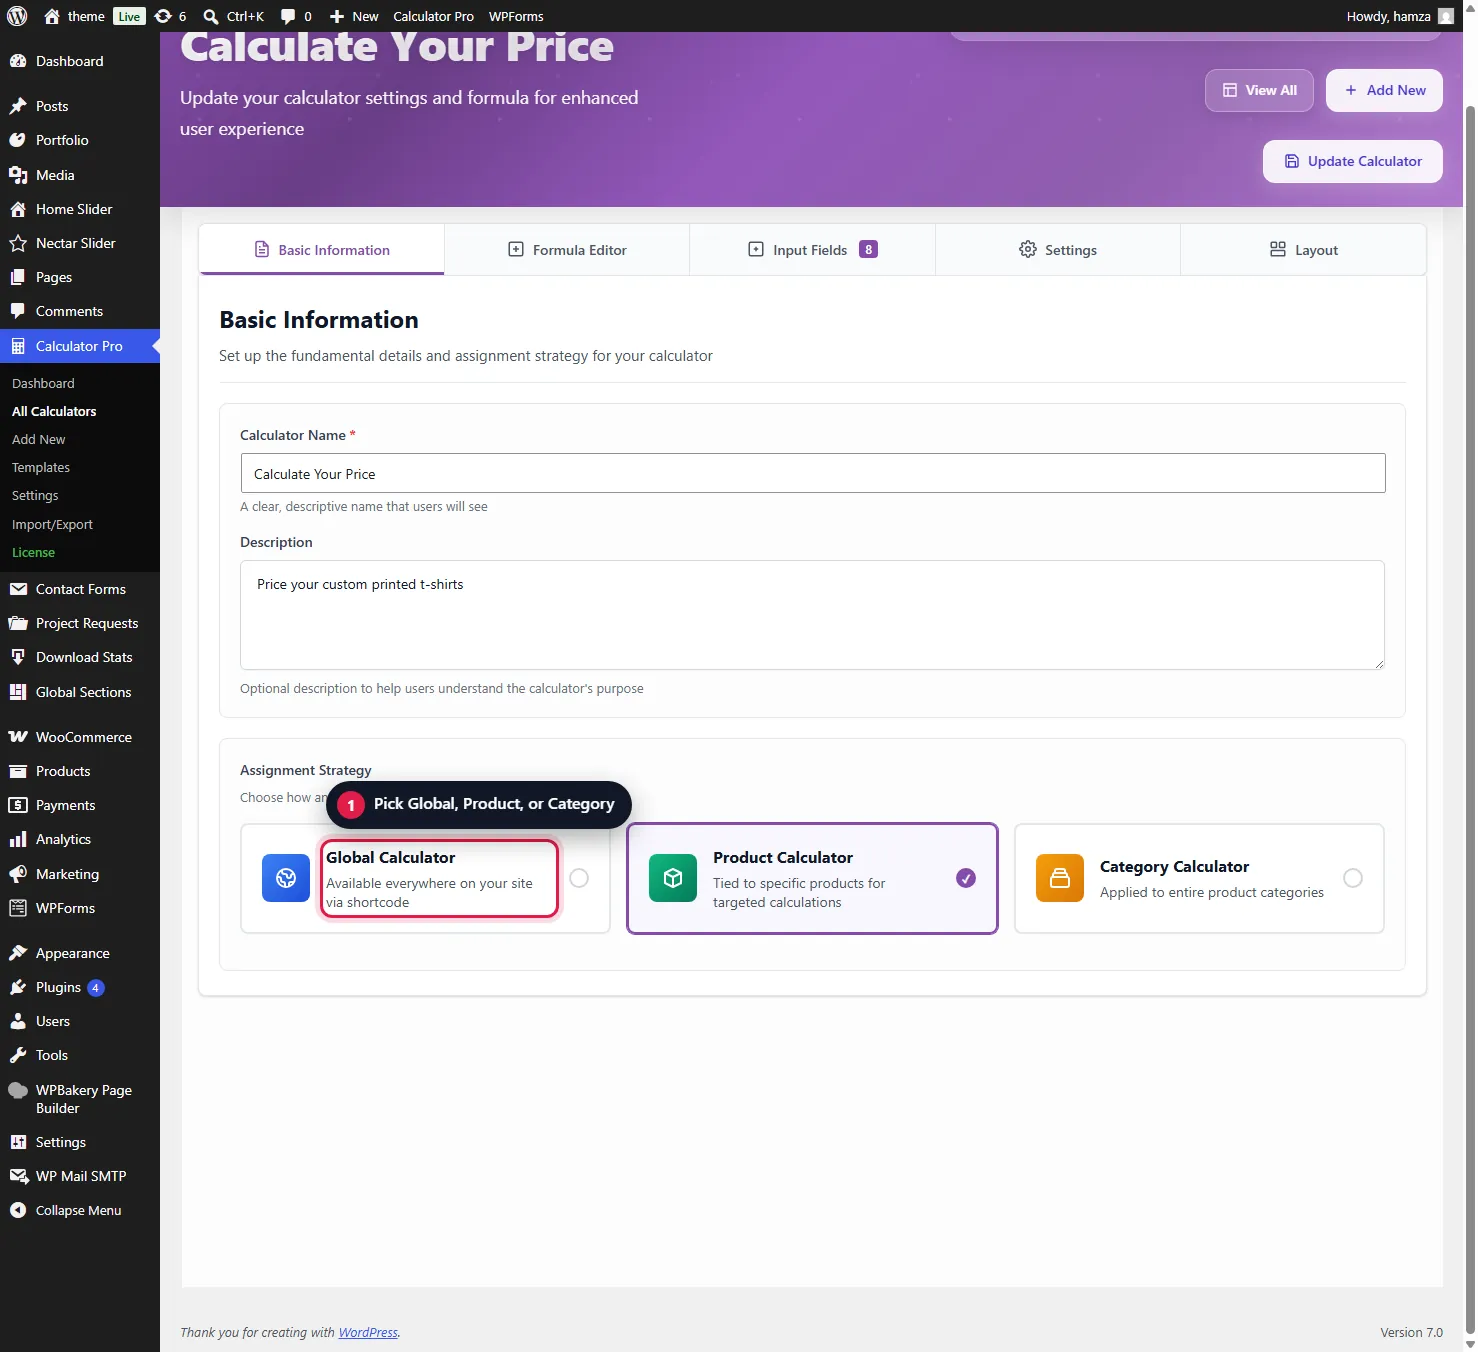
Alright, now let’s talk about the different ways you can make your calculators appear on your site. Remember that Assignment Strategy section in the Basic tab? This is where it all comes together.
You have THREE powerful ways to assign calculators:
1. Global Calculator (Default)
Set in the Basic tab: choose “Global” in Assignment Strategy. Your calculator shows on every product in your shop that has no product or category calculator of its own. Perfect when most of your products use the same pricing structure!
2. Product Calculator (Specific)
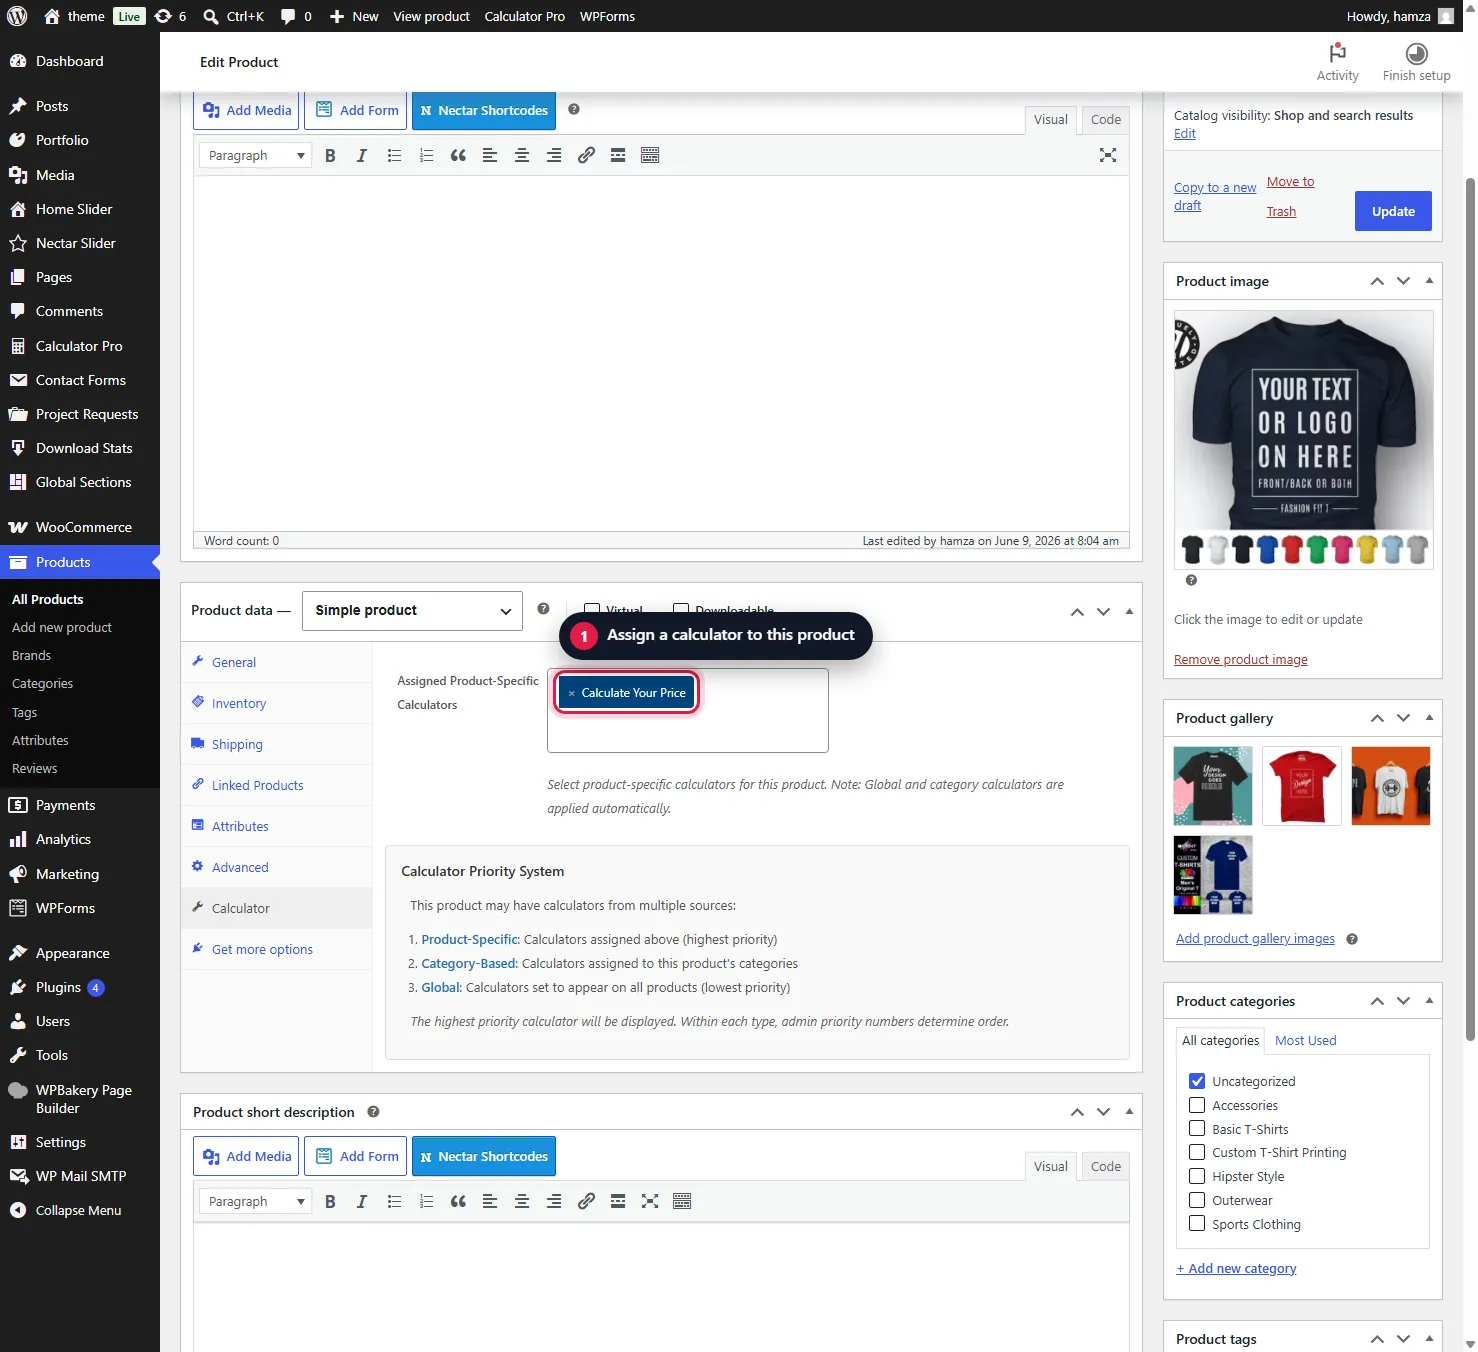
For individual products that need their own calculator:
- Edit your product in WooCommerce
- Go to the “Product Data” section
- Click on the “Calculator” tab (you’ll see it next to General, Inventory, etc.)
- Select which calculator to assign
- Save. Done!
3. Category Calculator (Powerful)
Assign one calculator to an entire product category – every product in that category automatically gets the calculator!
To set this up: In your calculator’s Basic tab, choose “Category” in Assignment Strategy. The category selector appears right there – check all the categories you want!
Product Calculator → Category Calculator → Global Calculator. So if a product has its own calculator assigned, that takes priority over everything else. Only one calculator shows on a product. Between calculators of the same kind, the higher Priority number in the Settings tab wins (1-100, default 1).
Was this page helpful?
Thanks for telling us.
Sorry it did not help. Tell us what you were looking for and we will add it.