Alright, let’s build your first calculator. I’m going to walk you through this step-by-step because honestly, the interface might look a bit different than what you’re used to (in a good way!).
Head to the Dashboard
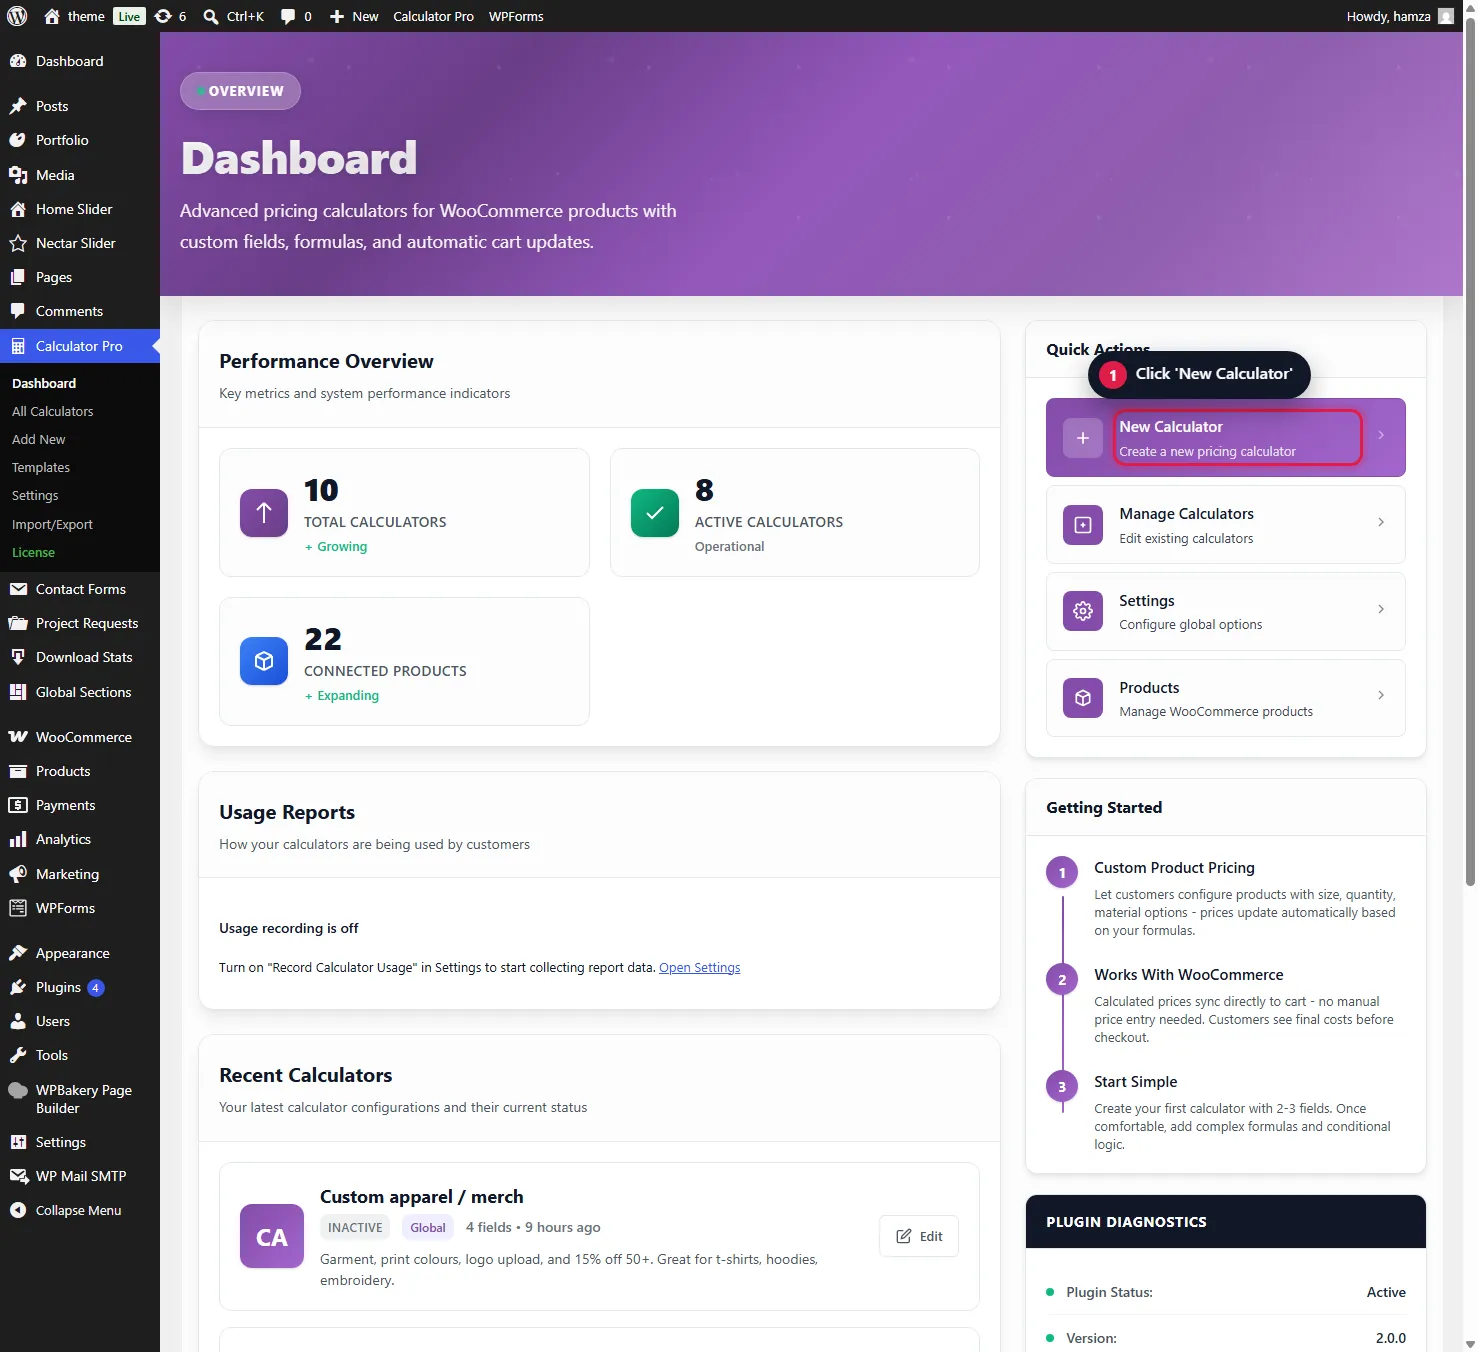
After you activate the plugin, you’ll see a new “Calculators” menu in your WordPress admin. Click on Dashboard first – it’s worth checking out. You’ll see your stats (which will be zero for now, obviously), and some quick action buttons.
Click the big “Add New Calculator” button. You ready? Let’s go!
The Basic Info Tab
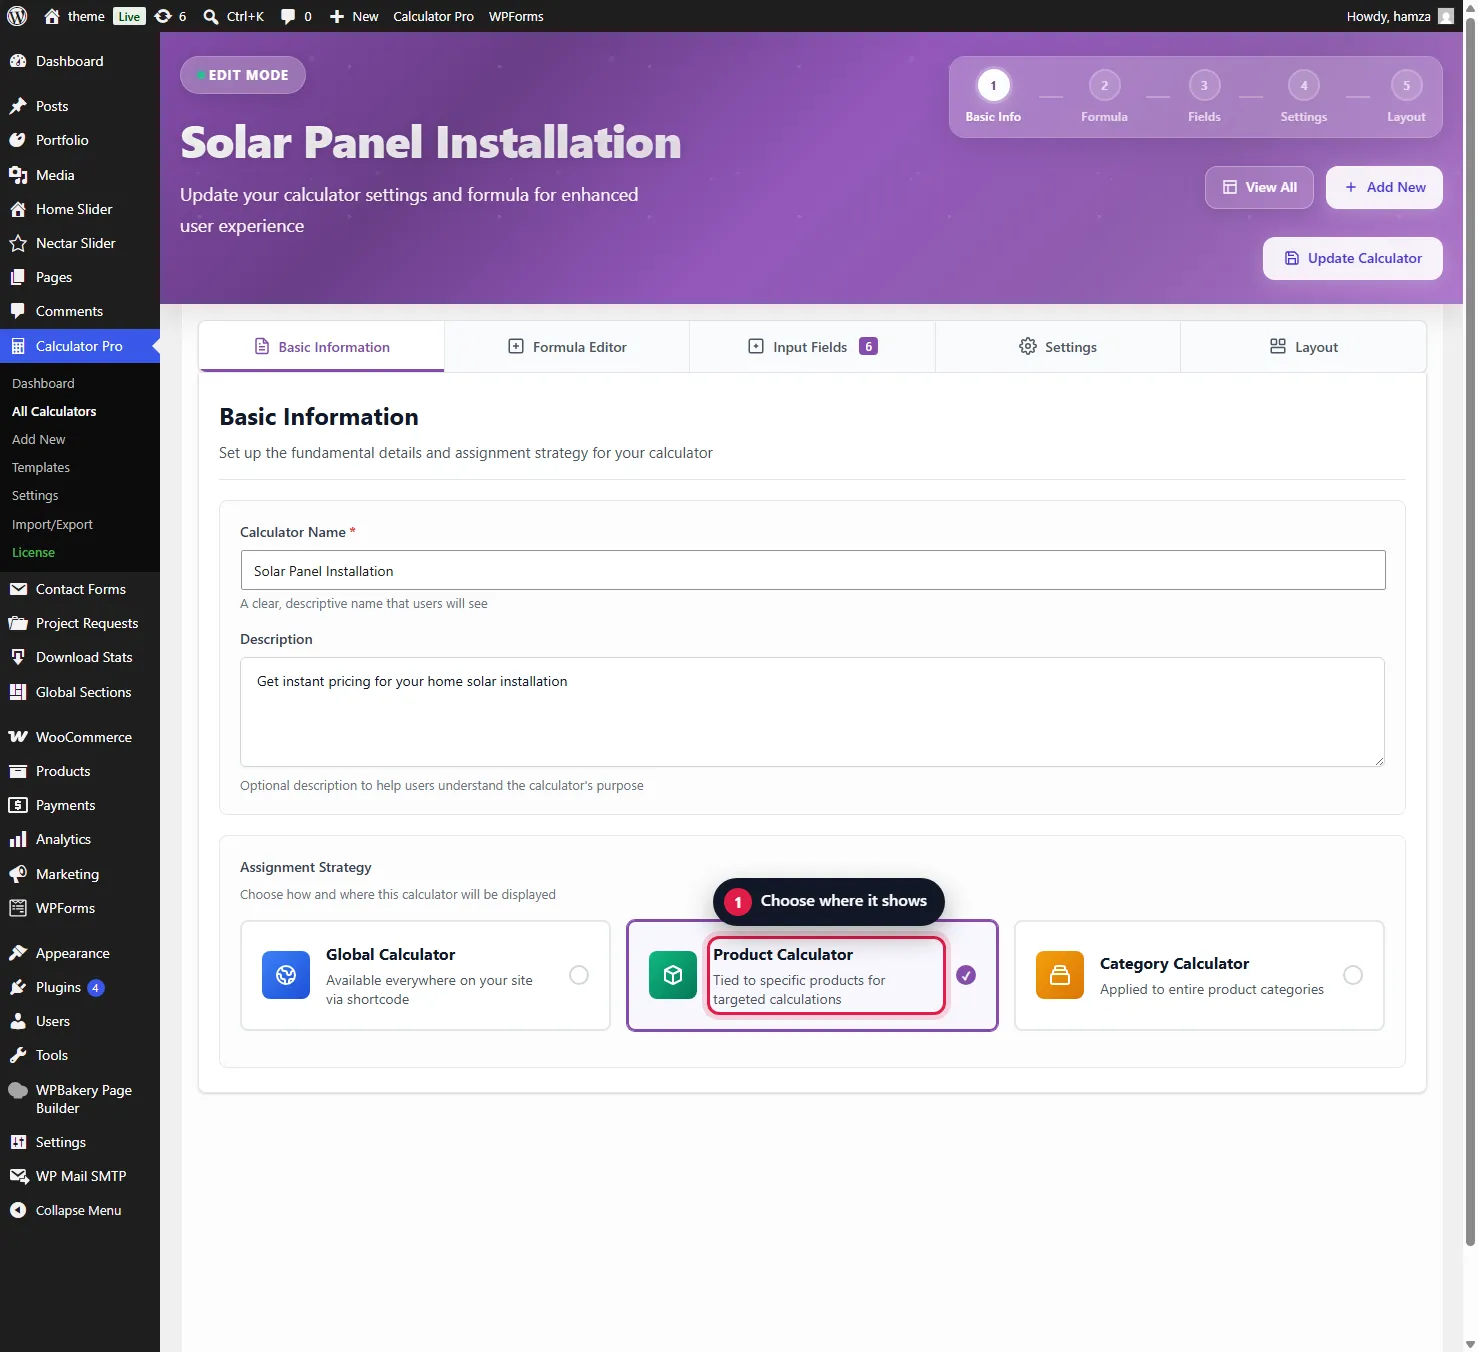
First things first – the plugin uses a tabbed interface. Think of it like filling out a form in stages. You’re starting on the Basic tab.
Give your calculator a name. Something descriptive like “Custom T-Shirt Calculator” or “Lawn Care Quote Calculator” – whatever makes sense for your business.
- Calculator Name – The title users will see
- Description – Optional description to help users understand what this calculator does
- Assignment Strategy – THIS IS THE BIG ONE! Choose where your calculator appears:
- Global Calculator – Available everywhere via shortcode
- Product Calculator – Tied to specific products
- Category Calculator – Applied to entire product categories
- Category Selection – When you pick “Category Calculator” above, a category selector appears right here in the Basic tab. Select which WooCommerce categories this calculator should appear on!
The Formula Tab
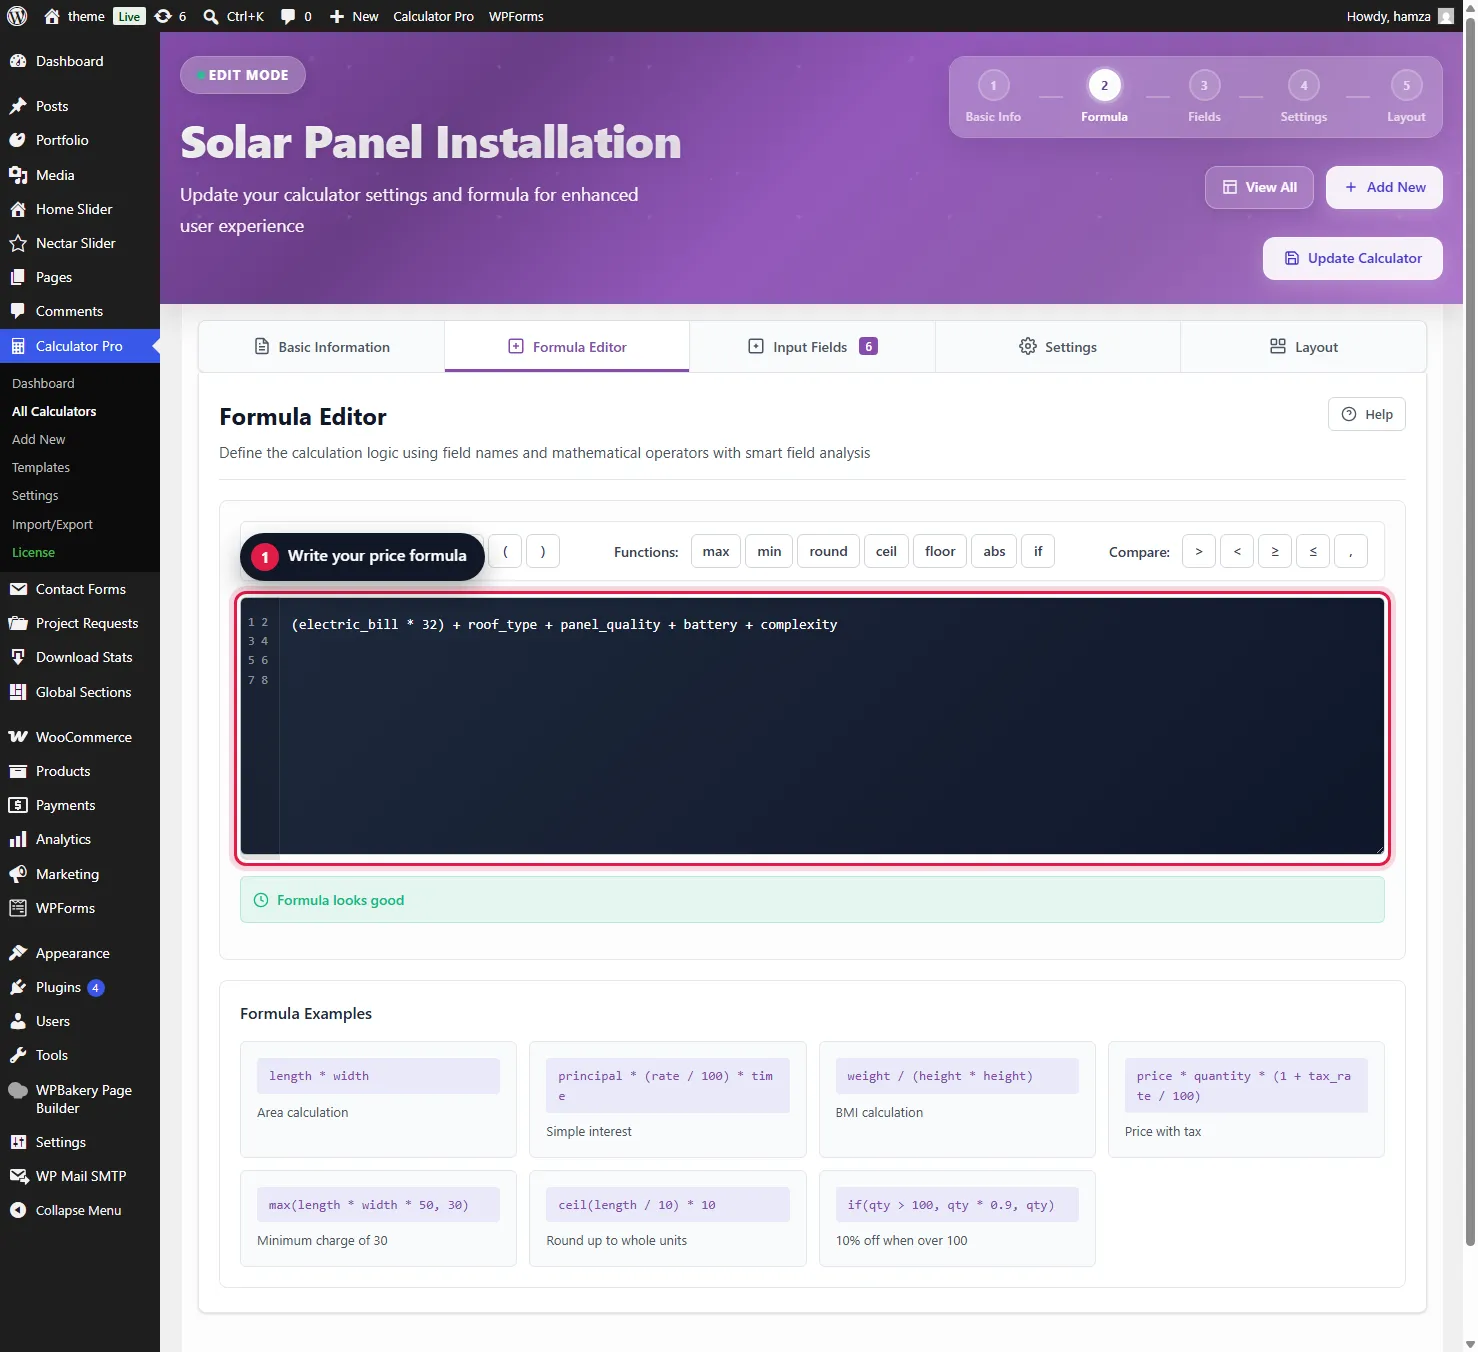
Now click over to the Formula tab. This is where you set up how the calculator actually calculates prices. You’ll configure your base price and how different field values affect the final price.
The Fields Tab – Where the Magic Happens
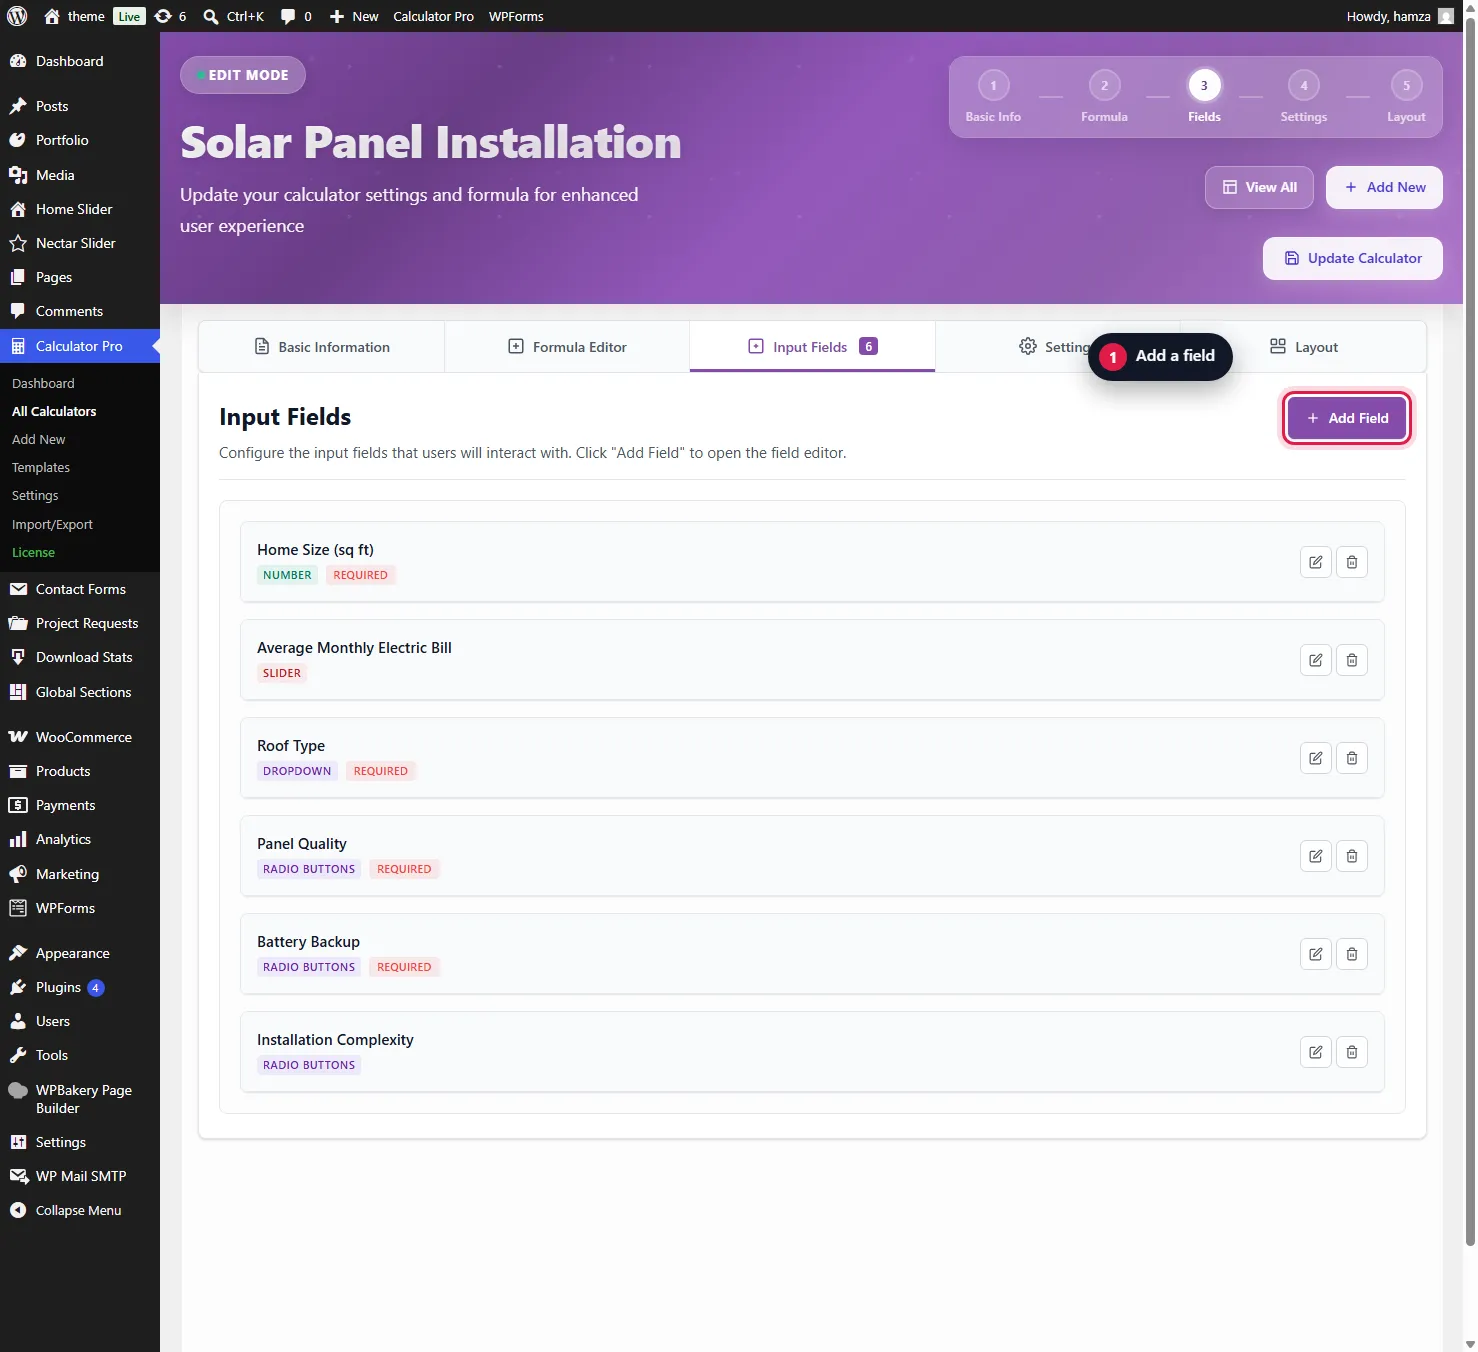
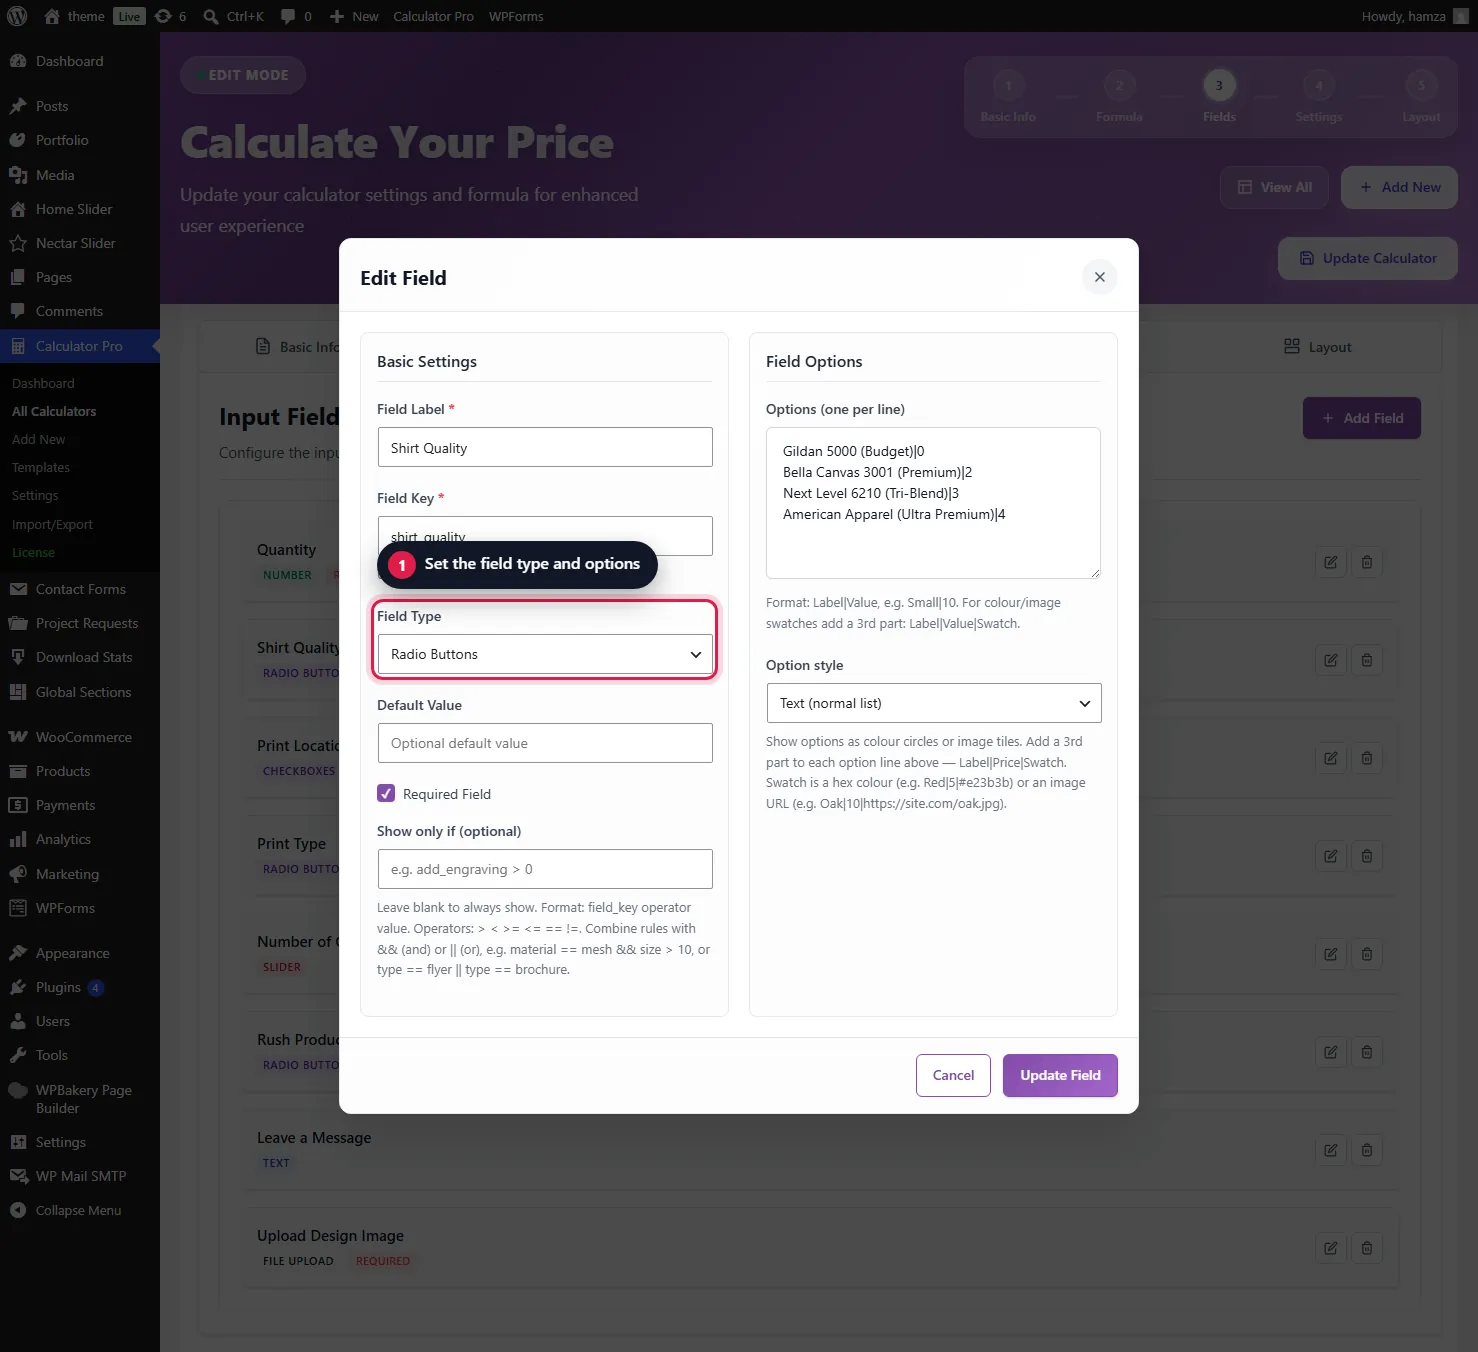
This is the fun part! Click on the Fields tab and you’ll see where you actually build your calculator.
- Text Box – For names, notes, or any custom text
- Number – For quantities and whole or decimal values
- Dropdown – A tidy list of options to pick from
- Pick One (Radio) – Several choices, customer picks one
- Tick Boxes (Checkbox) – Let them select more than one option
- Slider – A visual way to pick a number
- File Upload – Let customers upload artwork or specs
- Colour & Image Swatches – Show a pick-one or tick-box field as colour chips or image swatches
- Measurement – Width × length (or volume, linear metre, weight), priced by area
- Price Table – Tiered pricing where the rate changes by the quantity or size entered
- Size × Quantity Grid – A price matrix: the customer picks a row and a column
- Date / Booking – A single date or a date range priced per day or night
- Add-ons – A tickable list of extras, each priced flat, per unit, per size, or as a %
Settings Tab
Last tab! This is where you control publication settings and behavior options for your calculator.
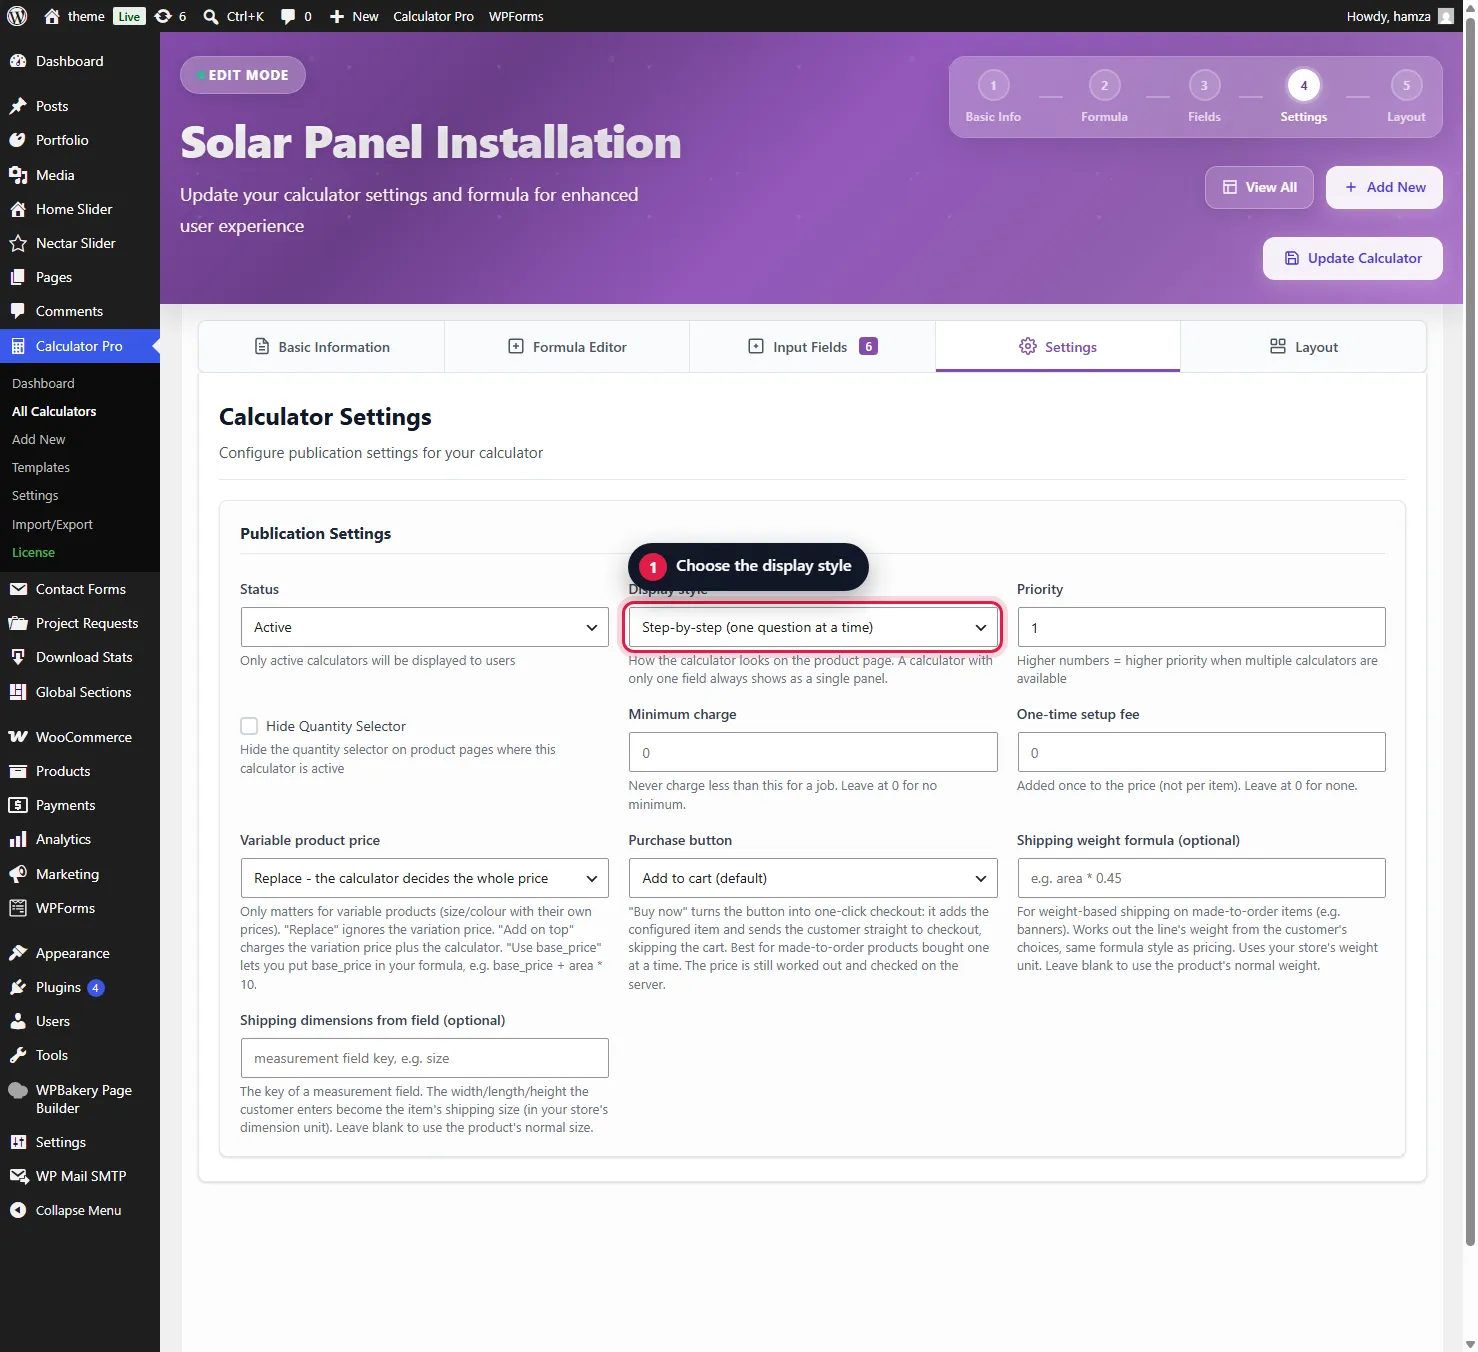
- Status – Set calculator as Active or Inactive. Only active calculators show to users.
- Priority – Control the display order when multiple calculators are assigned to the same place. Higher numbers = higher priority (1-100, default is 1)
- Hide Quantity Selector – Check this to hide the quantity input field on product pages. Useful if you’re controlling quantity through your calculator fields instead.
- Display Style – Choose how the calculator looks: Step-by-step (one question at a time), All-in-one (every field in one card), or Inline (no box, blends into your page).
- Buy Button Mode – Use the normal Add to Cart, or switch to Buy Now to send the customer straight to checkout.
Notice something missing? Category Assignment isn’t in this Settings tab – it’s actually back in the Basic Info tab under “Assignment Strategy”! We’ll cover all the details about connecting your calculators to products and categories in the next section: Connecting Calculators to Your Products.
Save It!
Hit that Save Calculator button and you’re done! Your calculator is now ready to assign to products.