Let me walk you through a complete, realistic example from start to finish. You sell custom T-shirts, and the price depends on the style, the size, the print method, how many shirts the customer orders and two extras. Here is exactly how to set it up.
Every picture on this page comes from a real build of this calculator, on a shop running our StoreWise theme. We placed the order the way a customer would.
Make two product categories in WooCommerce, Apparel and Custom T-Shirts, and put your T-shirt product in them. Give the product a regular price, for example $15. Step 8 explains why.
The Basic Information tab
Go to Calculator Pro > Add New in your WordPress admin. You start on the Basic Information tab.
- Calculator Name: Custom T-Shirt Price Calculator
- Description: Configure your custom t-shirt and get an instant price quote
- Assignment Strategy: Category Calculator
- Select Categories: tick Apparel and Custom T-Shirts
In the Step-by-step and All-in-one display styles, customers see the name and the description at the top of the calculator. Inline leaves them out. Category Calculator puts the calculator on every product in the categories you tick. Product Calculator is for single products, and Global Calculator puts it on every product in your shop.
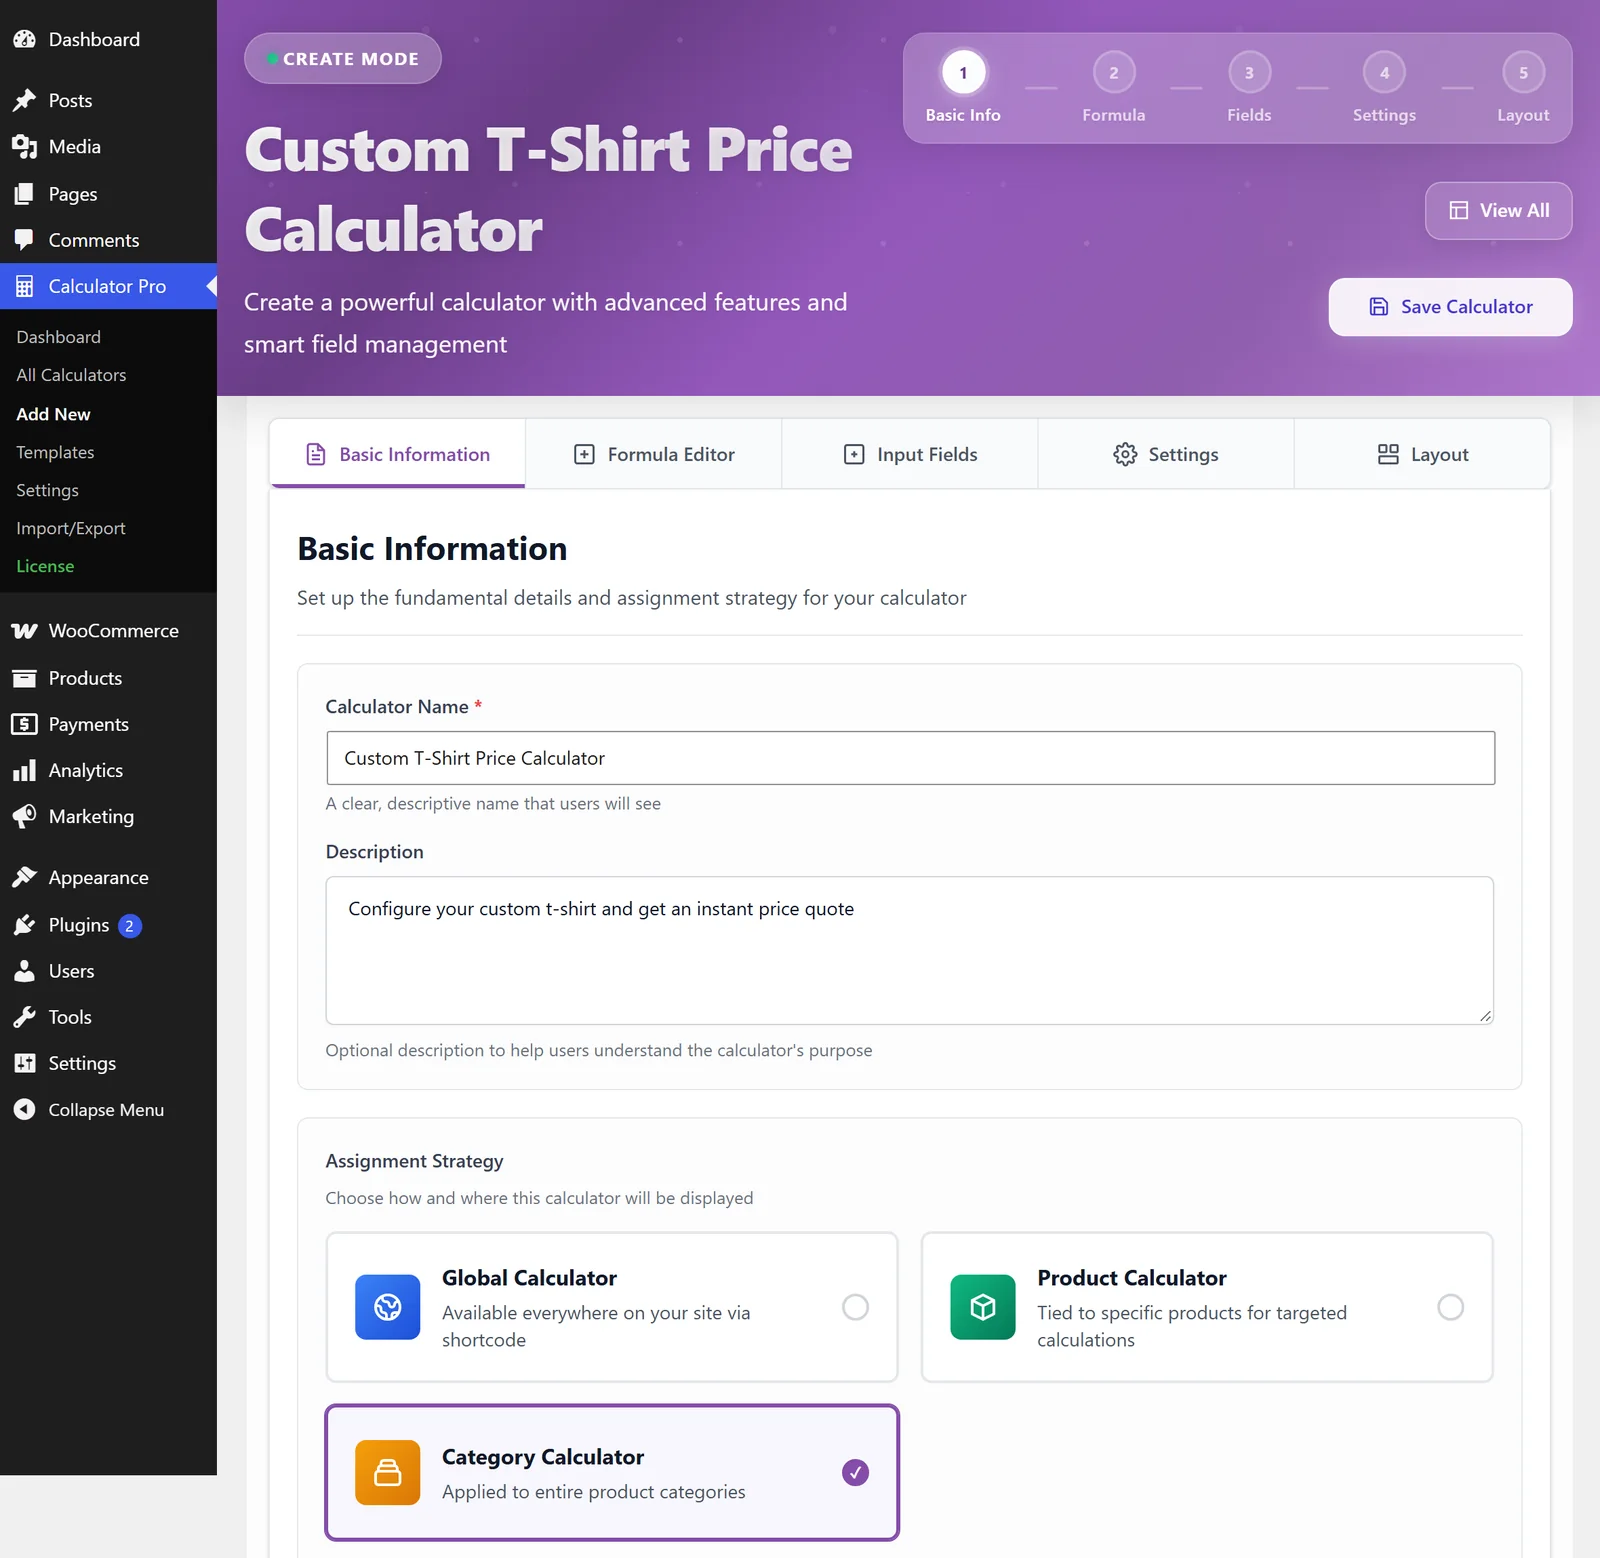
Calculator Pro > Add New: the name, the description and Category Calculator picked.
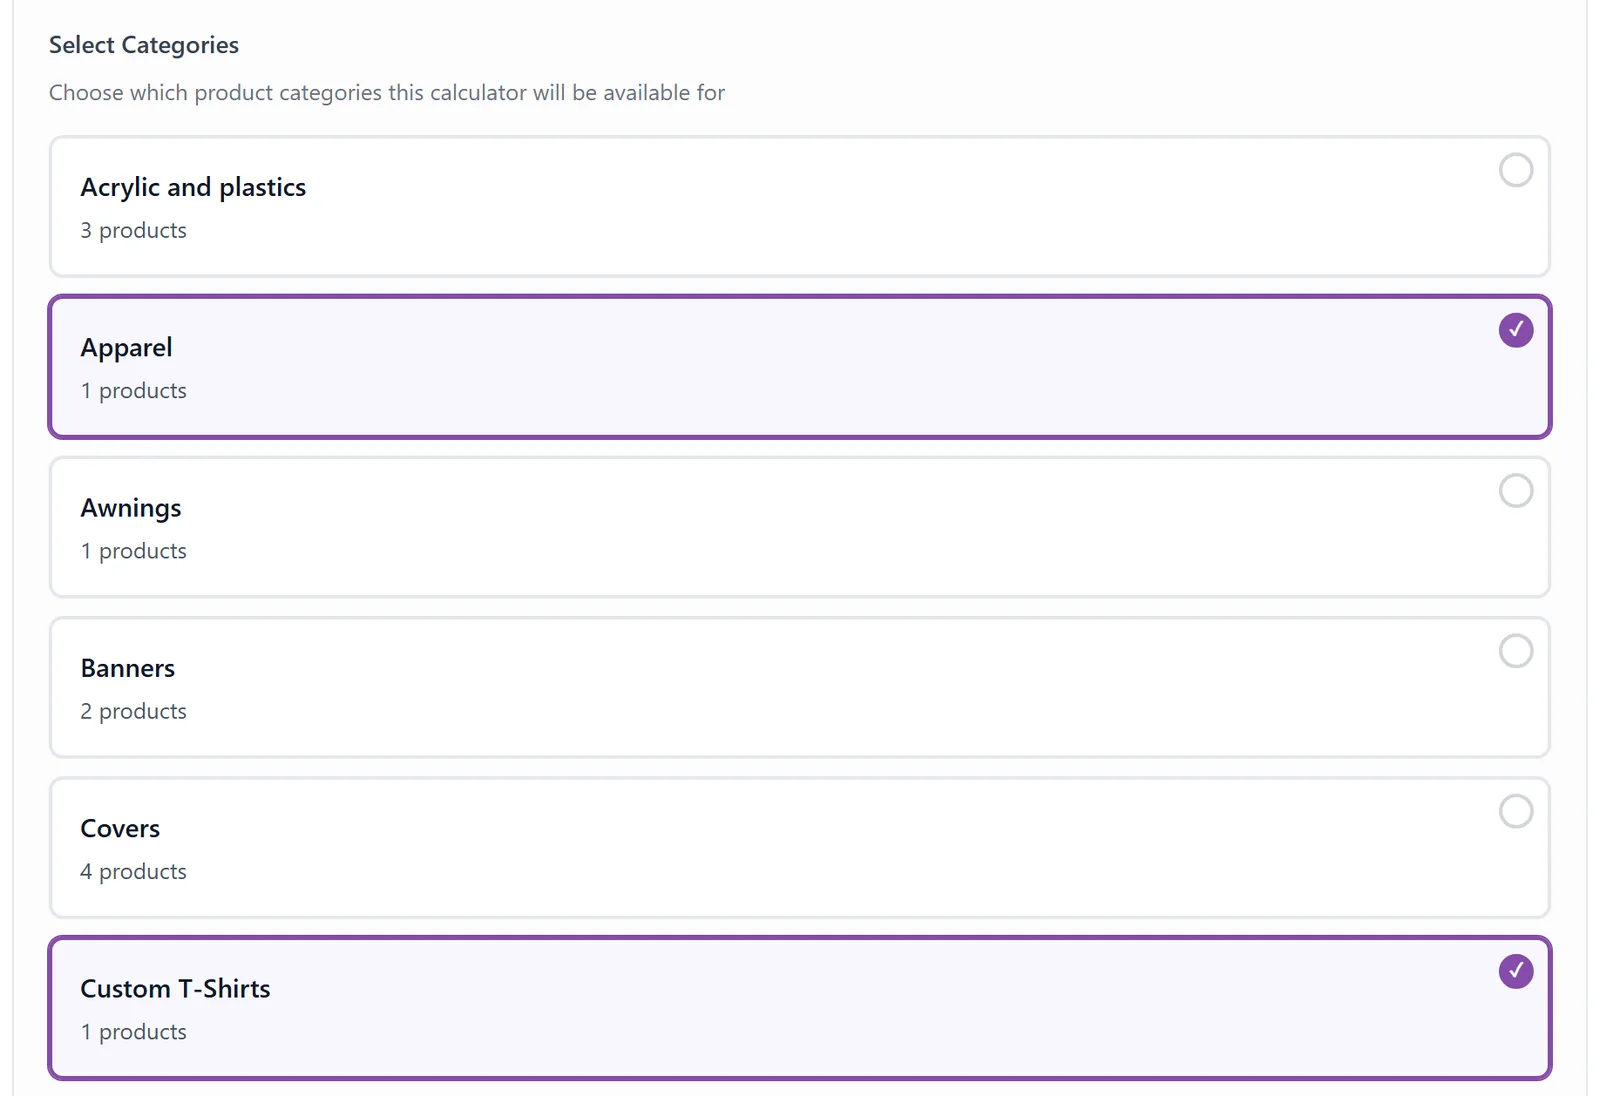
Tick every category the calculator belongs to. Here: Apparel and Custom T-Shirts.
Now click Save Calculator at the top right. The Input Fields tab only opens for a saved calculator; before that it says “Save Calculator First”.
The Input Fields tab
Input Fields comes after Formula Editor in the tab row, but add the fields first: the formula uses their keys.
Open the Input Fields tab and click Add Field once for each field below. Fill in the Add New Field window and click its Add Field button. Each field is saved straight away.
Choices go in the Options (one per line) box. Each line is the name the customer sees, a | sign, and the amount the choice adds to the price, like Premium Soft Blend|5. A choice that adds nothing gets 0.
- Field Label: Choose Your T-Shirt Style
- Field Key: tshirt_style
- Field Type: Dropdown
- Required Field: ticked
- Options (one per line):
Basic Cotton|0Premium Soft Blend|5Vintage Distressed|8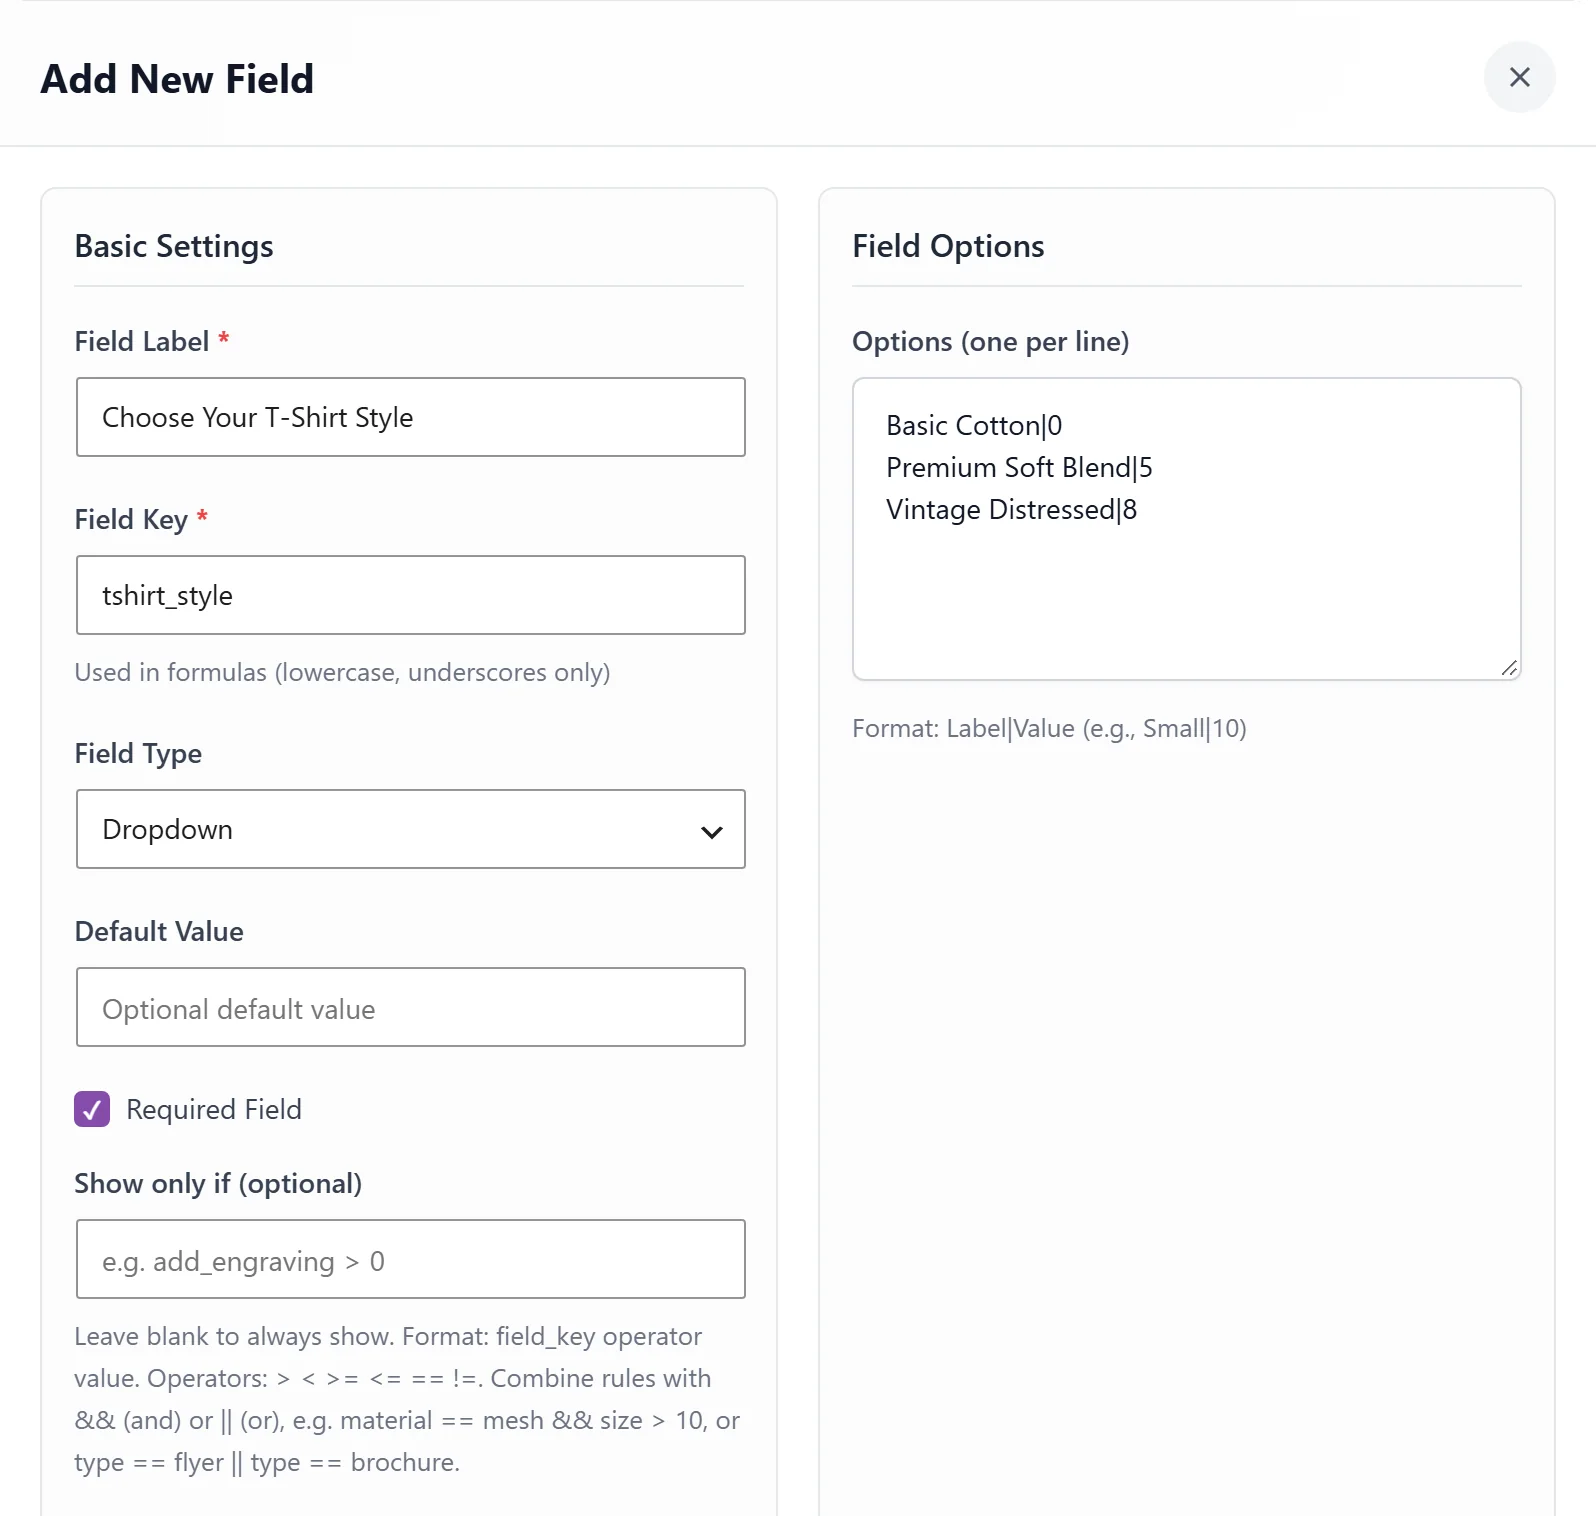
Field #1 in the Add New Field window. Each option is one line: the name the customer sees, a | sign, and the amount it adds.
- Field Label: Select Size
- Field Key: size
- Field Type: Dropdown
- Required Field: ticked
- Options (one per line):
Small|0Medium|0Large|0XL|22XL|43XL|6- Field Label: Choose Print Method
- Field Key: print_type
- Field Type: Radio Buttons
- Required Field: ticked
- Options (one per line):
Screen Print|0Direct-to-Garment|3Vinyl Heat Transfer|5- Field Label: How Many T-Shirts?
- Field Key: quantity
- Field Type: Number
- Default Value: 1
- Required Field: ticked
- Min Value: 1, Max Value: 500, Step: 1
- Price per unit (optional): leave it empty. The formula already multiplies by the quantity.
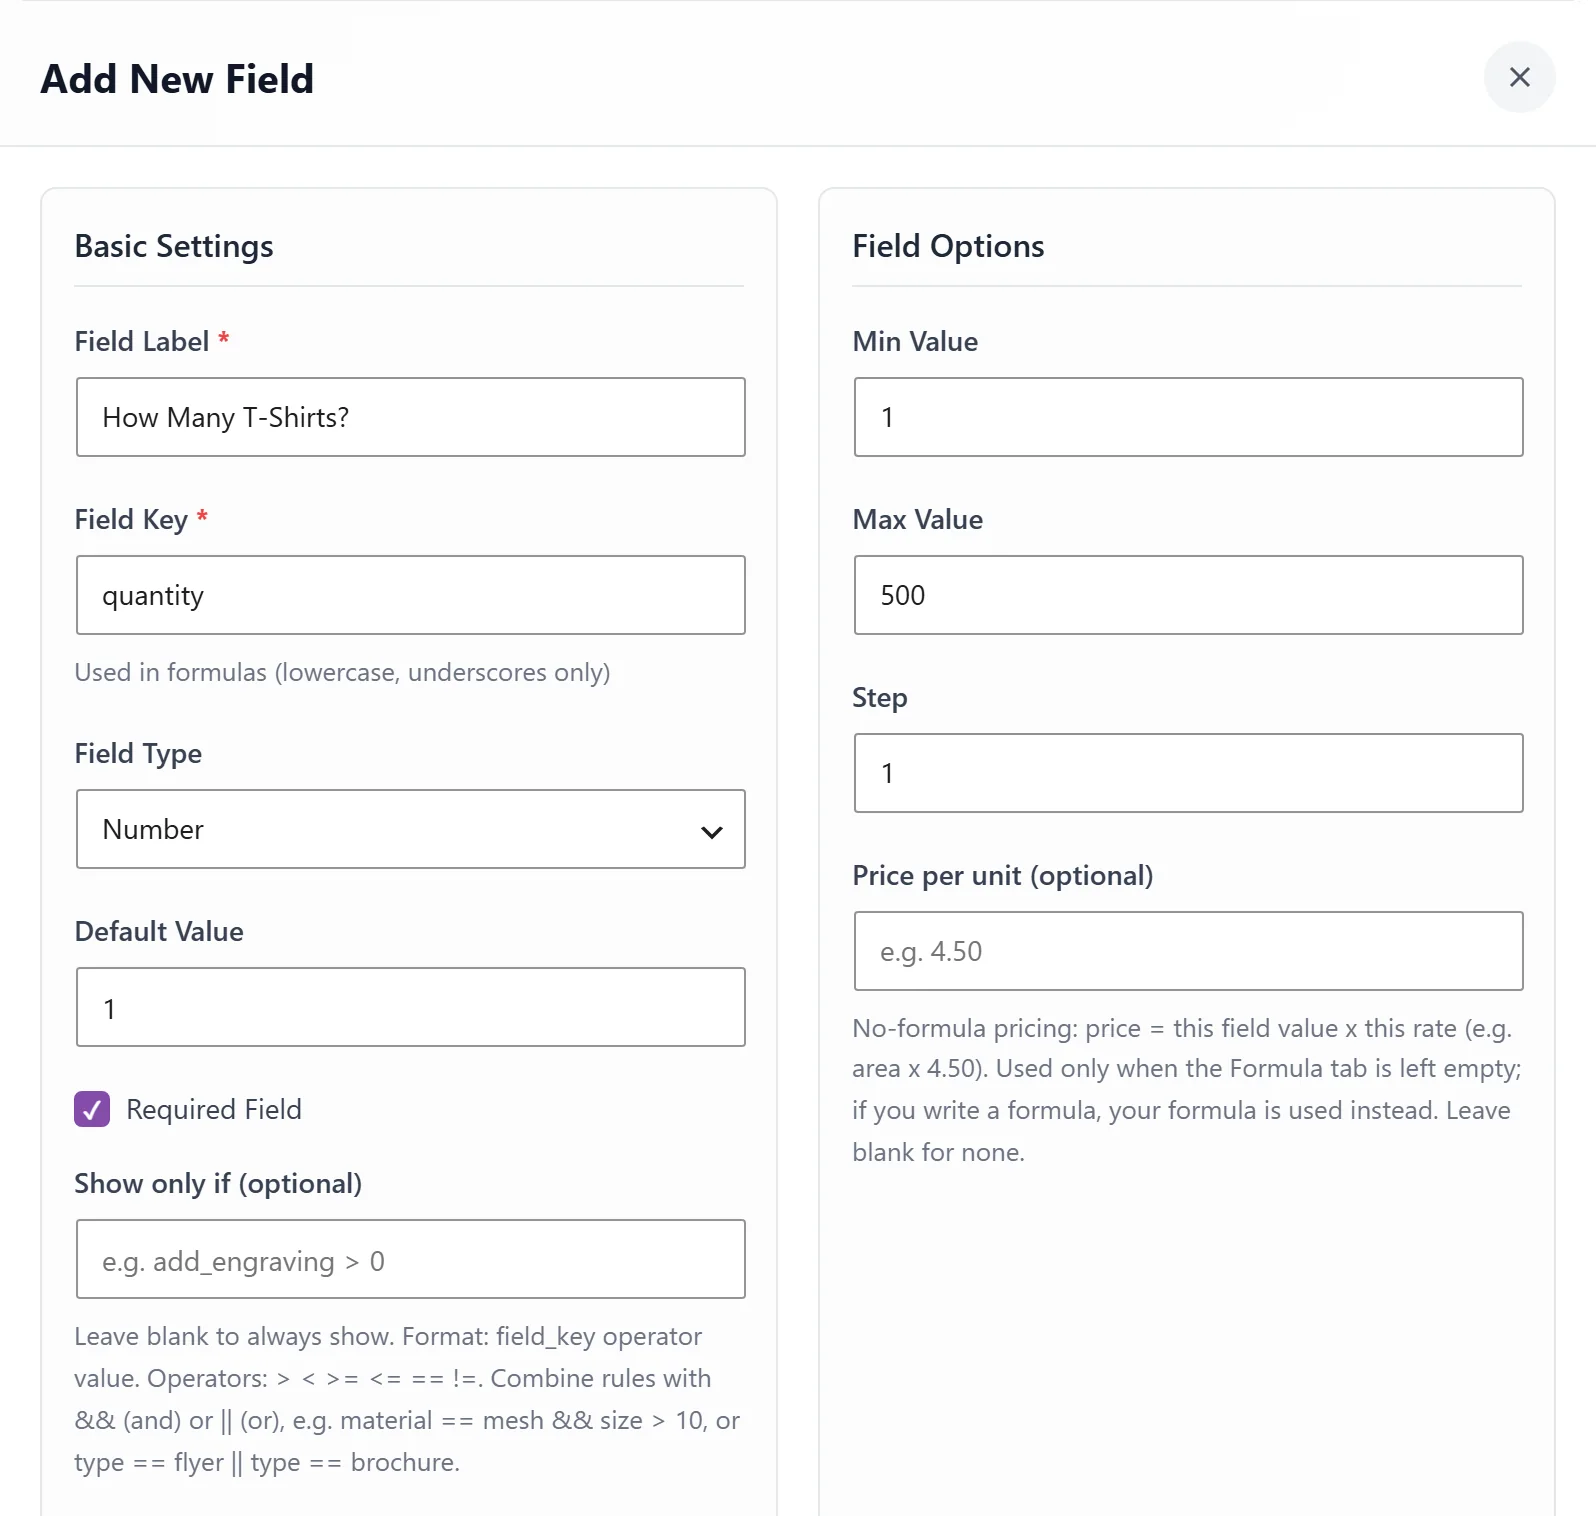
Field #4: a Number field with Min Value 1, Max Value 500, Step 1 and a Default Value of 1.
- Field Label: Extras (Optional)
- Field Key: extras
- Field Type: Add-ons (optional extras)
- Required Field: not ticked
- Options (one per line):
Rush order|15|per_unit|quantityGift packaging|5|per_unit|quantityOne line per extra, and the customer can tick any of them. Each line has four parts split by | signs. The hint in the window calls them Label|Amount|Type|Ref: the name the customer sees, the amount, how it is charged, and the key of the field it multiplies by. Here per_unit with quantity charges the amount for every shirt: $15 for the rush order (made in 2 days) and $5 for the gift packaging.
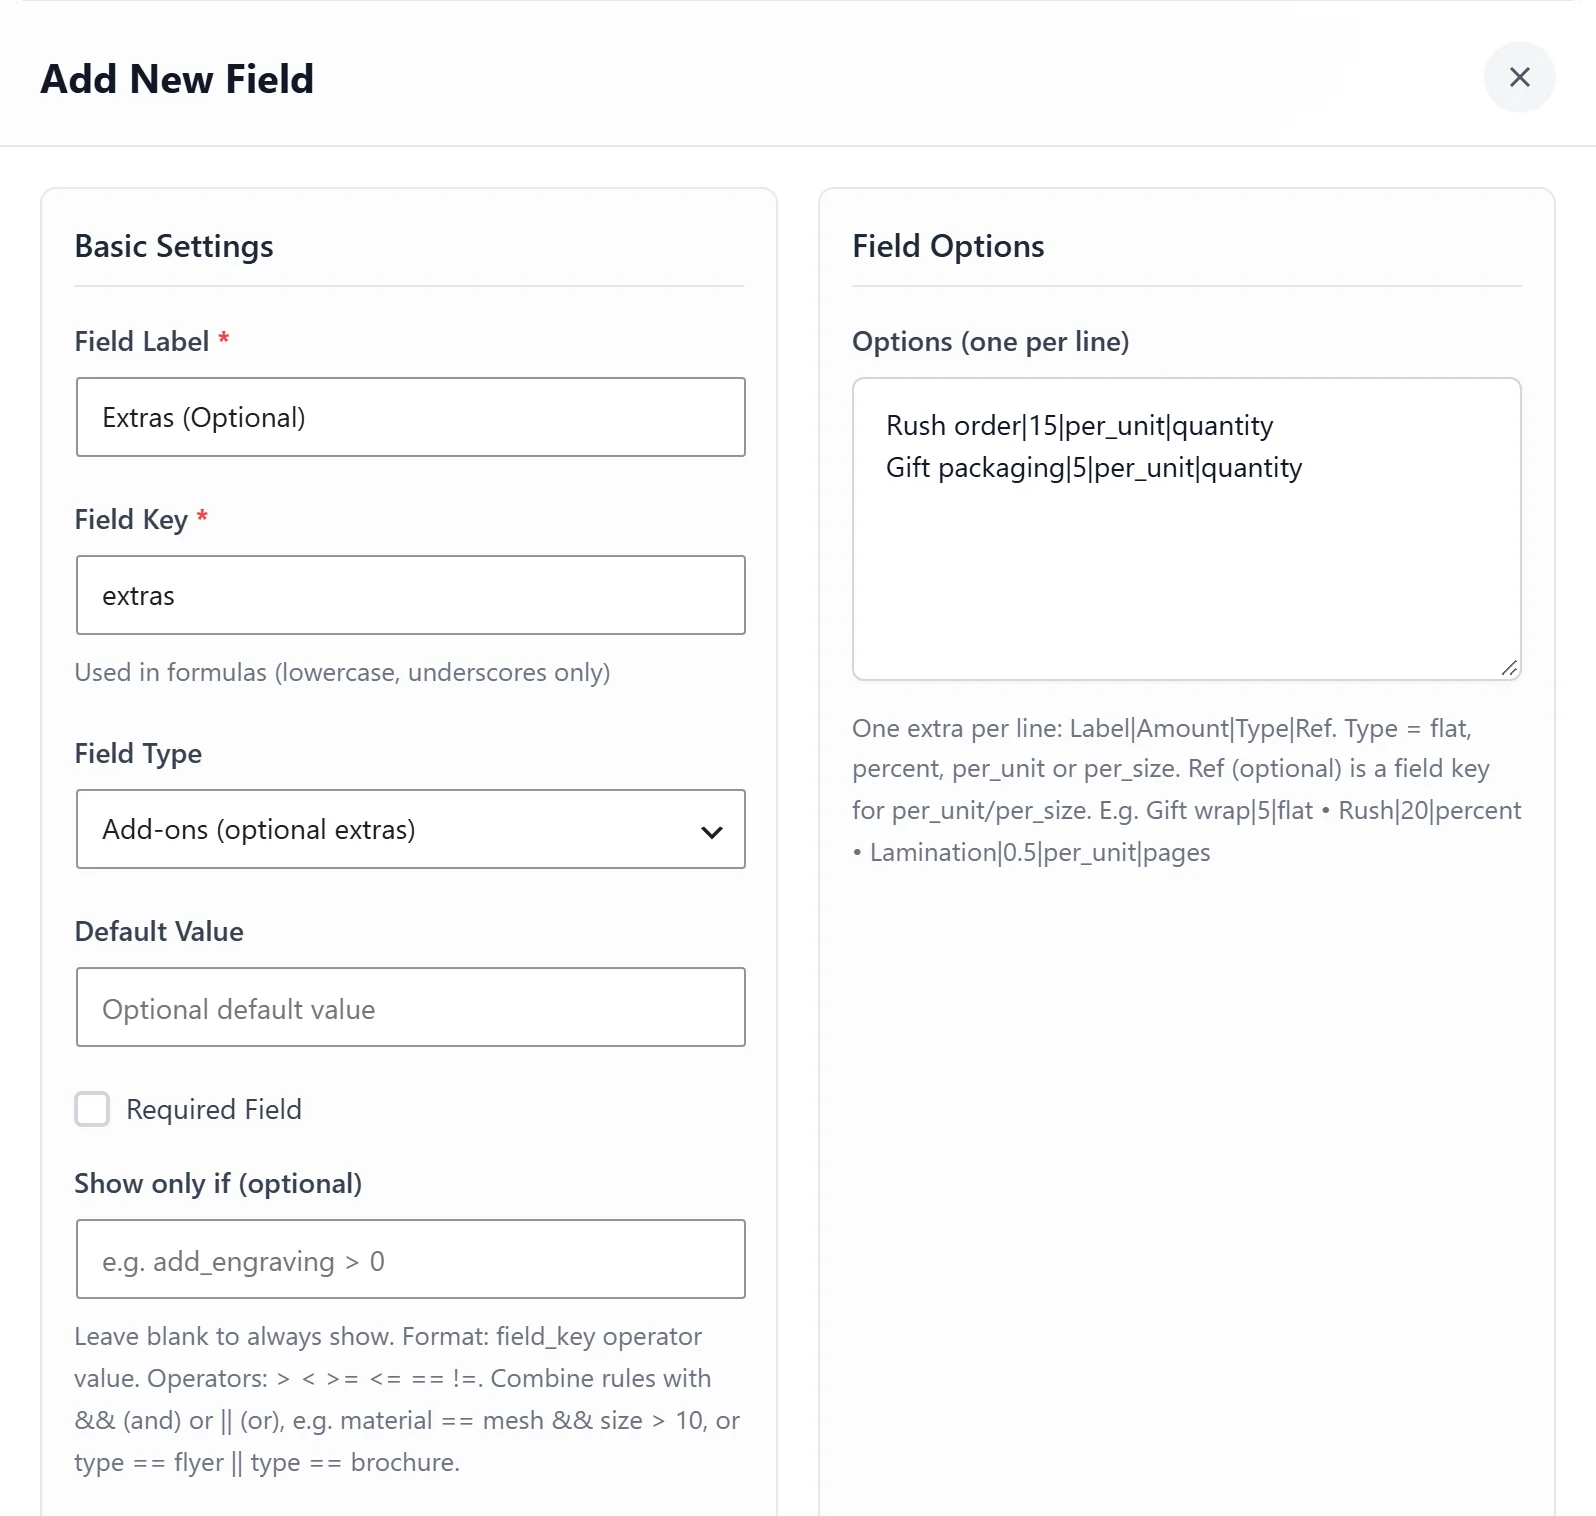
Field #5: one Add-ons field with two extras, one per line. per_unit with quantity charges each extra for every shirt.
- Field Label: Upload Your Design (PNG, JPG, PDF)
- Field Key: design_file
- Field Type: File Upload
- Required Field: ticked
- Allowed File Types: Images and PDF
- Maximum File Size (MB): 10
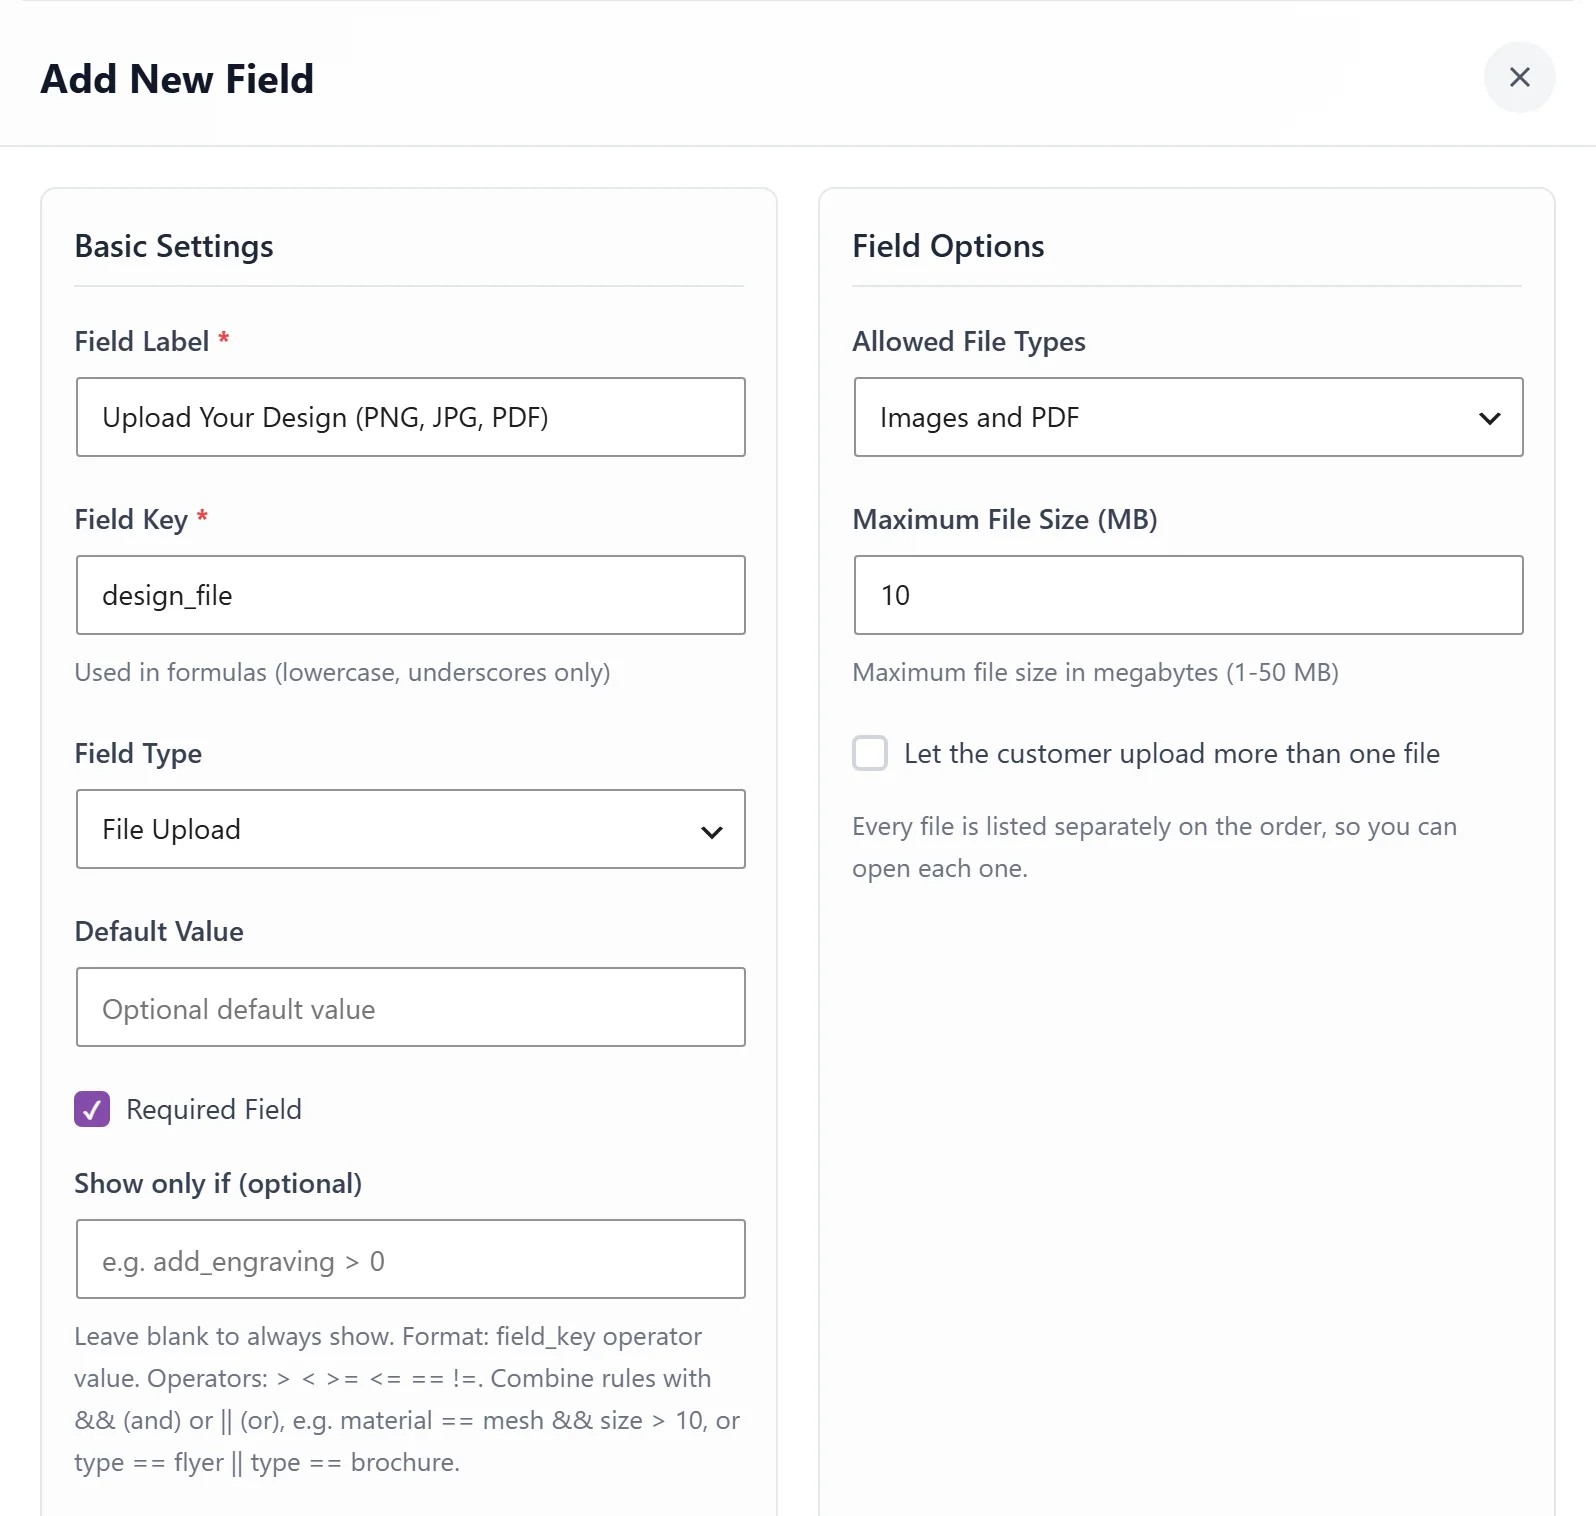
Field #6: File Upload, Images and PDF, up to 10 MB, required.
- Field Label: Any Special Instructions? (Optional)
- Field Key: special_notes
- Field Type: Text
- Required Field: not ticked
- Charge for the text: No charge
On the product page a Text field is a box four lines tall, so longer notes fit.
With all seven added, the tab lists them with their types.
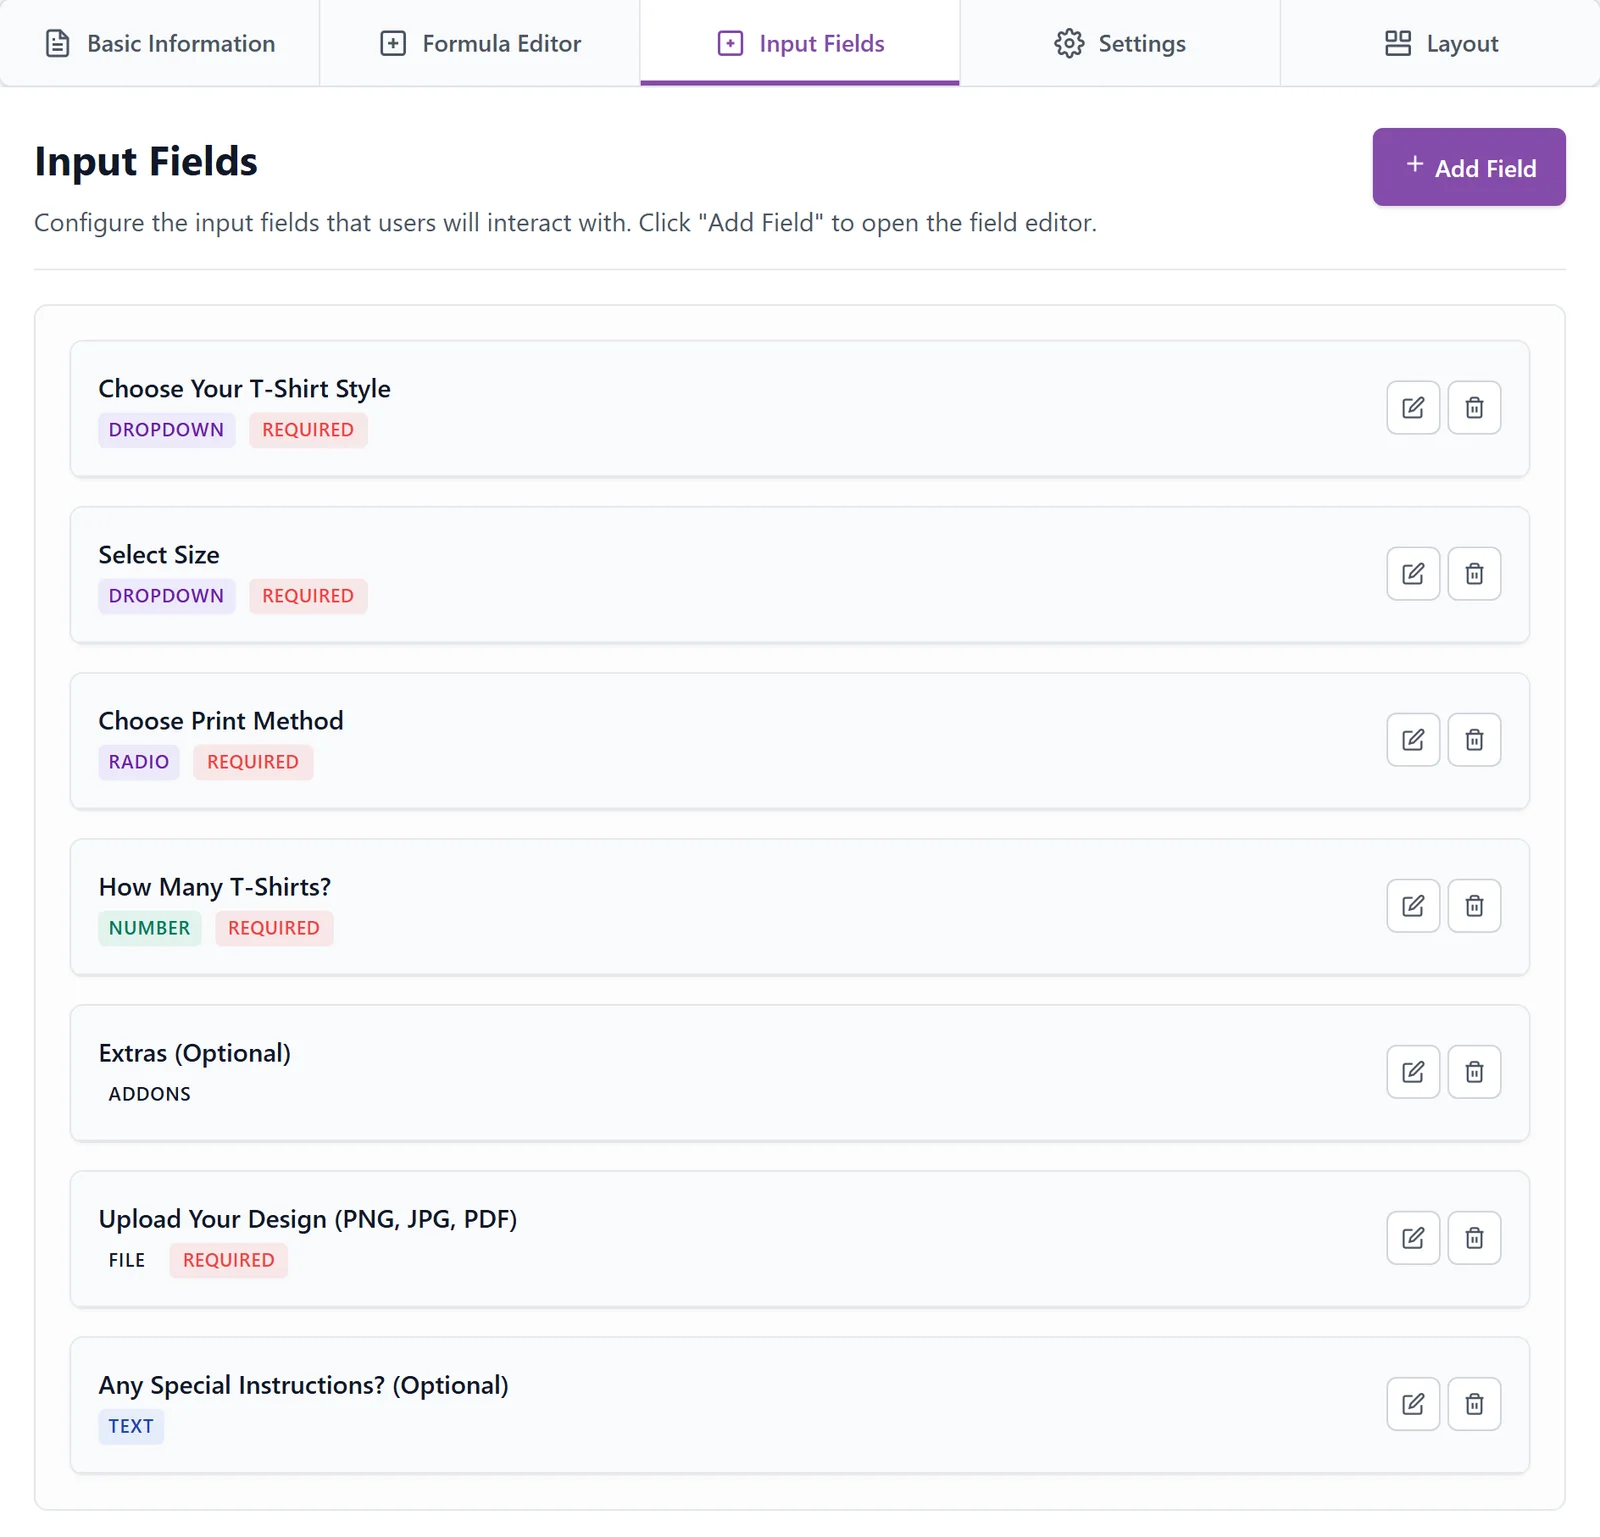
All seven fields in the Input Fields tab. The pencil opens a field again. The bin deletes it.
An Add-ons field stays out of the formula. PriceWise adds it after the formula, and every ticked extra gets its own line in the cost list under the total. That way the customer sees what the rush order adds. A Checkboxes field goes inside the formula and never gets a line of its own.
The Type decides how an extra is charged:
flat: the amount once, however many shirts, like Gift wrap|5|flatpercent: a percentage of the price, other ticked extras included, like Rush|20|percentper_unit: the amount times another field, like the quantity in this exampleper_size: the amount times the size worked out by a Sell by measurement field, such as square metres
The Formula Editor tab
Open the Formula Editor tab and type this formula:
(15 + tshirt_style + size + print_type) * quantityThere is no separate base price box, and the product’s regular price is not added to the price either. The 15 at the start of the formula is the price of one Basic Cotton shirt in Small, Medium or Large with a screen print. The rush order and the gift packaging are not in the formula. PriceWise adds them after it, because they sit in an Add-ons field.
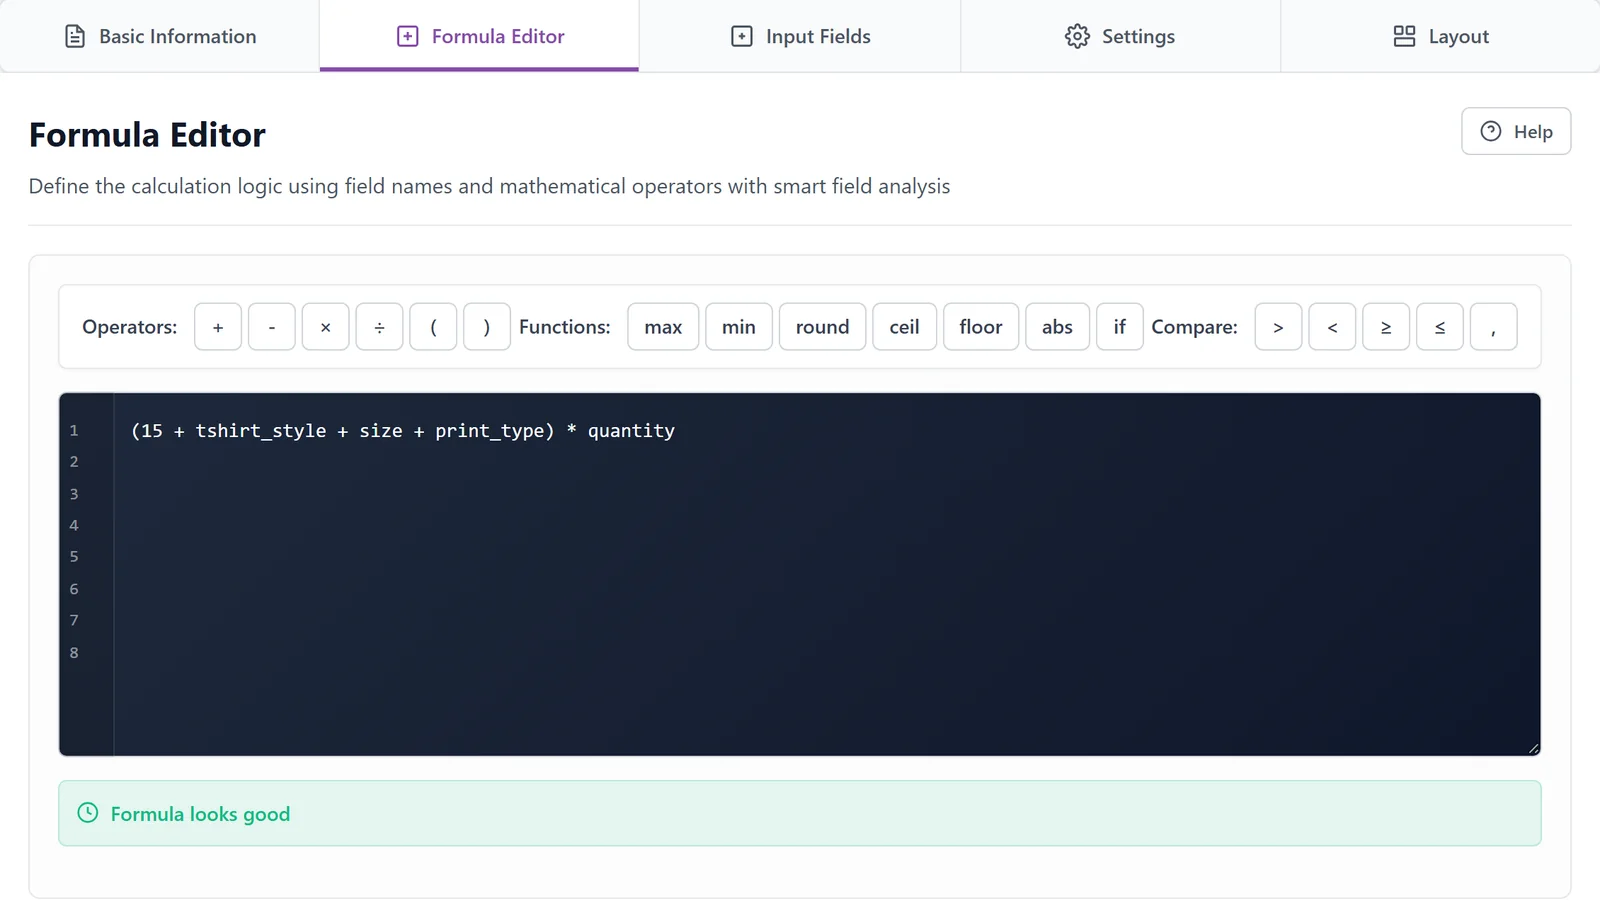
The formula in the Formula Editor. “Formula looks good” means PriceWise can read it. It does not check the field keys.
Each field key stands for the customer’s answer. Type the key as it is, with no brackets or other signs around it.
15= the base price of any T-shirttshirt_style= adds $0 for Basic Cotton, $5 for Premium Soft Blend or $8 for Vintage Distressedsize= adds $0 for Small, Medium and Large, $2 for XL, $4 for 2XL and $6 for 3XLprint_type= adds $0 for Screen Print, $3 for Direct-to-Garment or $5 for Vinyl Heat Transferquantity= the number the customer types, which multiplies the formula
Then PriceWise adds the ticked extras: Rush order $15 and Gift packaging $5, each times the quantity.
A customer orders Premium Soft Blend, XL, Direct-to-Garment, 3 shirts, with the rush order and without gift packaging:
(15 + 5 + 2 + 3) * 3 = $75+ rush order 15 * 3 = $45= $120 totalBreakdown:
- 15 = base price
- 5 = Premium Soft Blend
- 2 = XL size
- 3 = Direct-to-Garment print
- × 3 = quantity of 3 shirts, $75 from the formula
- 15 × 3 = rush order for 3 shirts, $45
- 0 = no gift packaging
The customer sees the same numbers in the cost list under the total: Price $75.00, Rush order $45.00, Total $120.00. That is the order in the pictures further down, and the cart line comes to exactly $120.00, with your shipping added on top.
- Type field keys as they are: quantity, not {quantity}.
- Keys are lowercase letters, numbers and underscores. Type them in the formula exactly as you typed them in the Field Key box (the pencil on a field shows it again). A word that matches no field counts as 0, or as 1 right after * or /, so a typo gives a wrong price, not an error message.
- The green “Formula looks good” means PriceWise can read the formula. It does not check your field keys.
- You can use + (add), – (subtract), * (multiply), / (divide) and brackets, plus the buttons above the box: max, min, round, ceil, floor, abs, if and the compare signs.
- A dropdown or radio choice counts as the number after its | sign.
- A ticked checkbox option counts as its number, and an unticked one as 0.
- An Add-ons field counts as 0 inside the formula, because it is added after it.
- A Number field counts as the number the customer types, kept between its Min Value and Max Value.
The Settings tab
Open the Settings tab and set these:
- Status: Active. Only active calculators show on product pages.
- Display style: Step-by-step (one question at a time), the default. With seven questions this keeps the calculator short next to your product photos. Inline (no box, blends into your theme) is shown further down; All-in-one shows every field together in one box.
- Priority: 1. This only matters when more than one calculator fits the same product. A Product Calculator wins over a Category Calculator, and a Category Calculator wins over a Global Calculator. Between two of the same kind, the higher number wins.
- Hide Quantity Selector: ticked. The calculator already asks how many shirts, so this hides the WooCommerce quantity box next to Add to Cart and keeps the cart line at 1. Customers don’t enter the number twice.
Leave the other settings (minimum charge, setup fee, variable product price, purchase button and shipping) as they are.
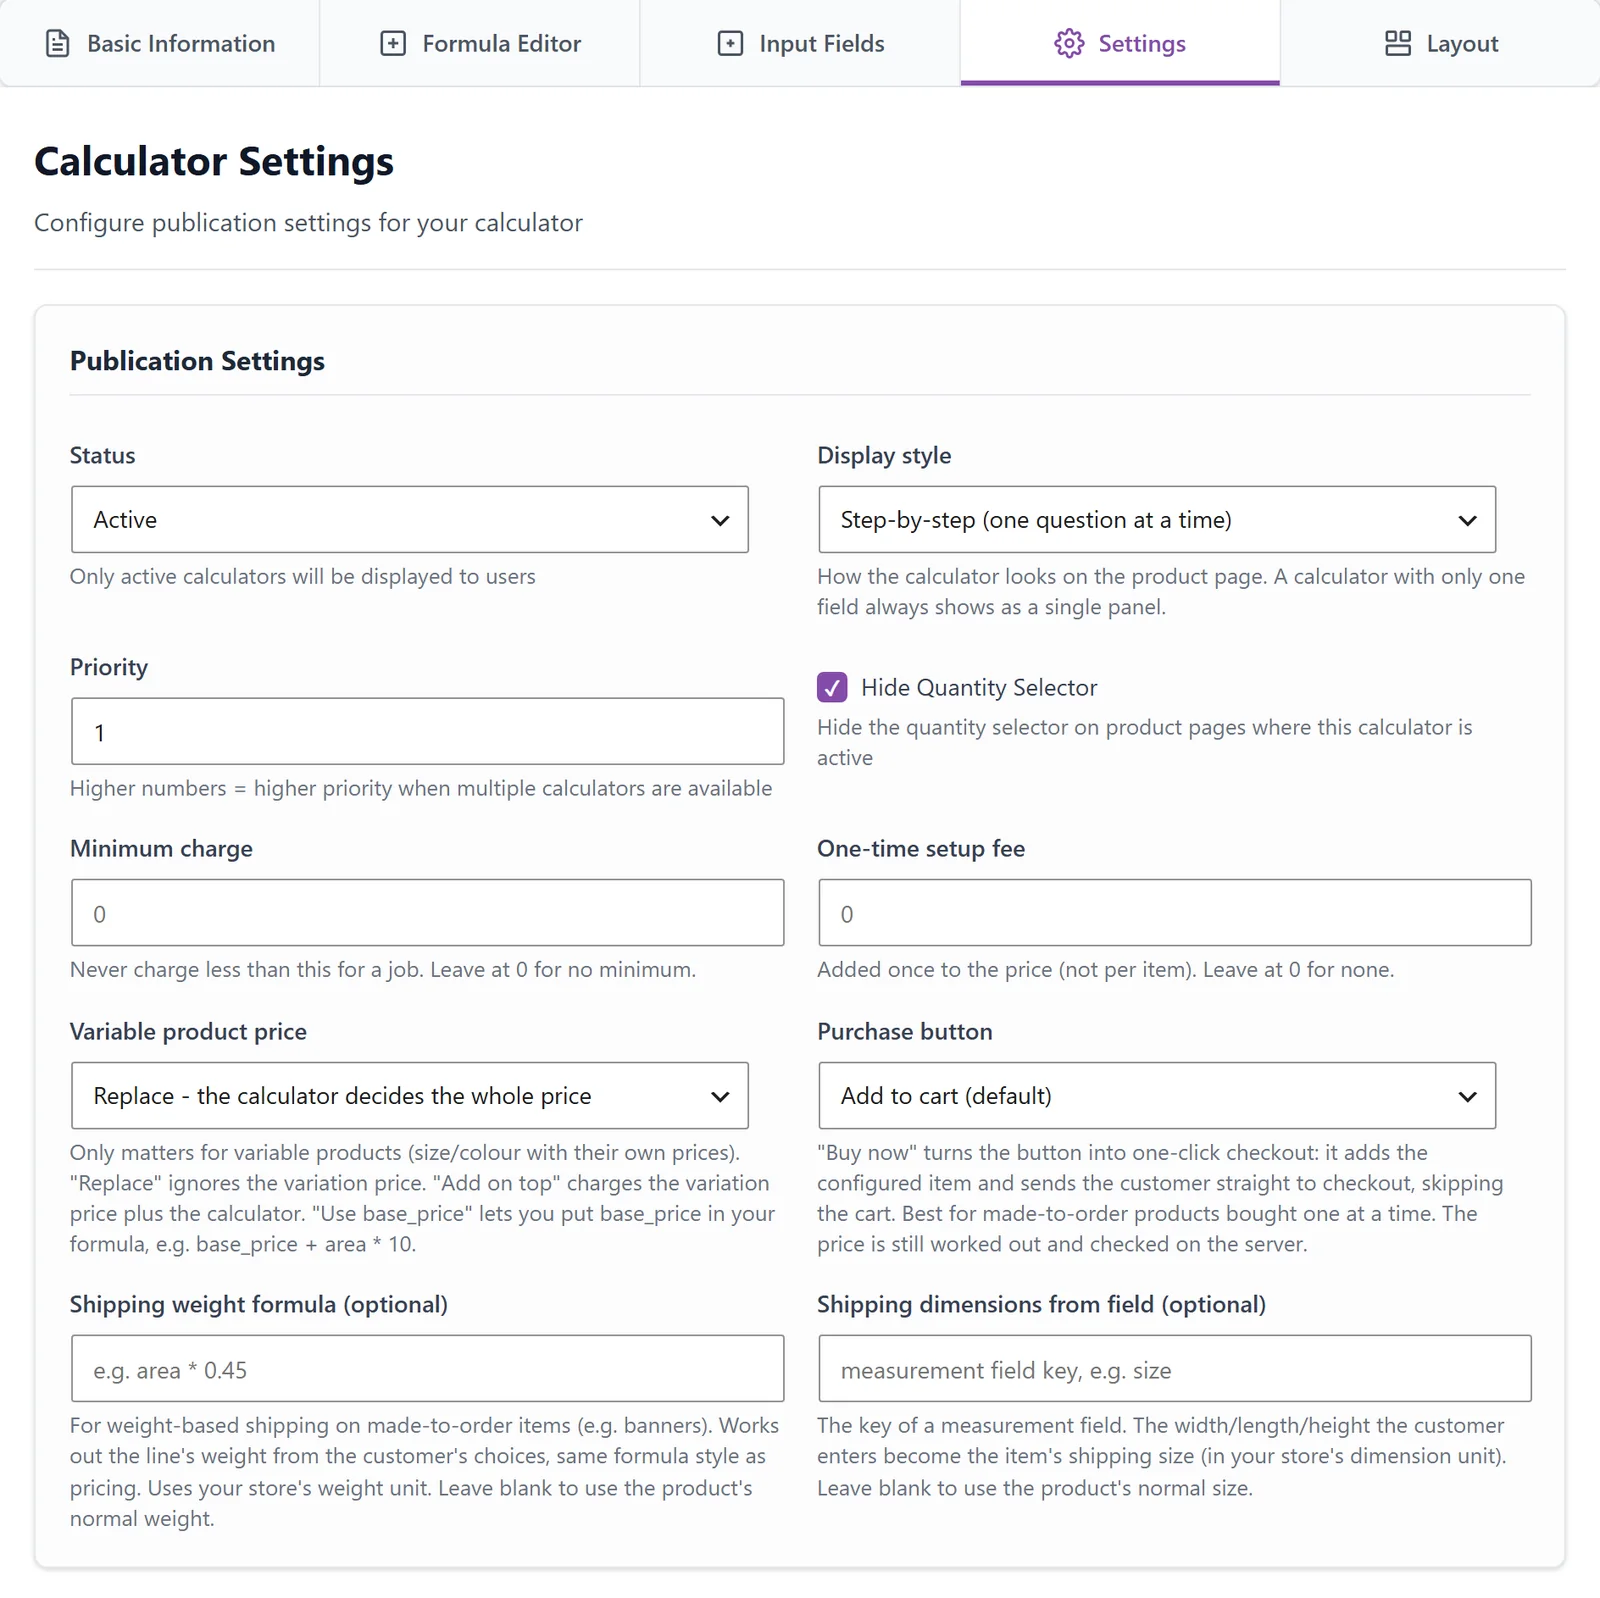
The Settings tab: Active, Step-by-step, Priority 1 and Hide Quantity Selector ticked.
The Layout tab
Open the Layout tab and click 1/2 on four fields: Choose Your T-Shirt Style, Select Size, How Many T-Shirts? and Extras (Optional). Each click is saved at once.
Half-width fields sit side by side in the Inline and All-in-one display styles, which makes the calculator shorter. Step-by-step shows one question at a time, so the widths change nothing there. On a phone every field takes the full width.
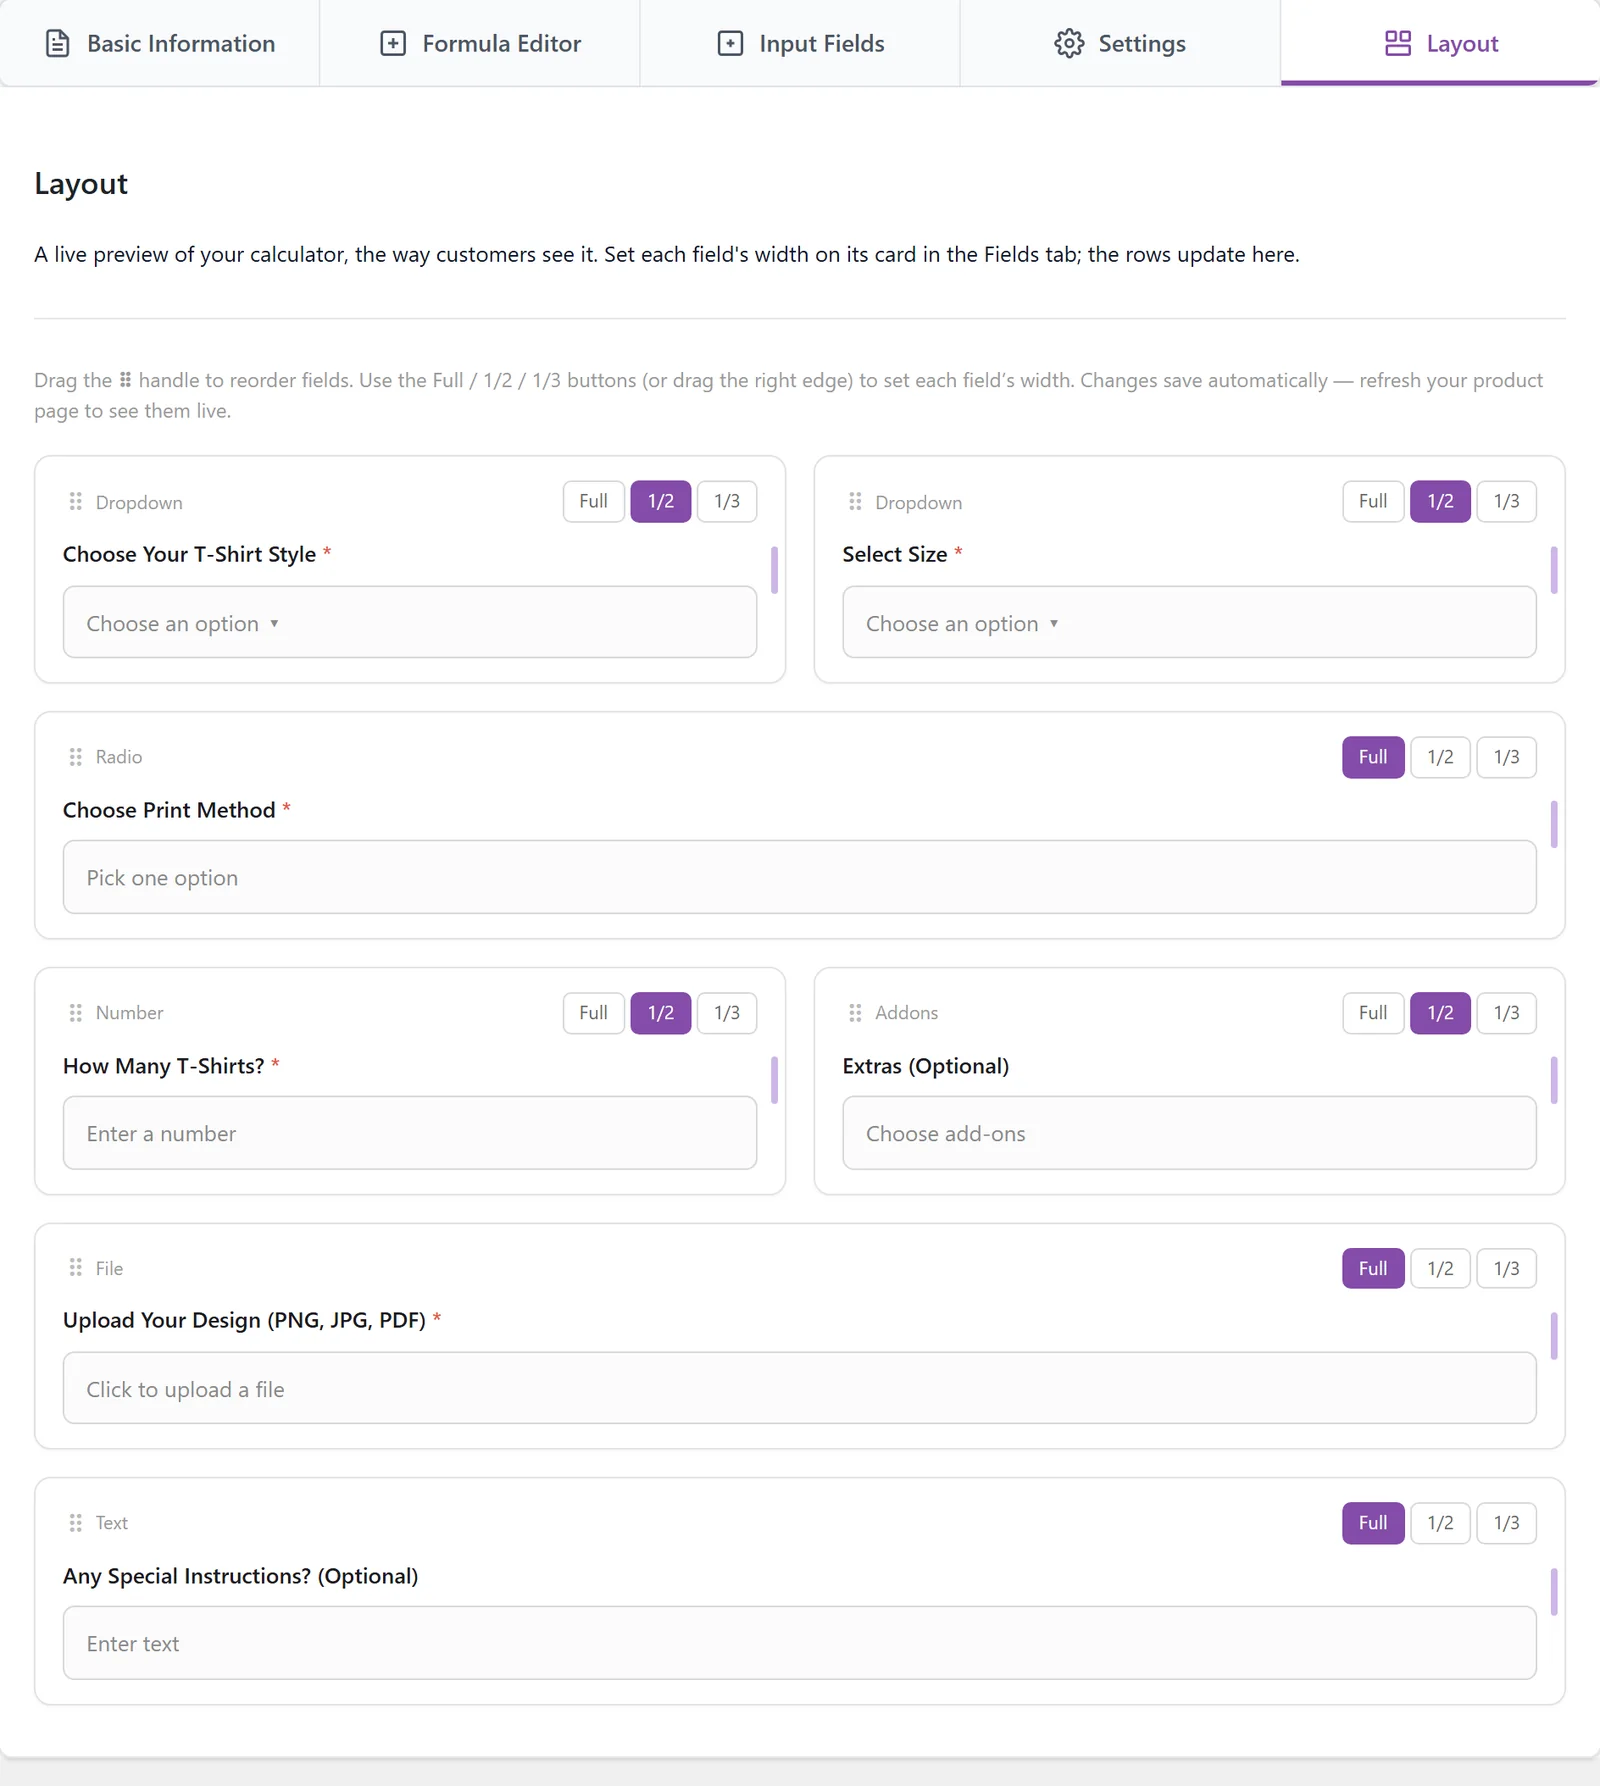
The Layout tab: style and size at 1/2, the number of shirts and the extras at 1/2. Each click on Full, 1/2 or 1/3 is saved at once.
Save
Click Update Calculator at the top right (it said Save Calculator before the first save), and you see “Calculator updated successfully!”. Because you chose Category Calculator in step 1, every product in Apparel and Custom T-Shirts now shows the calculator. There is nothing to set on the products themselves.
Make it full width
One more setting, and this one is for every calculator in your shop. It is not the Settings tab from step 4. Go to Calculator Pro > Settings, open the Design tab, set Calculator Width to Full Width (under Layout & Styling Options) and click Save Changes.
Auto, the default, keeps the calculator to a card at most 400 px wide, which looks small in a wide product column. Full Width fills the column, as in the pictures below. Fixed widths from 400 px to 600 px are there too.
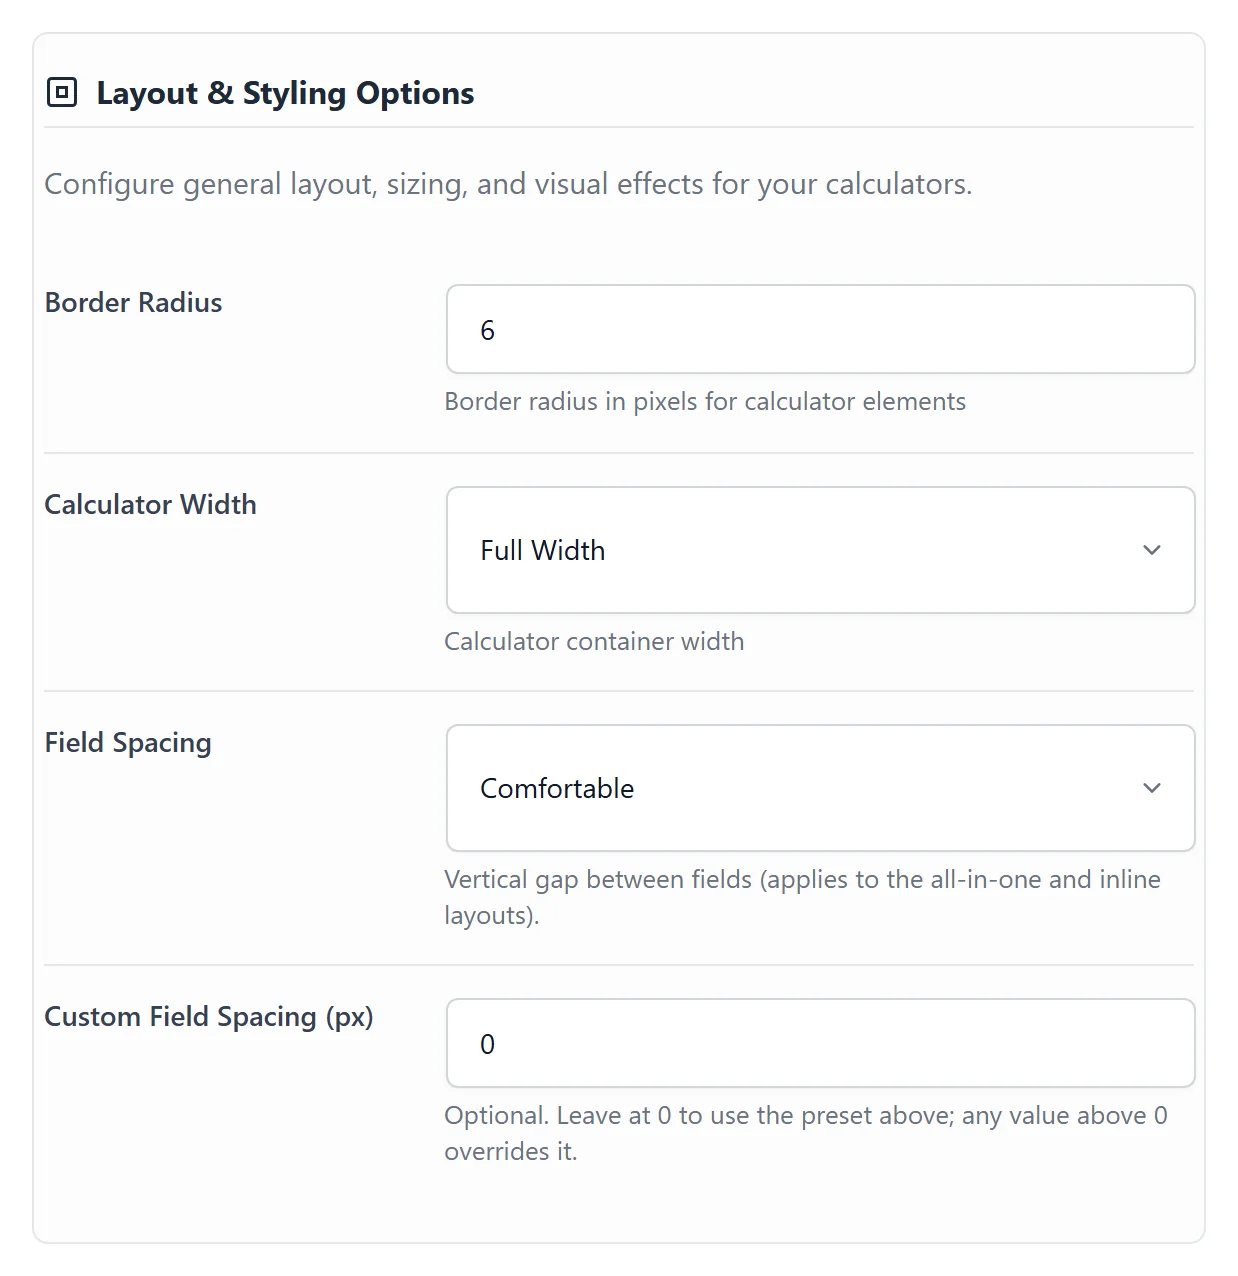
Calculator Pro > Settings > Design: Calculator Width set to Full Width. It applies to every calculator in the shop.
Don’t forget the product price
Remember the two requirements from the Common Issues and How to Fix Them page:
- Your calculator has fields (this one has seven).
- Your WooCommerce product has a regular price. WooCommerce only sells a product that has a price, so set any regular price, like $15. The calculator works out the real price, and the shop shows the product as “From $15.00”.
What your customers see
The customer answers one question at a time and moves with Next and Prev: style, size, print method, how many shirts, the extras, the design upload and a note. The total in the footer updates as they go. When the rush order is ticked, the cost list under the total shows Price $75.00, Rush order $45.00 and Total $120.00. Add to Cart works as soon as the five required fields are filled, whichever question the customer is on.
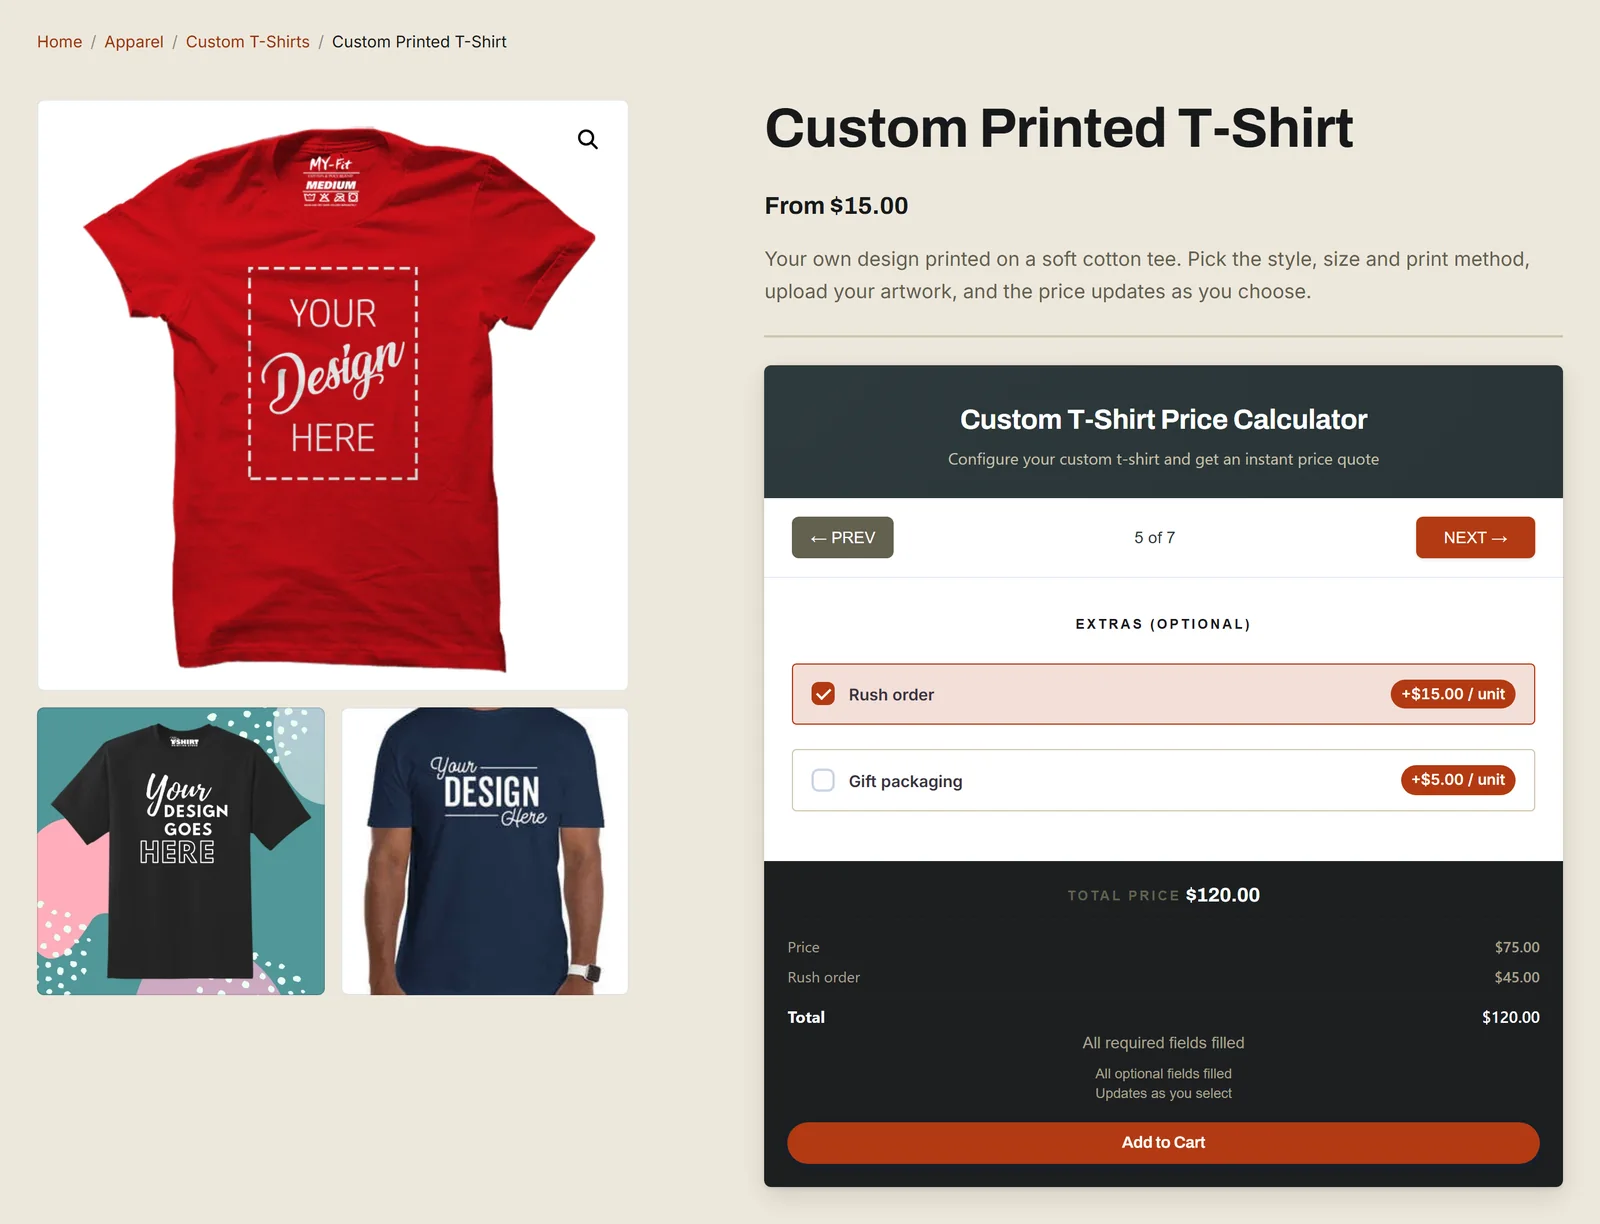
Step-by-step on a StoreWise product page: one question at a time, here the extras, with the cost list (Price $75.00, Rush order $45.00, Total $120.00) and Add to Cart underneath.
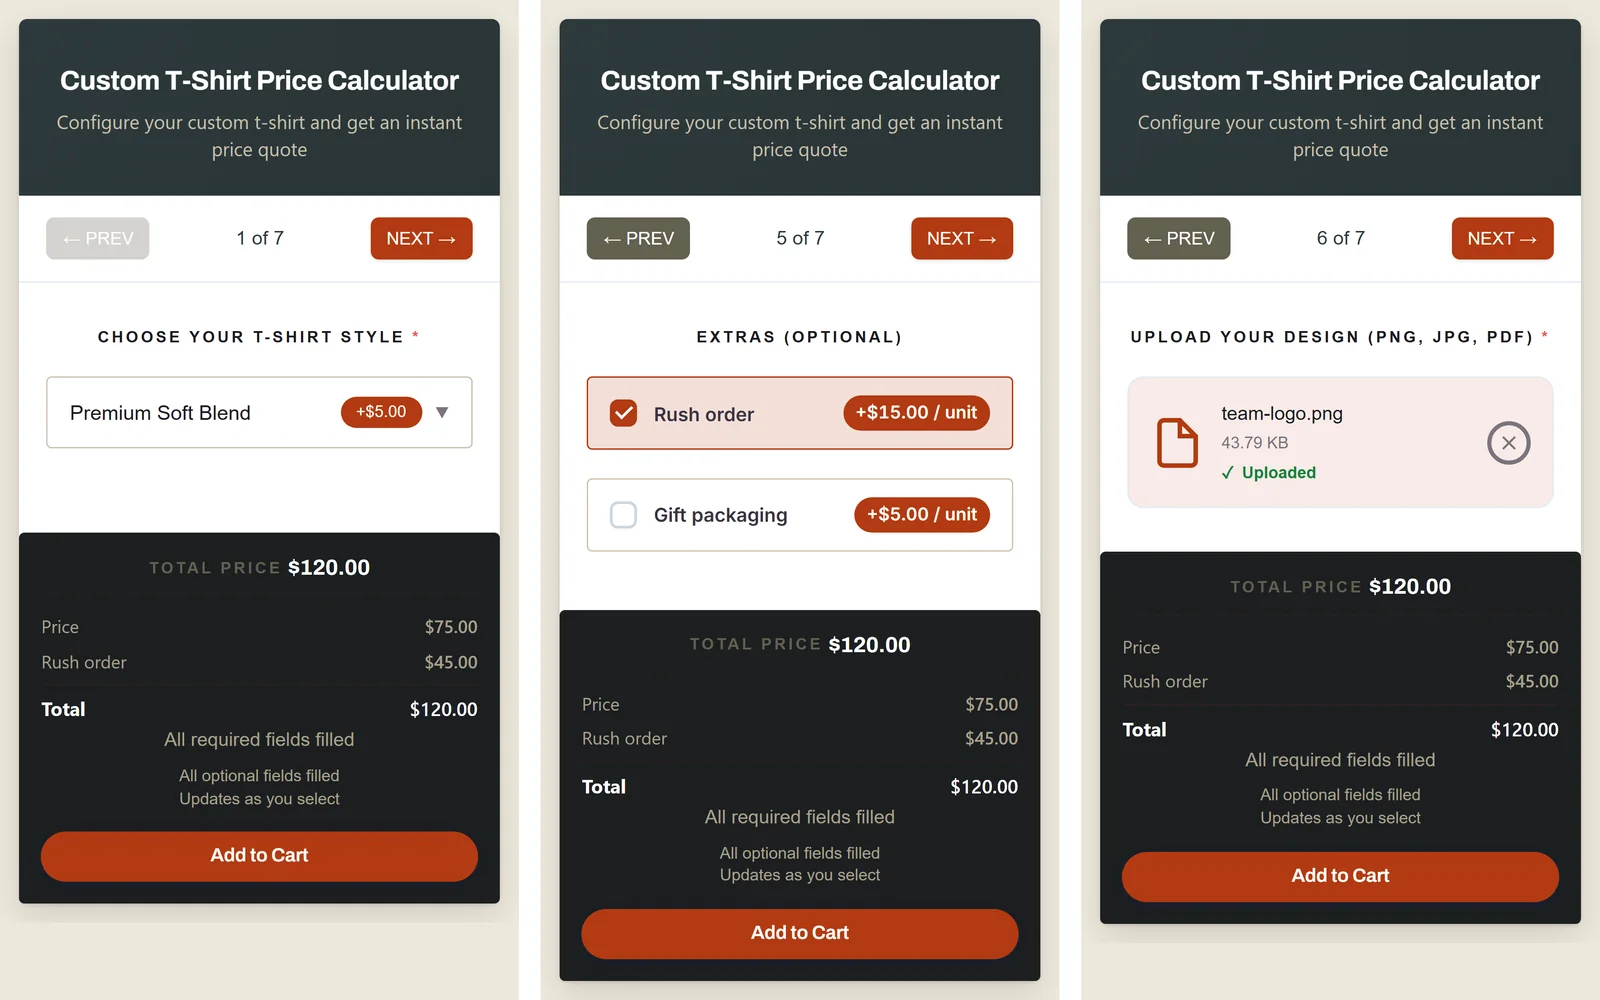
On a phone: one question at a time, with the cost list, the total and Add to Cart right under it.
Prefer the questions straight on the page, without a box? Set Display style to Inline. The same seven fields then take on your theme’s own look, without the box, the calculator’s name and its description. Style and size sit side by side, and so do the number of shirts and the extras, as set in the Layout tab. The total, the cost list and Add to Cart come after the last field.
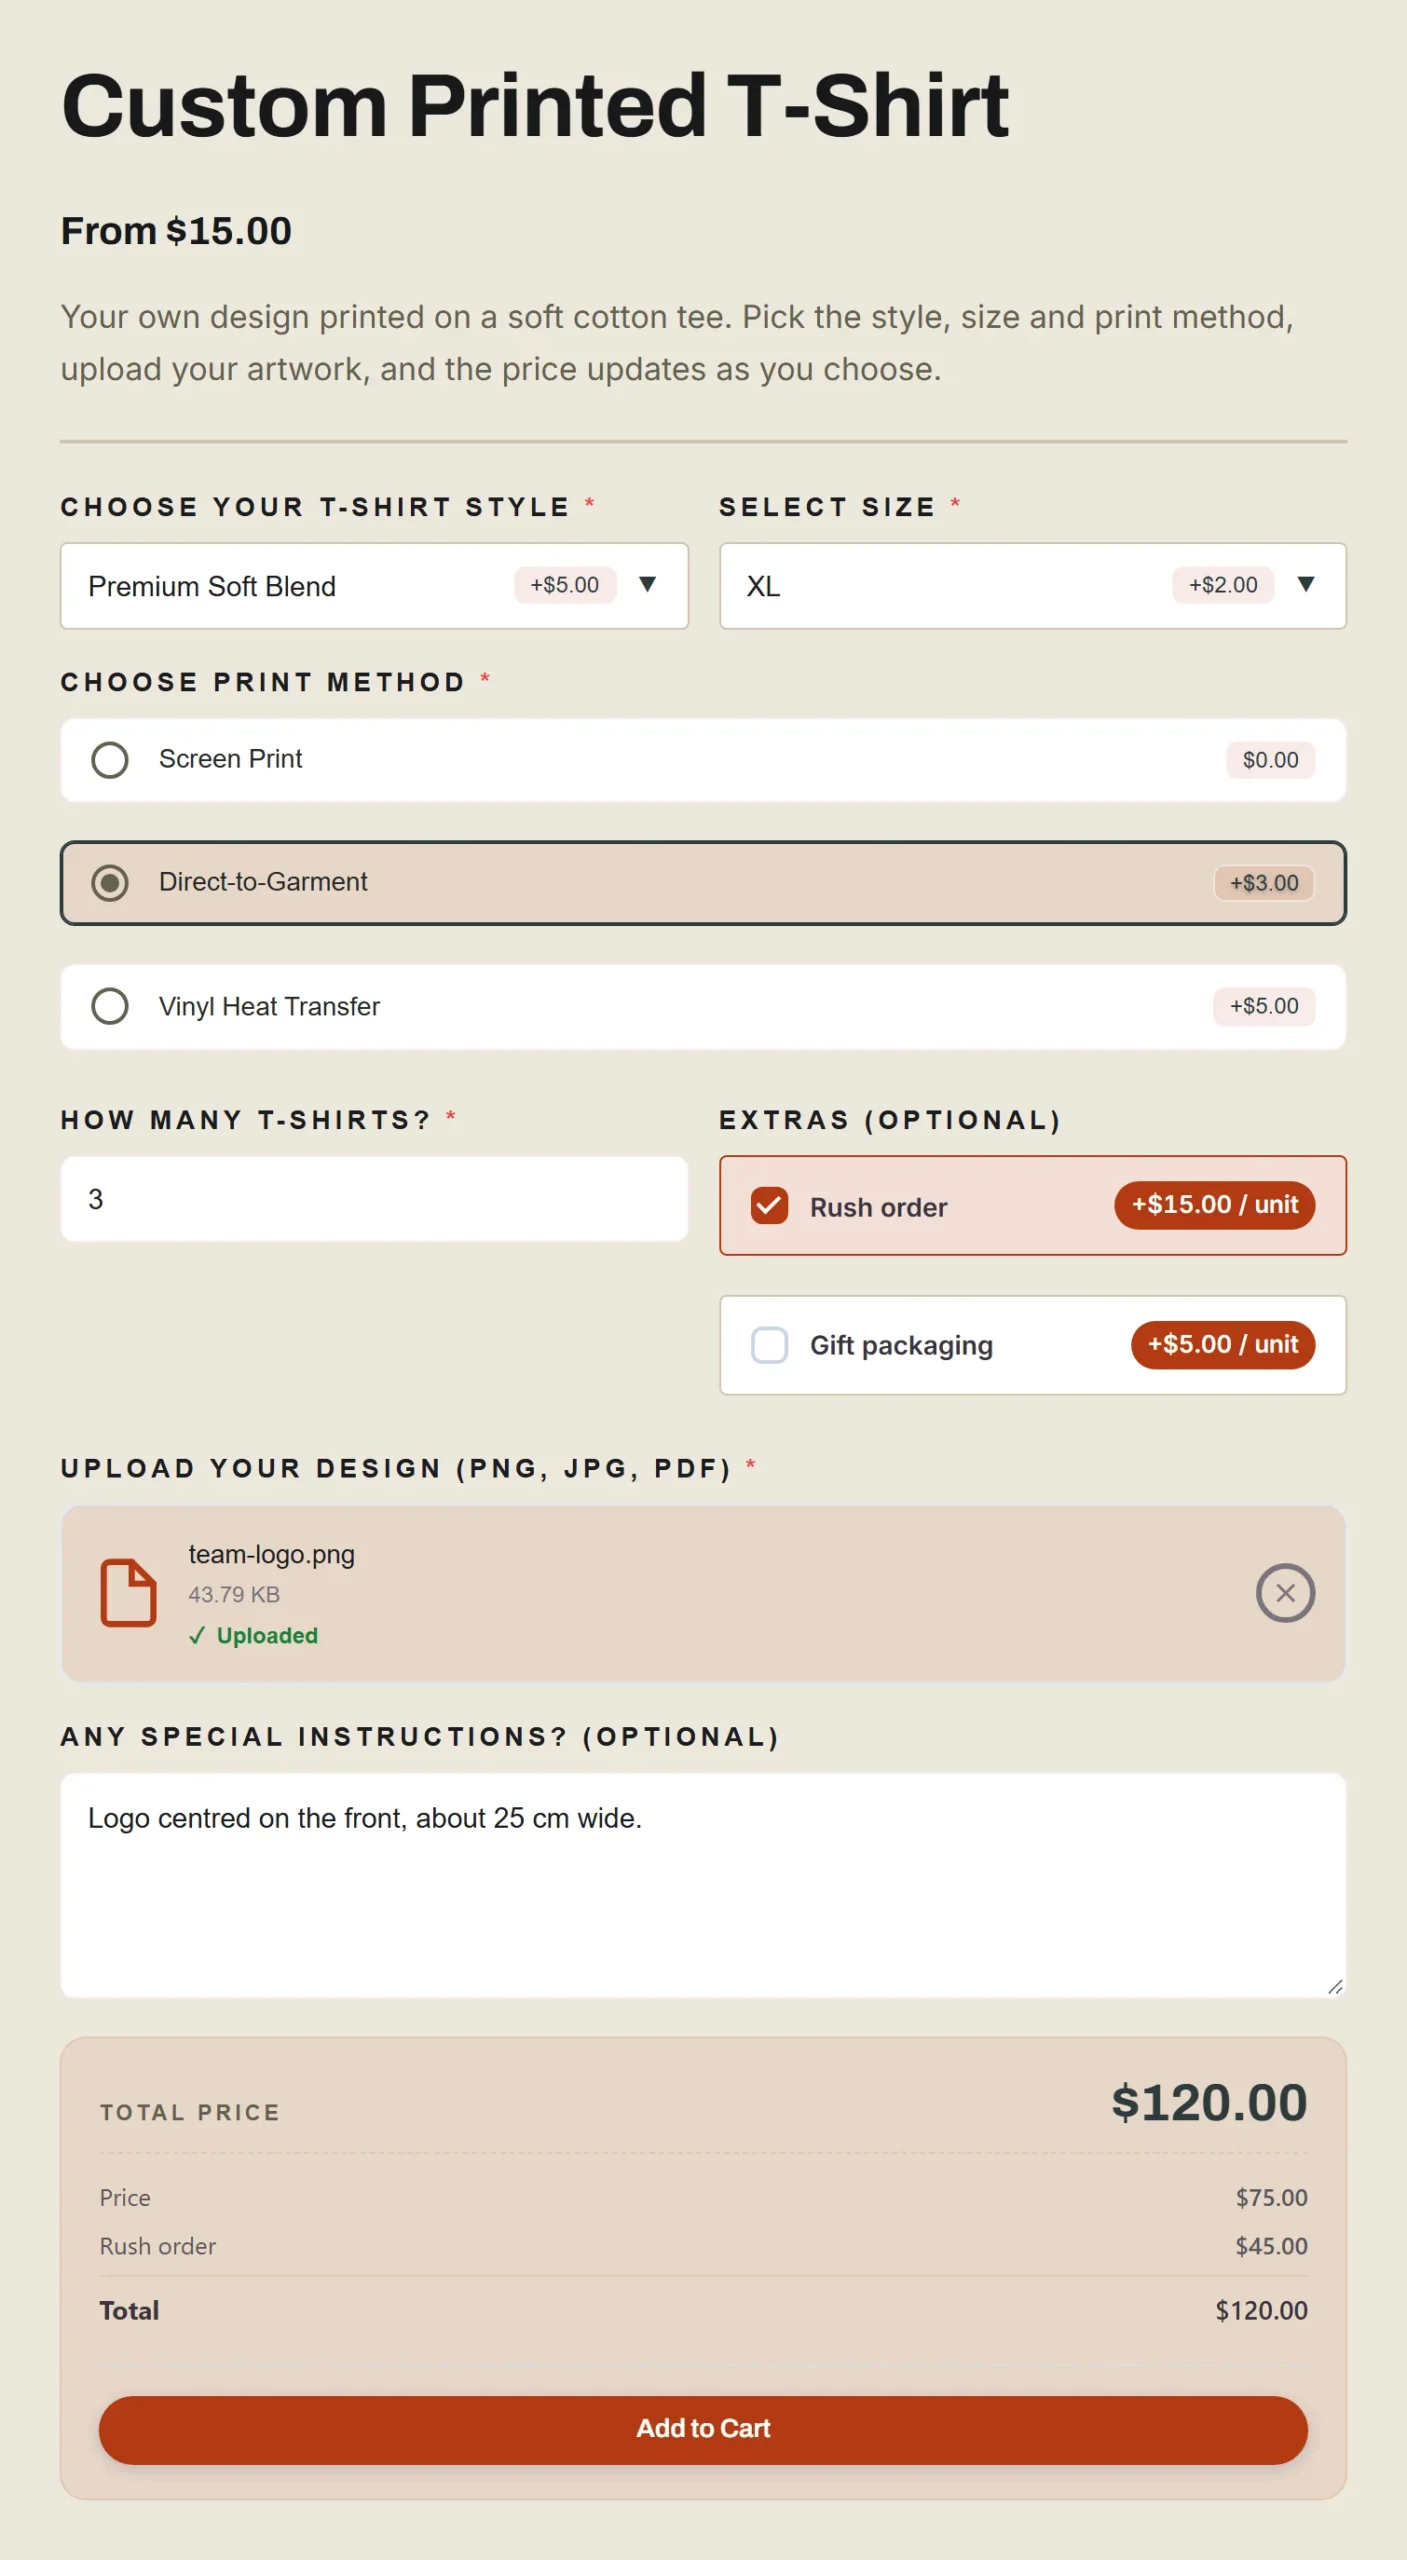
The same calculator set to Inline: no box, no name or description. Style and size sit side by side, and so do the number of shirts and the extras. The cost list and Add to Cart come last.
In the cart and at checkout the customer sees the calculated price and every answer.
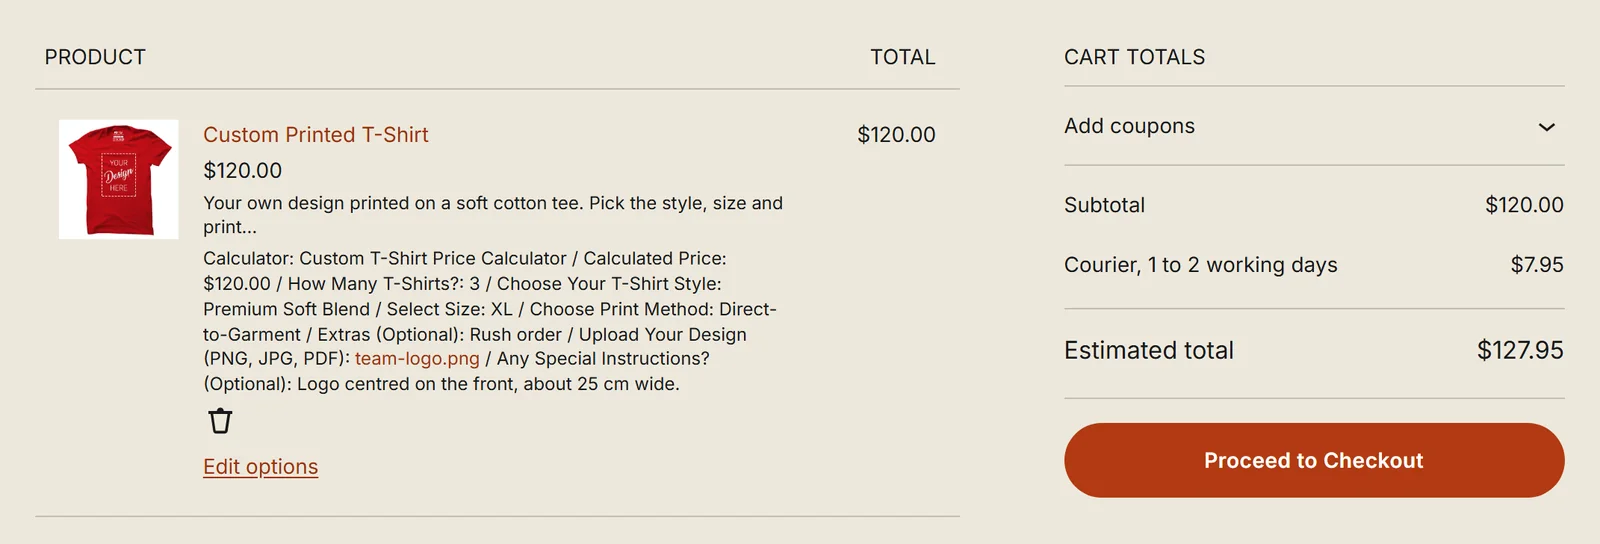
In the cart: the calculated $120.00 and every answer, including the rush order, the design file and the instructions.
When the order comes in, open it in WooCommerce > Orders. The T-shirt line shows the same $120.00 and every answer, with a link to the uploaded design, so you know exactly what to print. Your shipping is added on top, here $7.95.
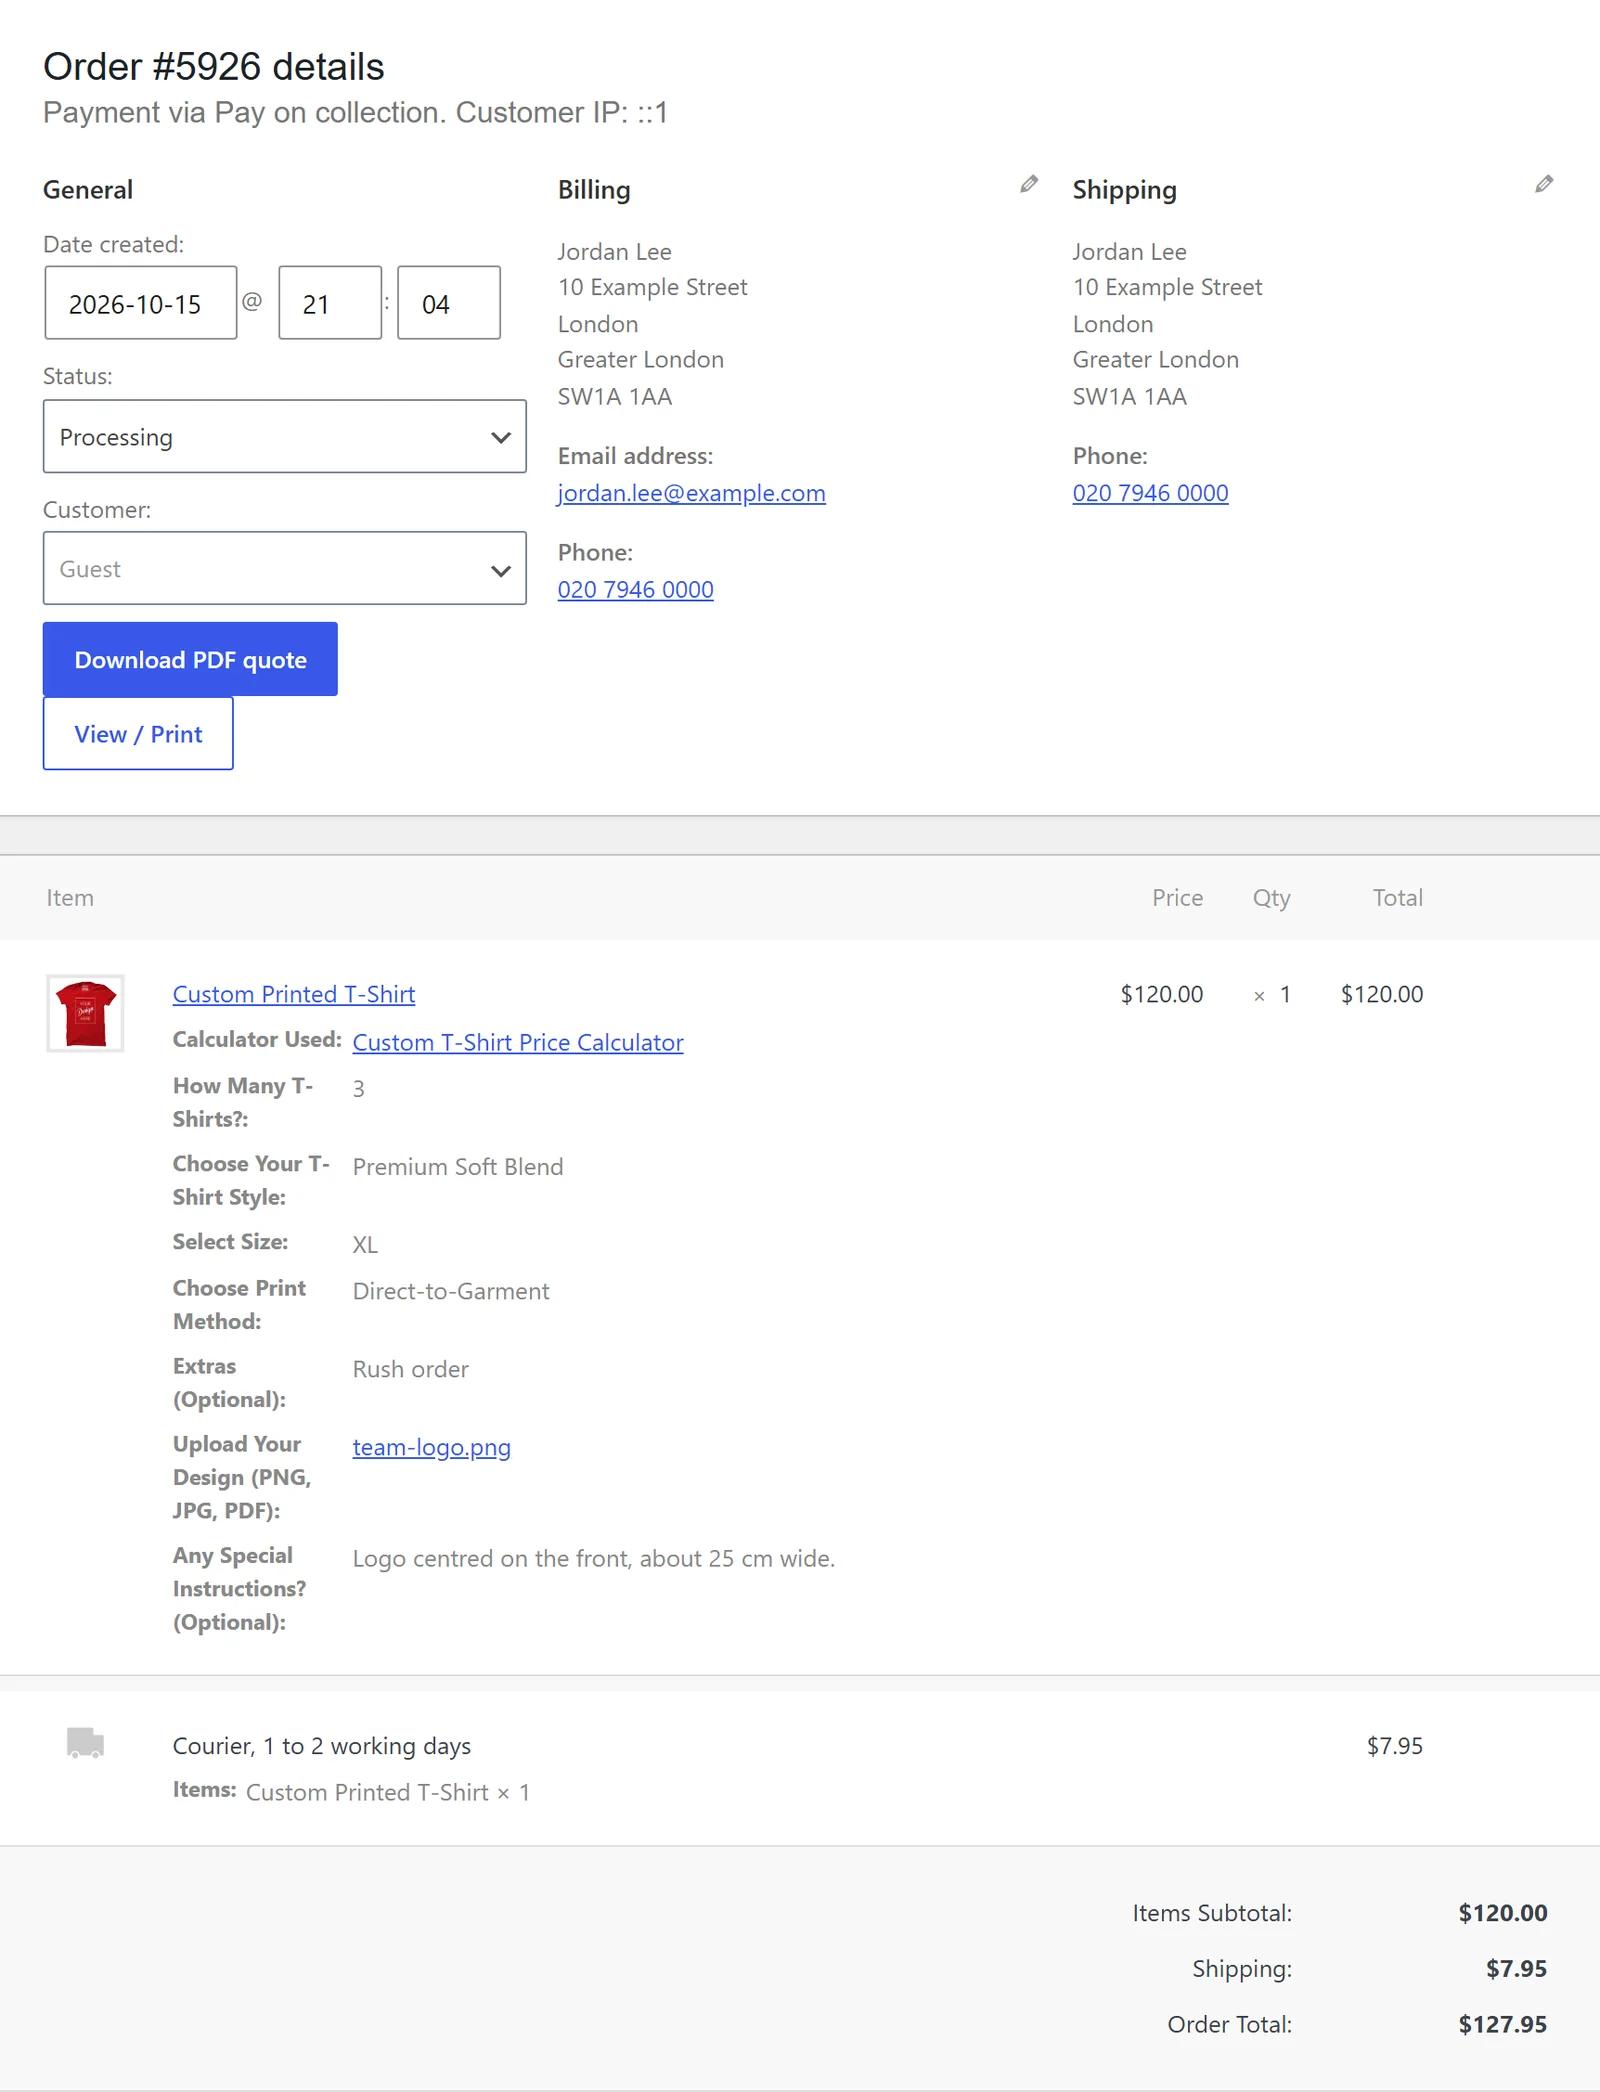
WooCommerce > Orders: the order keeps the calculated $120.00, every answer and a link to the design file.
One calculator now prices every T-shirt in your Apparel and Custom T-Shirts categories, and a new product you add to those categories gets it too. Your customers choose, see the price change as they go, and the calculated price and all their choices go into the cart and stay with the order.
Was this page helpful?
Thanks for telling us.
Sorry it did not help. Tell us what you were looking for and we will add it.