A customer orders a banner for their shop opening. It arrives blank, because the product page never asked what to print. Another customer emails to ask how long the warranty is on your flooring, because the page doesn’t say.
Both are custom field problems, and WooCommerce has no setting for either. A product gets a title, a price, a description and an Add to Cart button. Anything else is up to you.
So I built a test shop and added custom fields to WooCommerce product pages in the ways that hold up. I tested each on a block theme (Twenty Twenty-Five), a classic one (Storefront) and my own StoreWise theme, with the block cart and the classic cart. Then I placed real test orders, to see if what the customer typed actually reached the order and the emails. The screenshots are from StoreWise.
Below is what worked, the exact code I tested, and where the code stops.
In short: To show extra details you fill in, like a warranty or the material, use a product attribute (no code), or a custom field plus the few lines of code in Way 1.
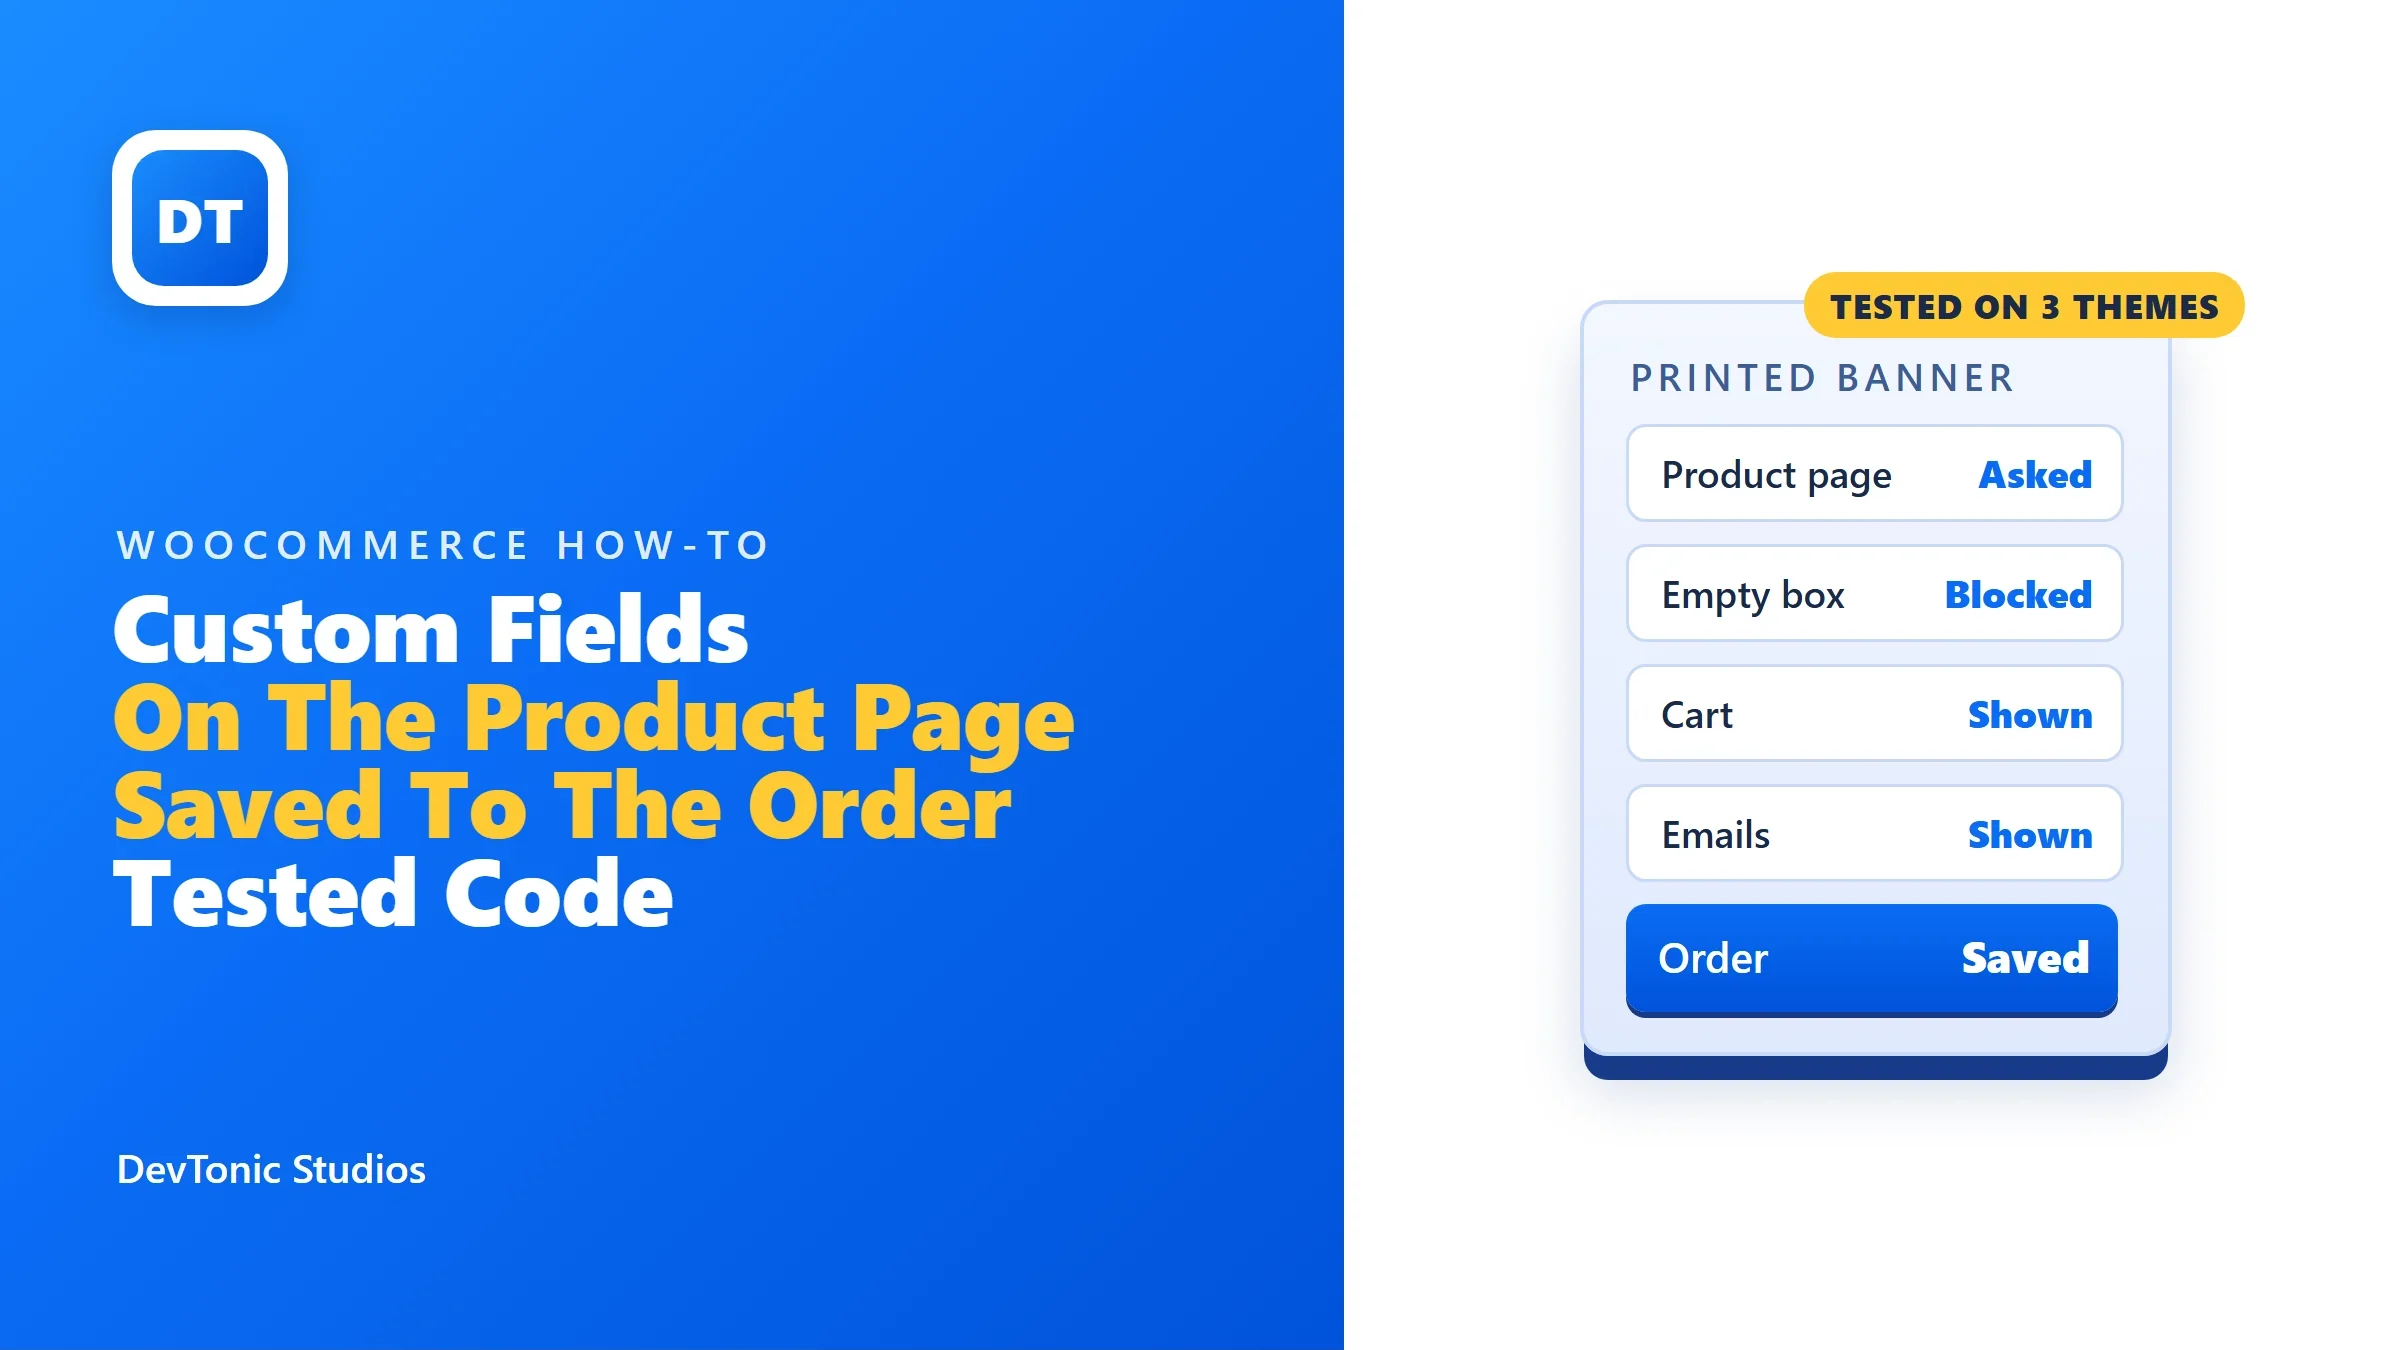
To let the customer type something before Add to Cart, like the words to print, use the snippet in Way 2. It has six parts, because the text has to survive the cart, the checkout and the order.
If you need dropdowns, uploads, several fields, or a price that changes with the answers, that is what my PriceWise plugin does.
First, decide which custom field you need
“Custom field” is used for two different jobs, and the fix for one does nothing for the other:
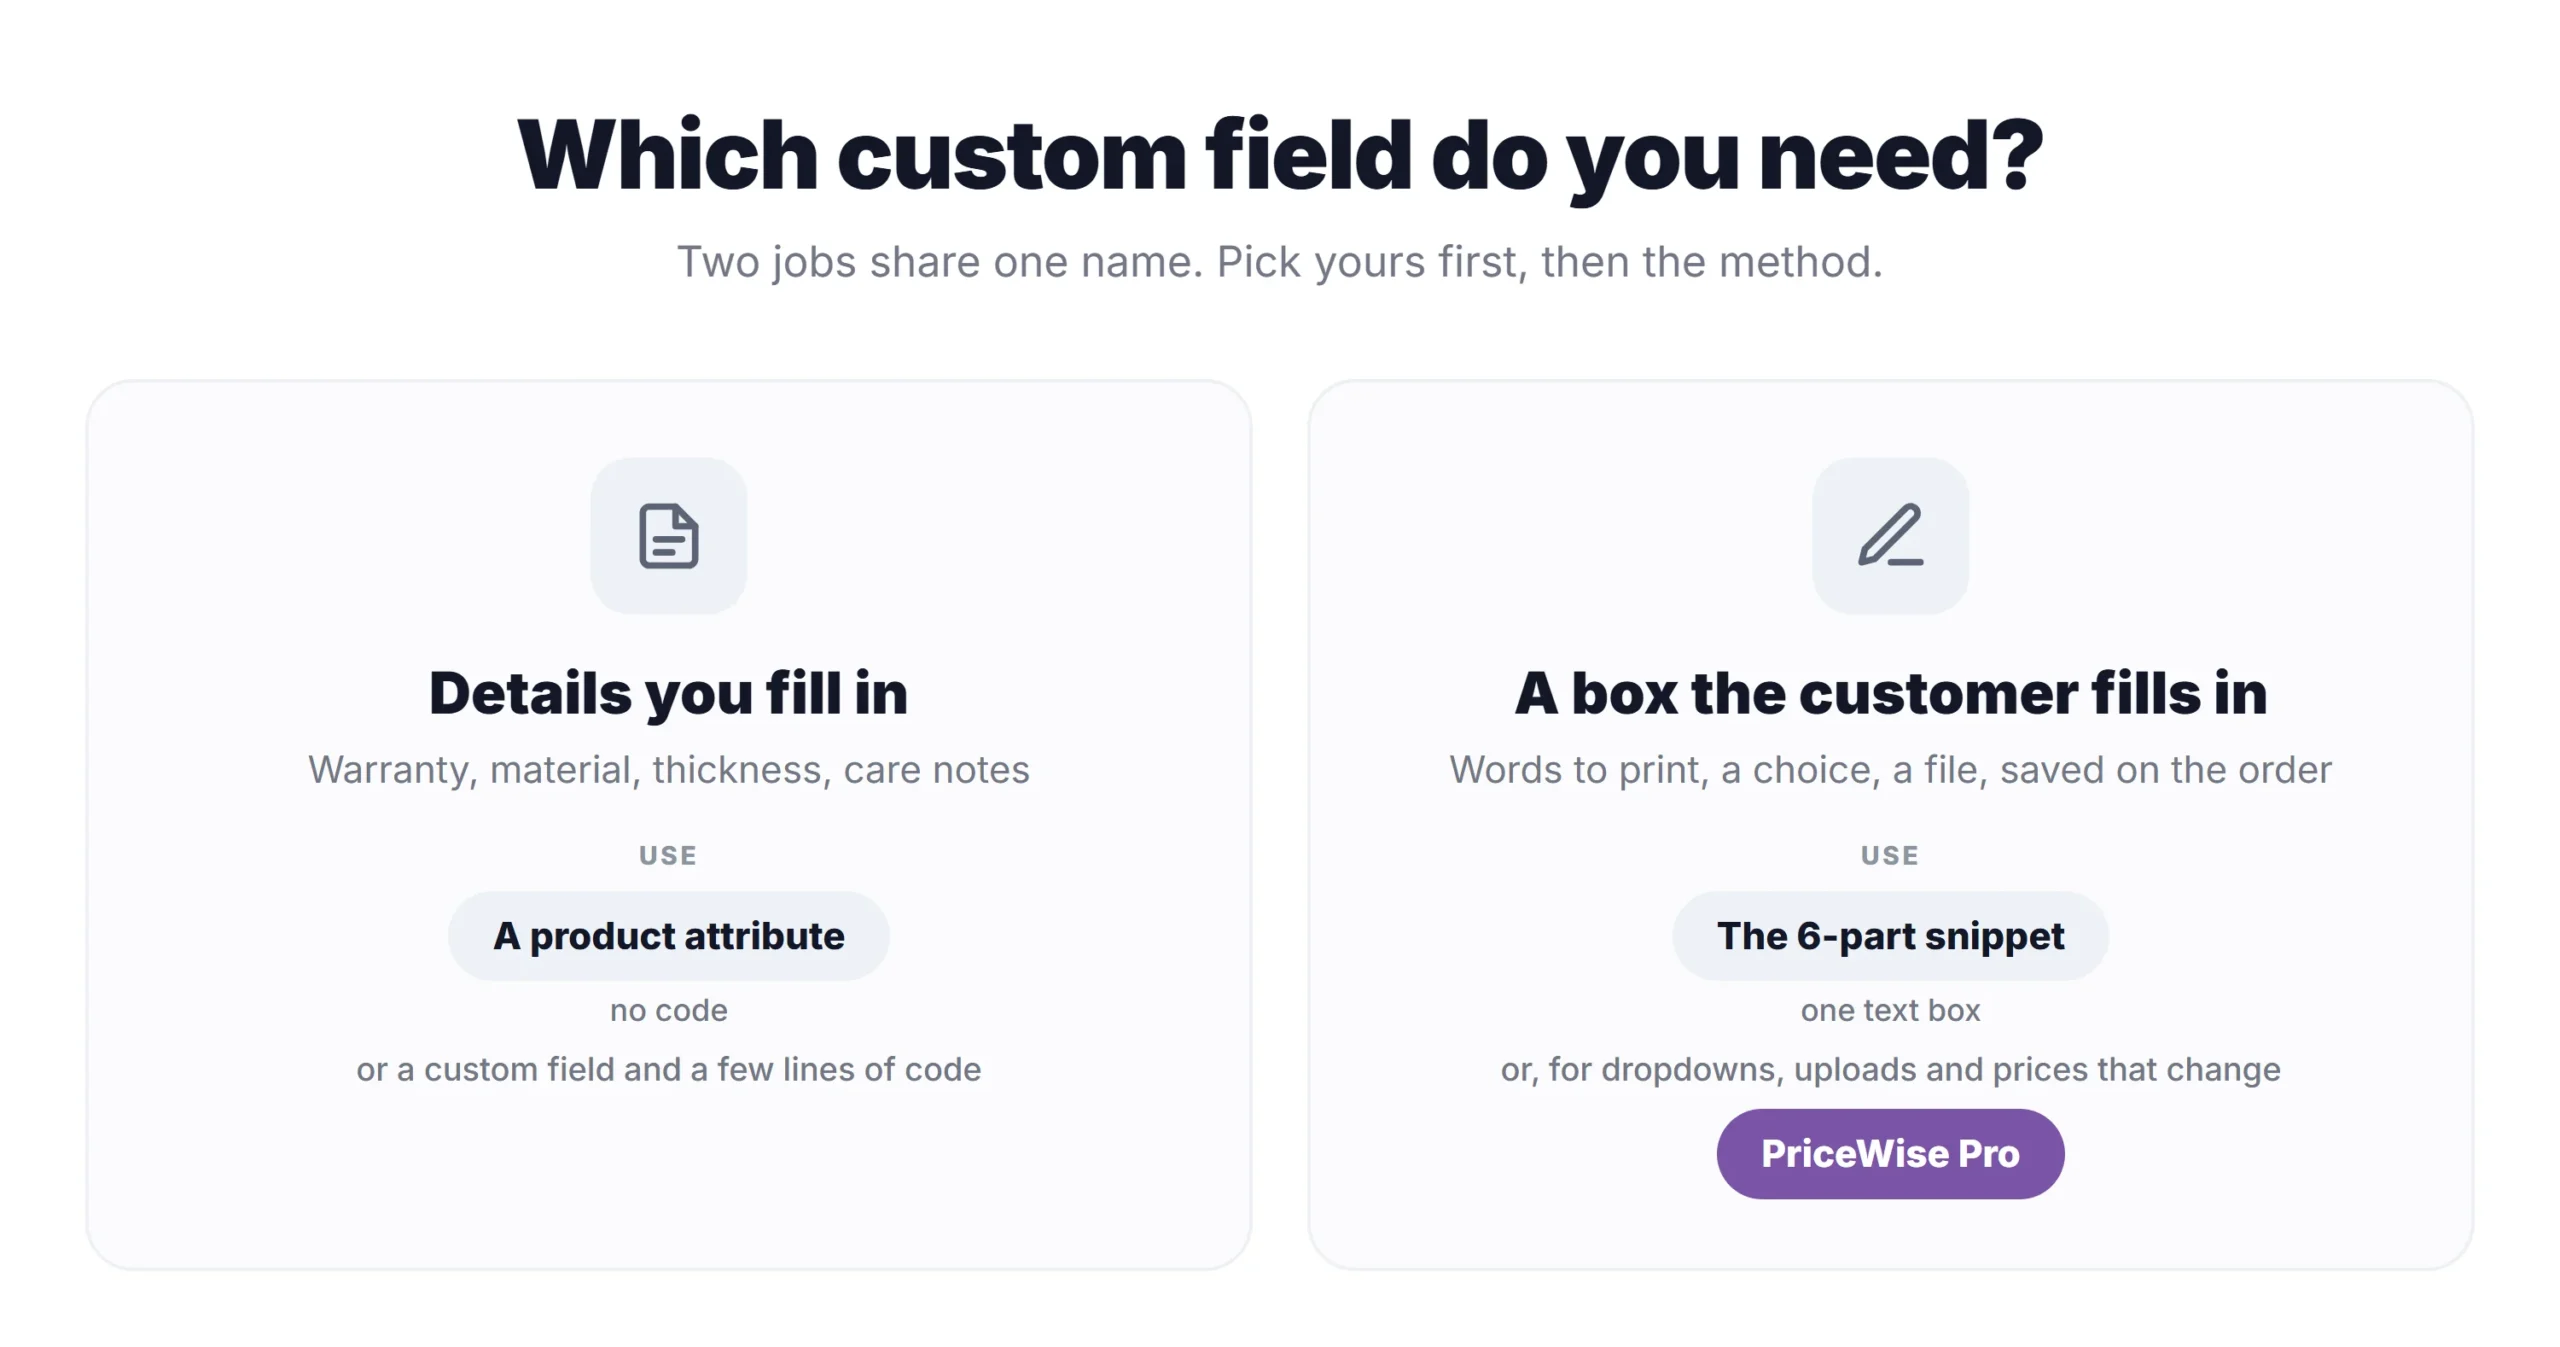
- Details you fill in. You type them once per product and every shopper reads them: a warranty, the material, the thickness, care notes.
- A box the customer fills in. Each shopper answers it before Add to Cart: the words to print, a name to engrave, a choice, a file. The answer has to travel with the order, or you end up emailing people to ask.
If you meant extra fields at checkout, like a VAT number or delivery notes, that is a third job. I cover it near the end.
Way 1: show extra details on the product page
The no-code way: a product attribute
For a few facts per product, WooCommerce already has a place to put them. In the product’s Attributes tab, add one (say Wood, with the value European oak), keep “Visible on the product page” ticked, and update the product.
It shows up in the Additional information tab. It did on all three themes I tested:
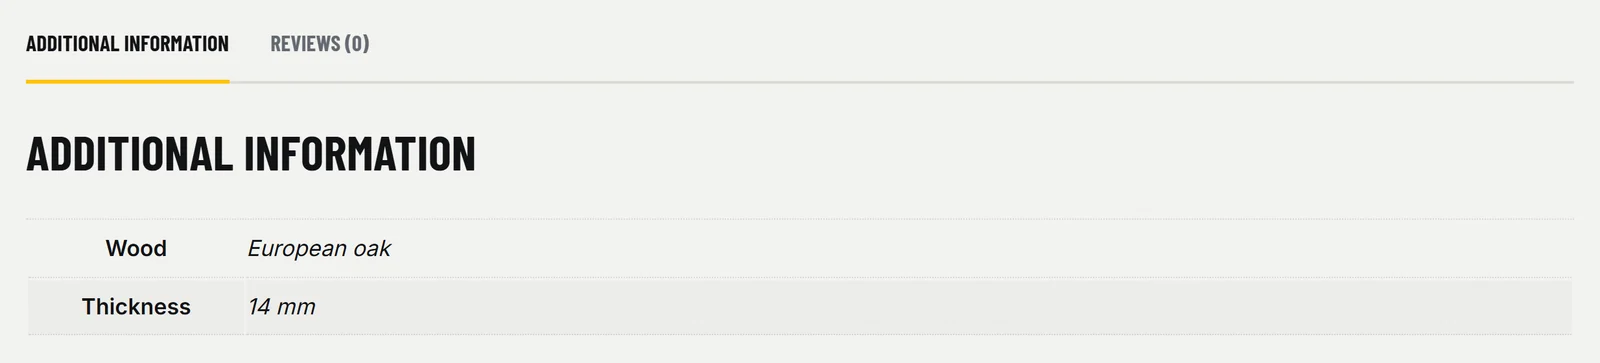
For most shops, that is enough. The catch is where it shows: only in that tab, further down the page. If you want a detail near the price, or you want it kept out of the attribute list, use a custom field.
A real custom field and a few lines of code
- Open the product and click Screen Options at the top right. Tick Custom Fields.
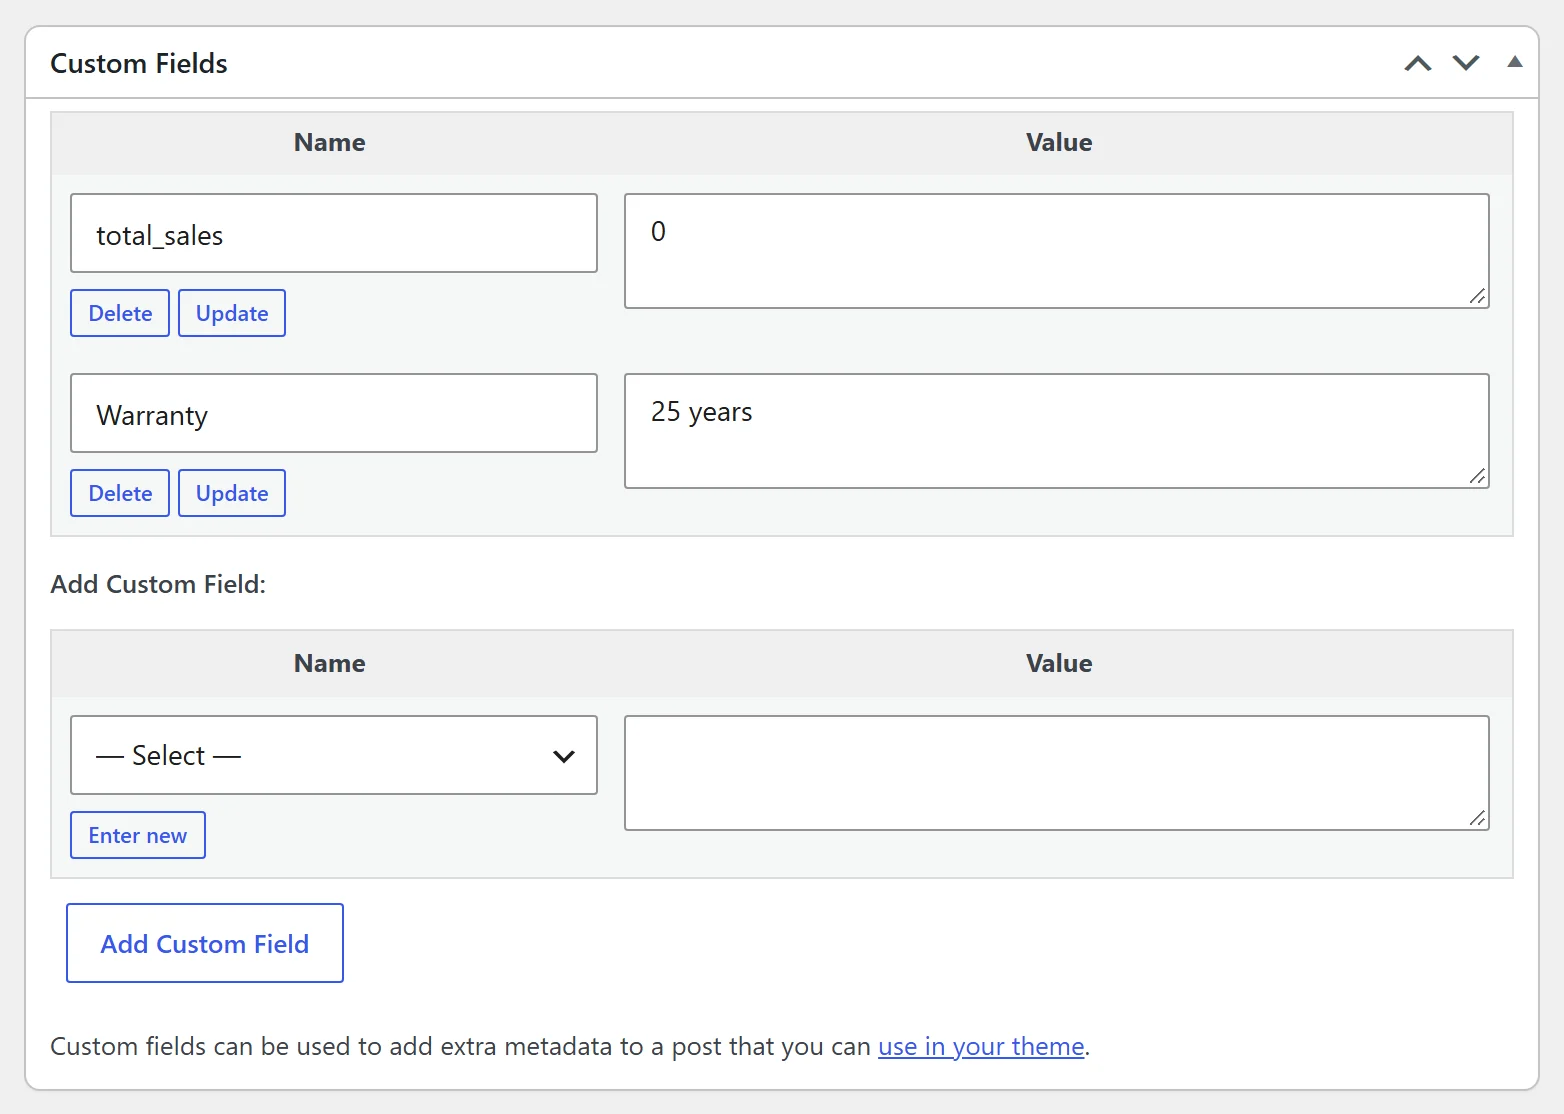
- Scroll down to the Custom Fields box. Add a field with the name
Warrantyand the value25 years, then update the product. - Add the code below with a code snippets plugin, or in your child theme’s
functions.php.
// Show a custom field under the product's SKU and categories.
// Add a custom field named "Warranty" to a product, and its value shows on that product's page.
add_action( 'woocommerce_product_meta_end', function () {
	global $product;
	$warranty = $product ? $product->get_meta( 'Warranty' ) : '';
	if ( '' !== $warranty ) {
		echo '<p class="product-warranty" style="font-size:.875em;margin:.5em 0 0">Warranty: ' . esc_html( $warranty ) . '</p>';
	}
} );
It prints the warranty under the SKU and category, on any product that has one. Products without the field show nothing.
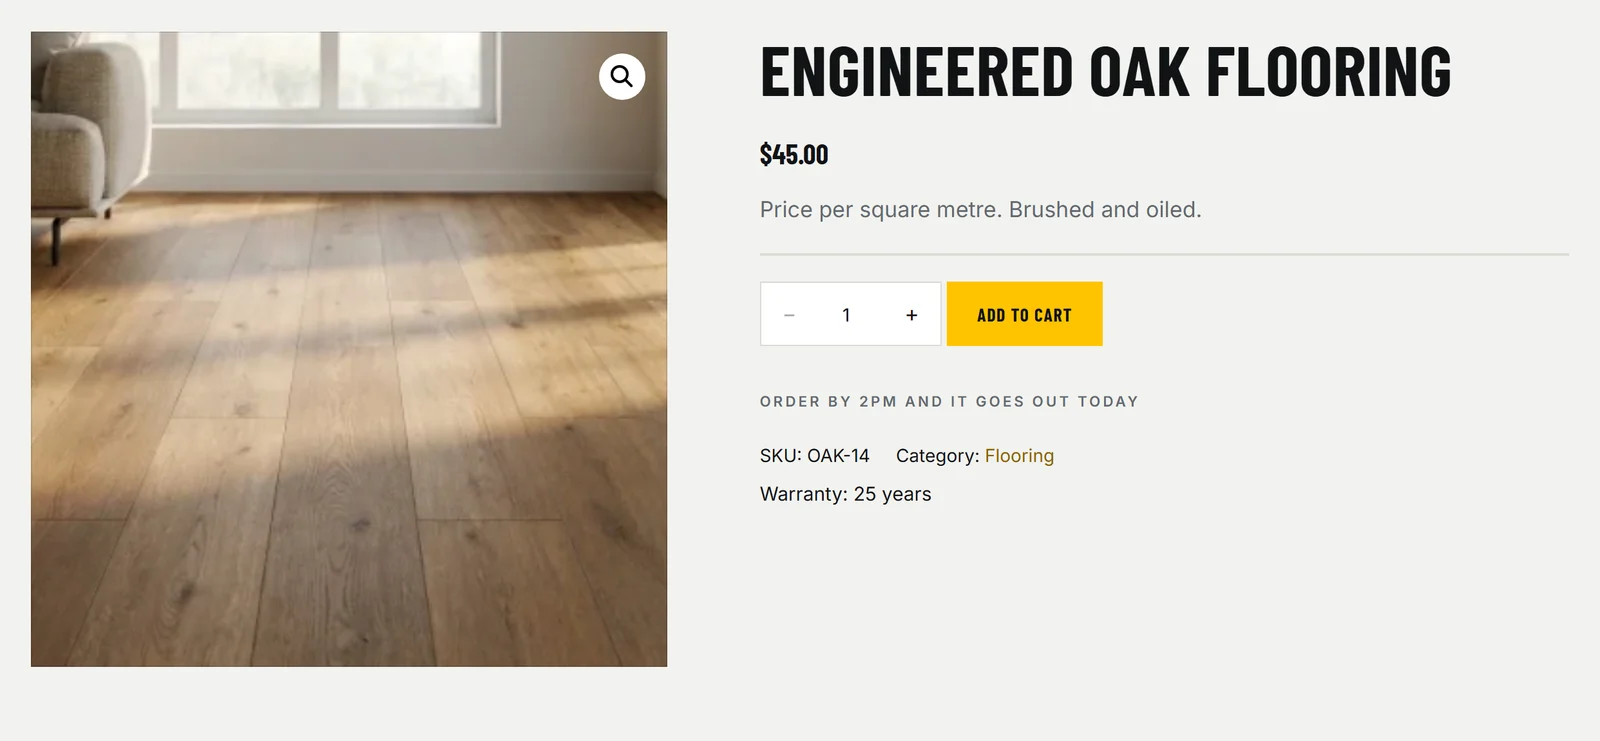
WooCommerce’s own help page says that to show custom fields you have to edit your theme’s files. You don’t. The hook in the code is one WooCommerce also runs on block themes, where a lot of older product page code does nothing. It worked the same on Twenty Twenty-Five, Storefront and StoreWise.
If you have lots of these, a plugin like Advanced Custom Fields gives you a nicer box to type them into. You still need a few lines like these to show them on the page.
Way 2: a box the customer fills in before Add to Cart
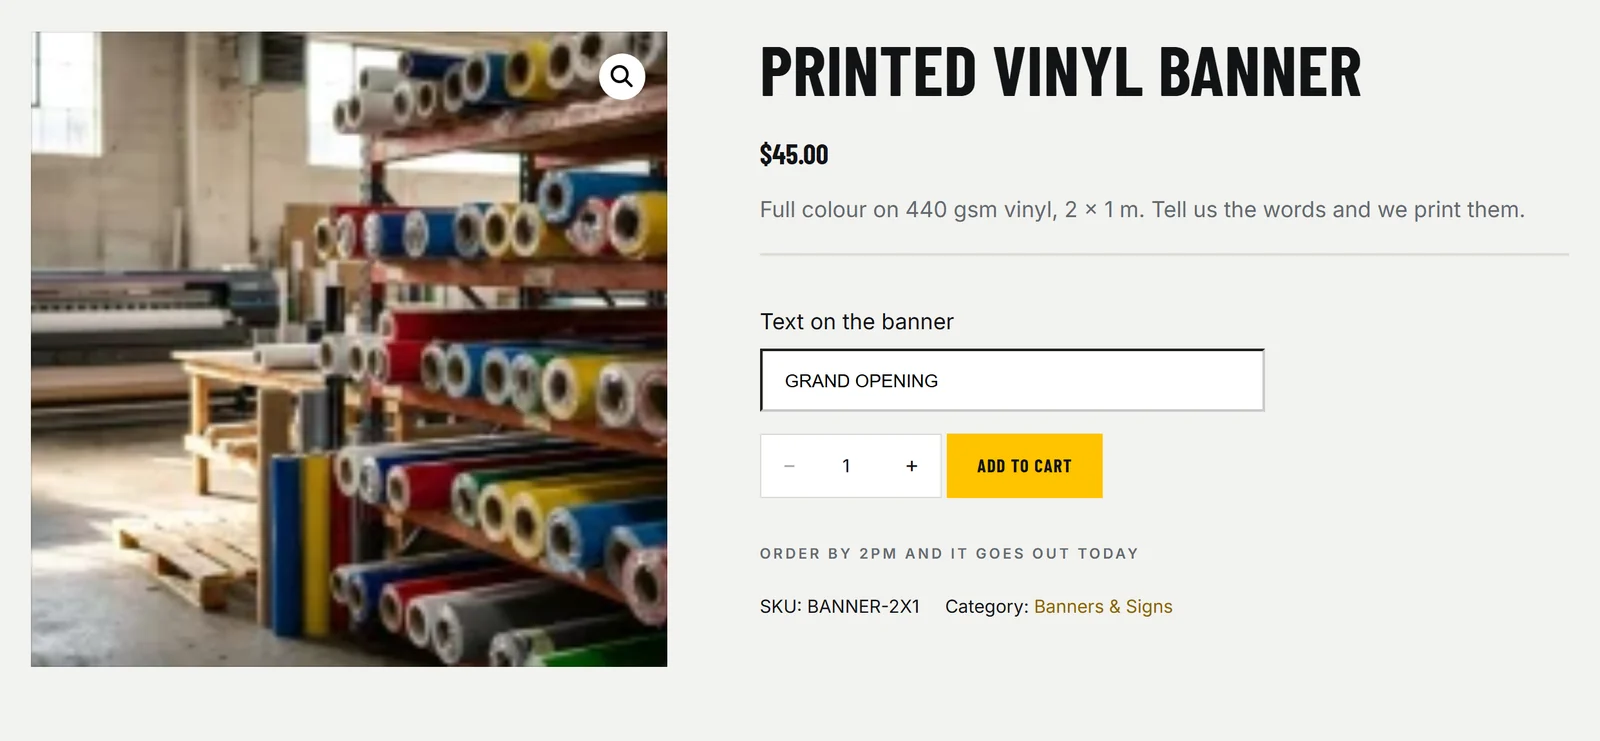
This is what most people mean by custom fields on a product page, and it is where a copied snippet can let you down. Showing a text box is the easy part. Getting what the customer typed all the way to your order screen and the emails is what the other parts are for.
You switch it on per product, with the custom field box from Way 1. Give the product a custom field named customer_text_label. Its value is the label the customer sees, for example Text on the banner. Products without it are left alone.
// A text box the customer fills in before Add to Cart, saved on the order.
// It shows on any product with a custom field named "customer_text_label".
// The value of that custom field is the label, for example "Text on the banner".

// 1. The box, above the Add to Cart button.
add_action( 'woocommerce_before_add_to_cart_button', function () {
	global $product;
	$label = $product ? $product->get_meta( 'customer_text_label' ) : '';
	if ( '' === $label ) {
		return;
	}
	printf(
		'<p class="customer-text"><label for="customer_text" style="display:block;margin-bottom:.4em">%s</label><input type="text" id="customer_text" name="customer_text" class="input-text" maxlength="60" required style="width:100%%;max-width:28em;box-sizing:border-box"></p>',
		esc_html( $label )
	);
} );

// 2. No text, no Add to Cart. This also covers add-to-cart links and the block shop buttons.
add_filter( 'woocommerce_add_to_cart_validation', function ( $passed, $product_id ) {
	$label = get_post_meta( $product_id, 'customer_text_label', true );
	$text  = isset( $_POST['customer_text'] ) ? trim( sanitize_text_field( wp_unslash( $_POST['customer_text'] ) ) ) : '';
	if ( '' !== $label && '' === $text ) {
		wc_add_notice( sprintf( 'Please fill in "%s" before adding this to your cart.', $label ), 'error' );
		return false;
	}
	return $passed;
}, 10, 2 );

// 3. Keep the text with the cart line. Two different texts become two separate lines.
add_filter( 'woocommerce_add_cart_item_data', function ( $cart_item_data, $product_id ) {
	if ( isset( $_POST['customer_text'] ) && '' !== get_post_meta( $product_id, 'customer_text_label', true ) ) {
		$cart_item_data['customer_text'] = trim( sanitize_text_field( wp_unslash( $_POST['customer_text'] ) ) );
	}
	return $cart_item_data;
}, 10, 2 );

// 4. Show it in the cart and at checkout.
add_filter( 'woocommerce_get_item_data', function ( $item_data, $cart_item ) {
	if ( ! empty( $cart_item['customer_text'] ) ) {
		$item_data[] = array(
			'key'   => get_post_meta( $cart_item['product_id'], 'customer_text_label', true ),
			'value' => $cart_item['customer_text'],
		);
	}
	return $item_data;
}, 10, 2 );

// 5. Save it on the order, so it shows in the admin, the emails and My Account.
add_action( 'woocommerce_checkout_create_order_line_item', function ( $item, $cart_item_key, $values ) {
	if ( ! empty( $values['customer_text'] ) ) {
		$item->add_meta_data( get_post_meta( $values['product_id'], 'customer_text_label', true ), $values['customer_text'] );
	}
}, 10, 3 );

// 6. On the shop page, the button opens the product, where the box is, instead of adding it.
add_filter( 'woocommerce_product_supports', function ( $supports, $feature, $product ) {
	return ( 'ajax_add_to_cart' === $feature && '' !== $product->get_meta( 'customer_text_label' ) ) ? false : $supports;
}, 10, 3 );
add_filter( 'woocommerce_product_add_to_cart_url', function ( $url, $product ) {
	return '' !== $product->get_meta( 'customer_text_label' ) ? $product->get_permalink() : $url;
}, 10, 2 );
add_filter( 'woocommerce_product_add_to_cart_text', function ( $text, $product ) {
	return '' !== $product->get_meta( 'customer_text_label' ) ? 'Add your text' : $text;
}, 10, 2 );
What each part does:
- The box, above the Add to Cart button.
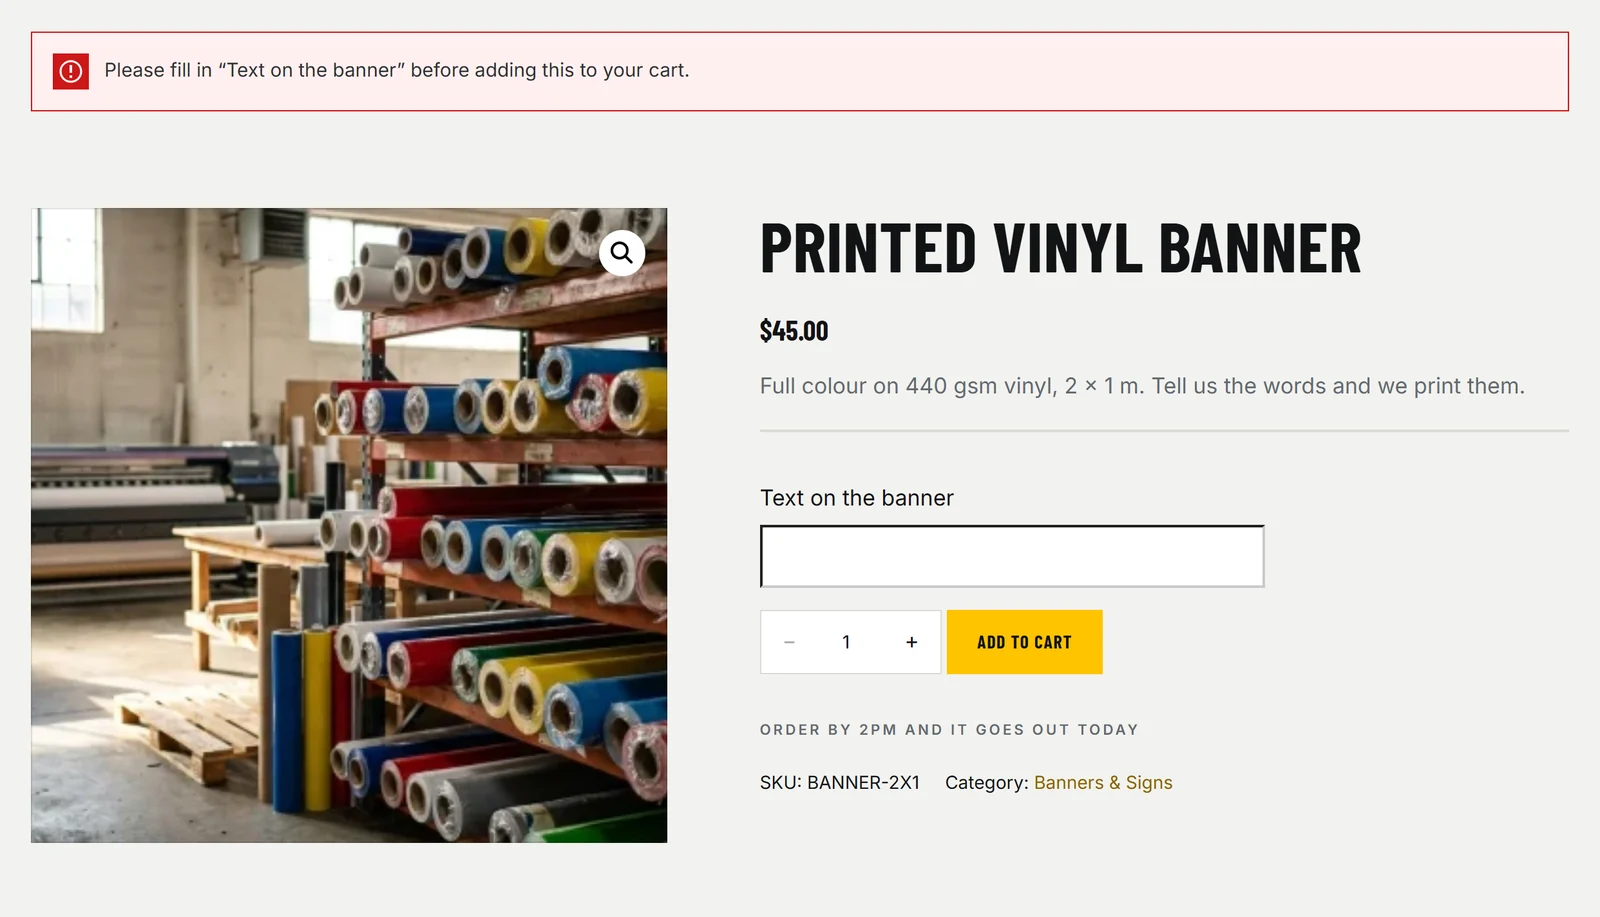
- The check. An empty box means no Add to Cart, with a message saying what is missing. It runs on your server, so it also stops add-to-cart links and the block theme’s shop buttons, which skip the product page.
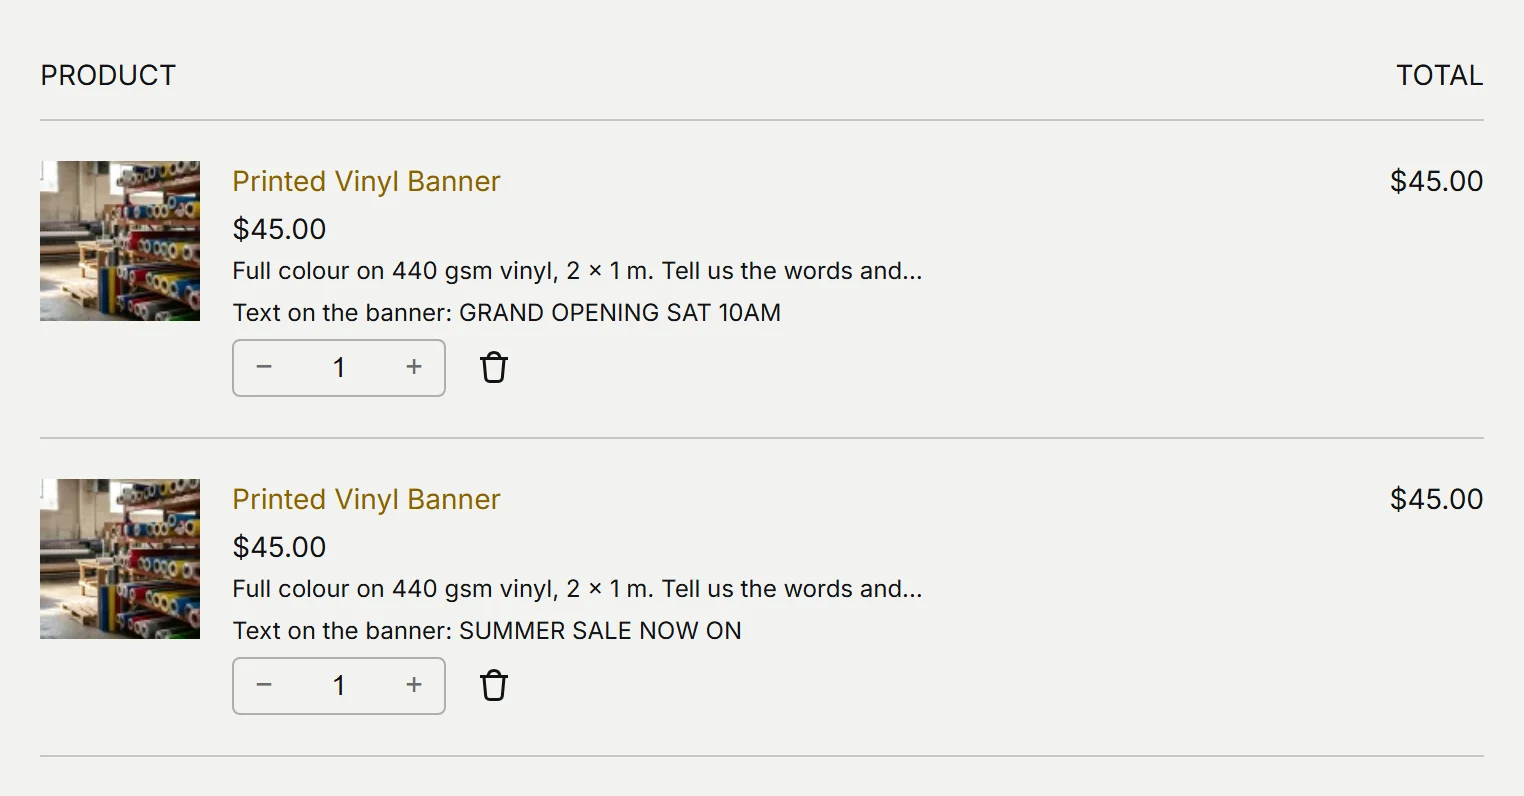
- Keeps the text with the cart line. Two banners with different words stay two lines instead of merging into one.
- Shows it in the cart and at checkout, block or classic.
- Saves it on the order. That puts it on your order screen, in the order emails and in the customer’s My Account.
- Fixes the shop page button. It says “Add your text” and opens the product, instead of trying to add a blank banner.
What I tested
An empty box stops right there, with the message from step 2:
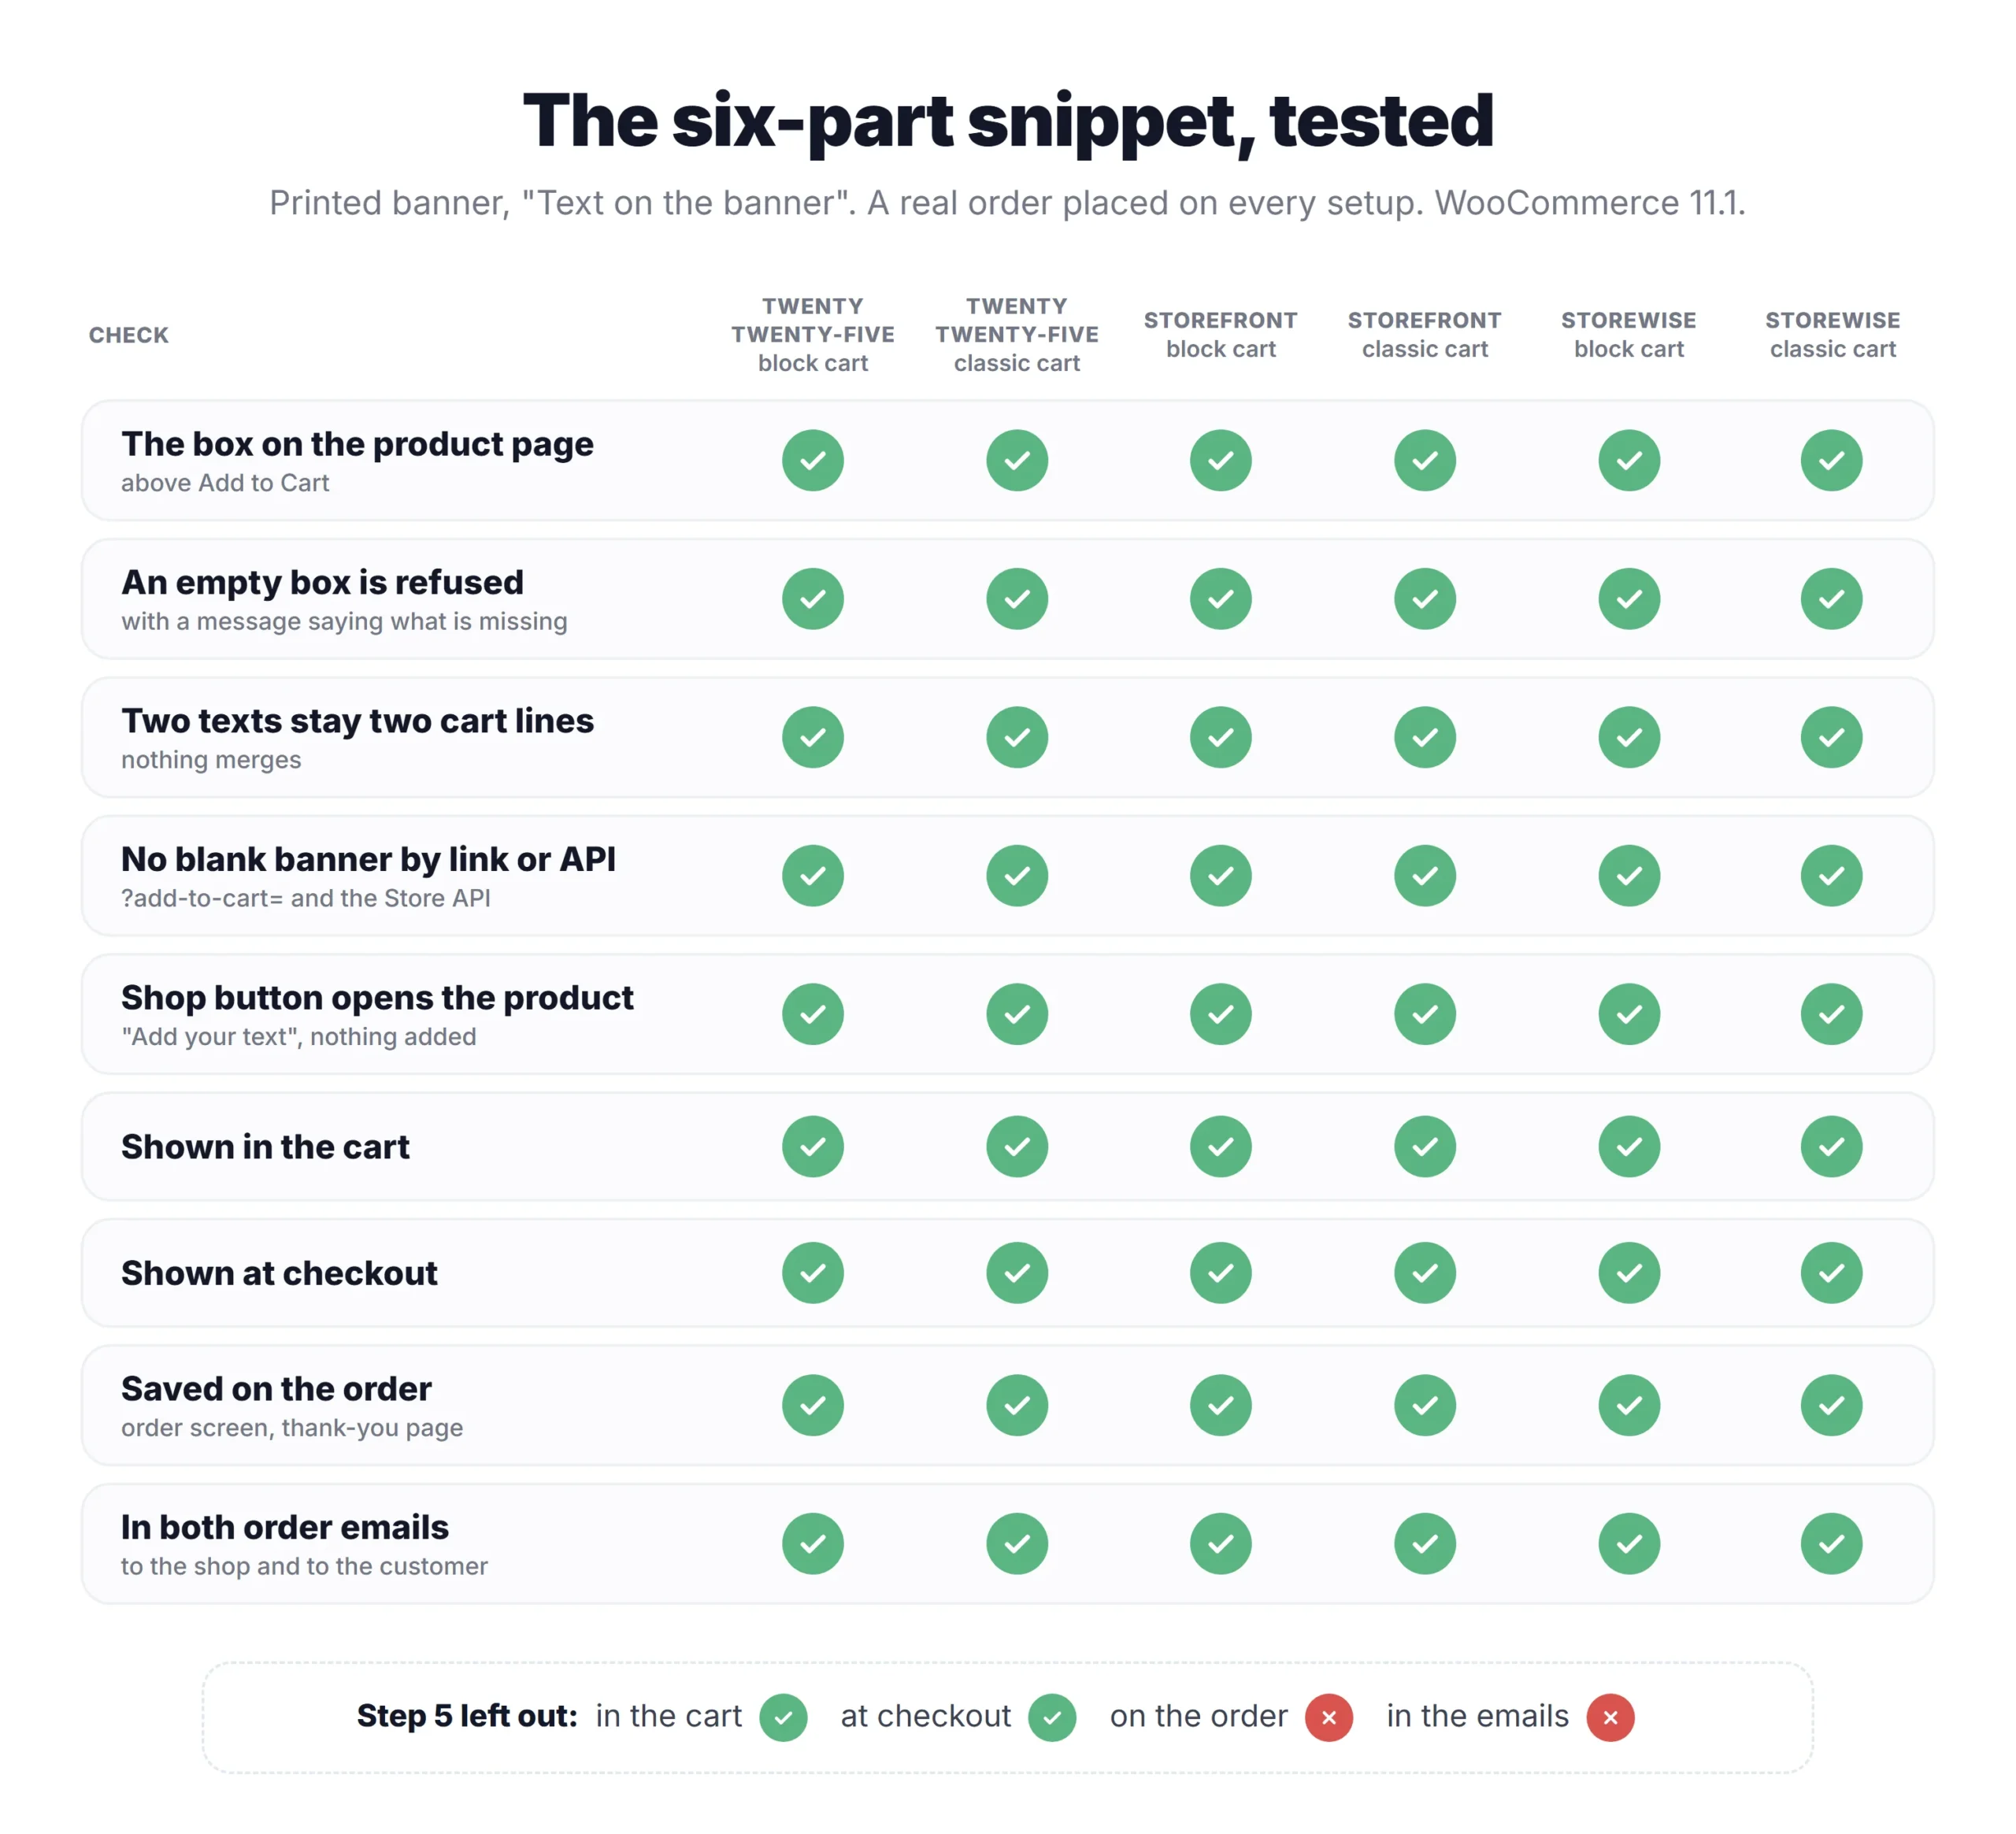
I ran it on all three themes, with both kinds of cart and checkout, and placed a real order each time:
The block cart, with two banners and two different texts:
And the order, where you need it:
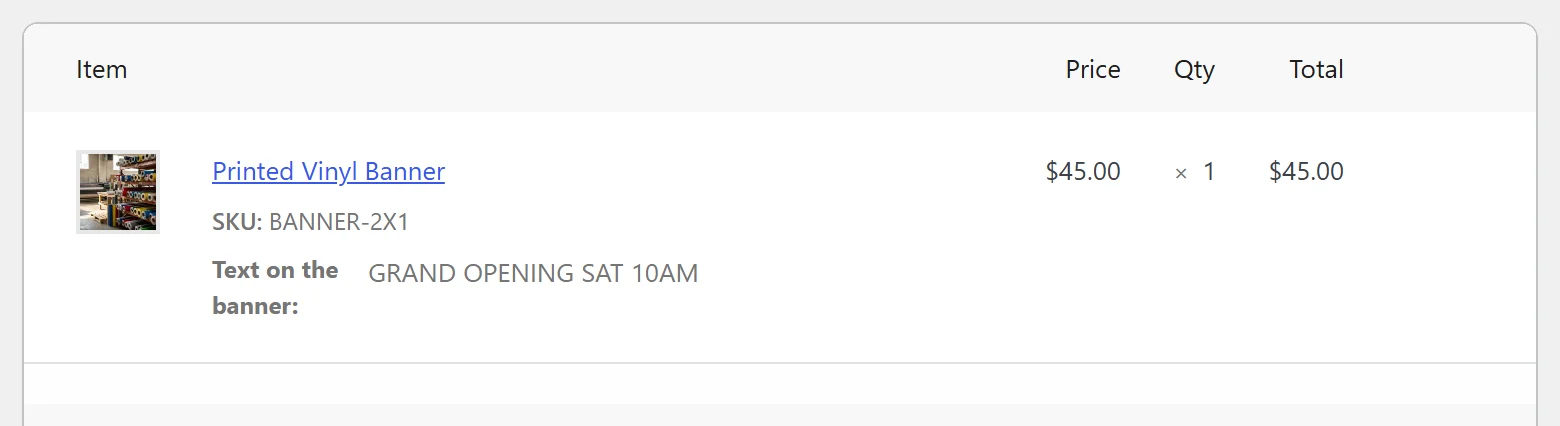
Then I took step 5 out, to see what happens with a snippet that stops at the cart. The text showed in the cart and at checkout. Then the order and both emails came through without it. The customer typed it, saw it, paid, and you never got it. That is the step to look for in any snippet you copy.
Where the snippet stops
- It needs WooCommerce’s normal product page. The box goes in the spot just above Add to Cart that WooCommerce’s own product form gives. If a page builder draws its own product page (a custom product template in Elementor or Divi, for example), or your theme uses WooCommerce’s newer Add to Cart with Options block, the box may not appear. Then the check in step 2 refuses every Add to Cart for that product, so try it on one product first.
- It is one text box. A dropdown, checkboxes or a date each need their own HTML, their own check and their own saving code. A file upload also needs safe file handling, which is not something to copy from a forum.
- The price never changes. If eyelets cost $8 more, the snippet cannot charge it without a lot more code.
- Every new field is more code to keep working through WooCommerce updates.
If one box is all you need, stop here. The snippet is free and it works.
Way 3: several fields, choices and prices with PriceWise
This is the job I built PriceWise Calculator Pro for. It started as a price calculator, so every field the customer fills in can change the price, and every answer is saved on the order.
Here is the same banner with PriceWise Pro: a text box for the words, a dropdown for the finishing, and an upload for a logo. Picking eyelets moves the total on the page from $45 to $53:
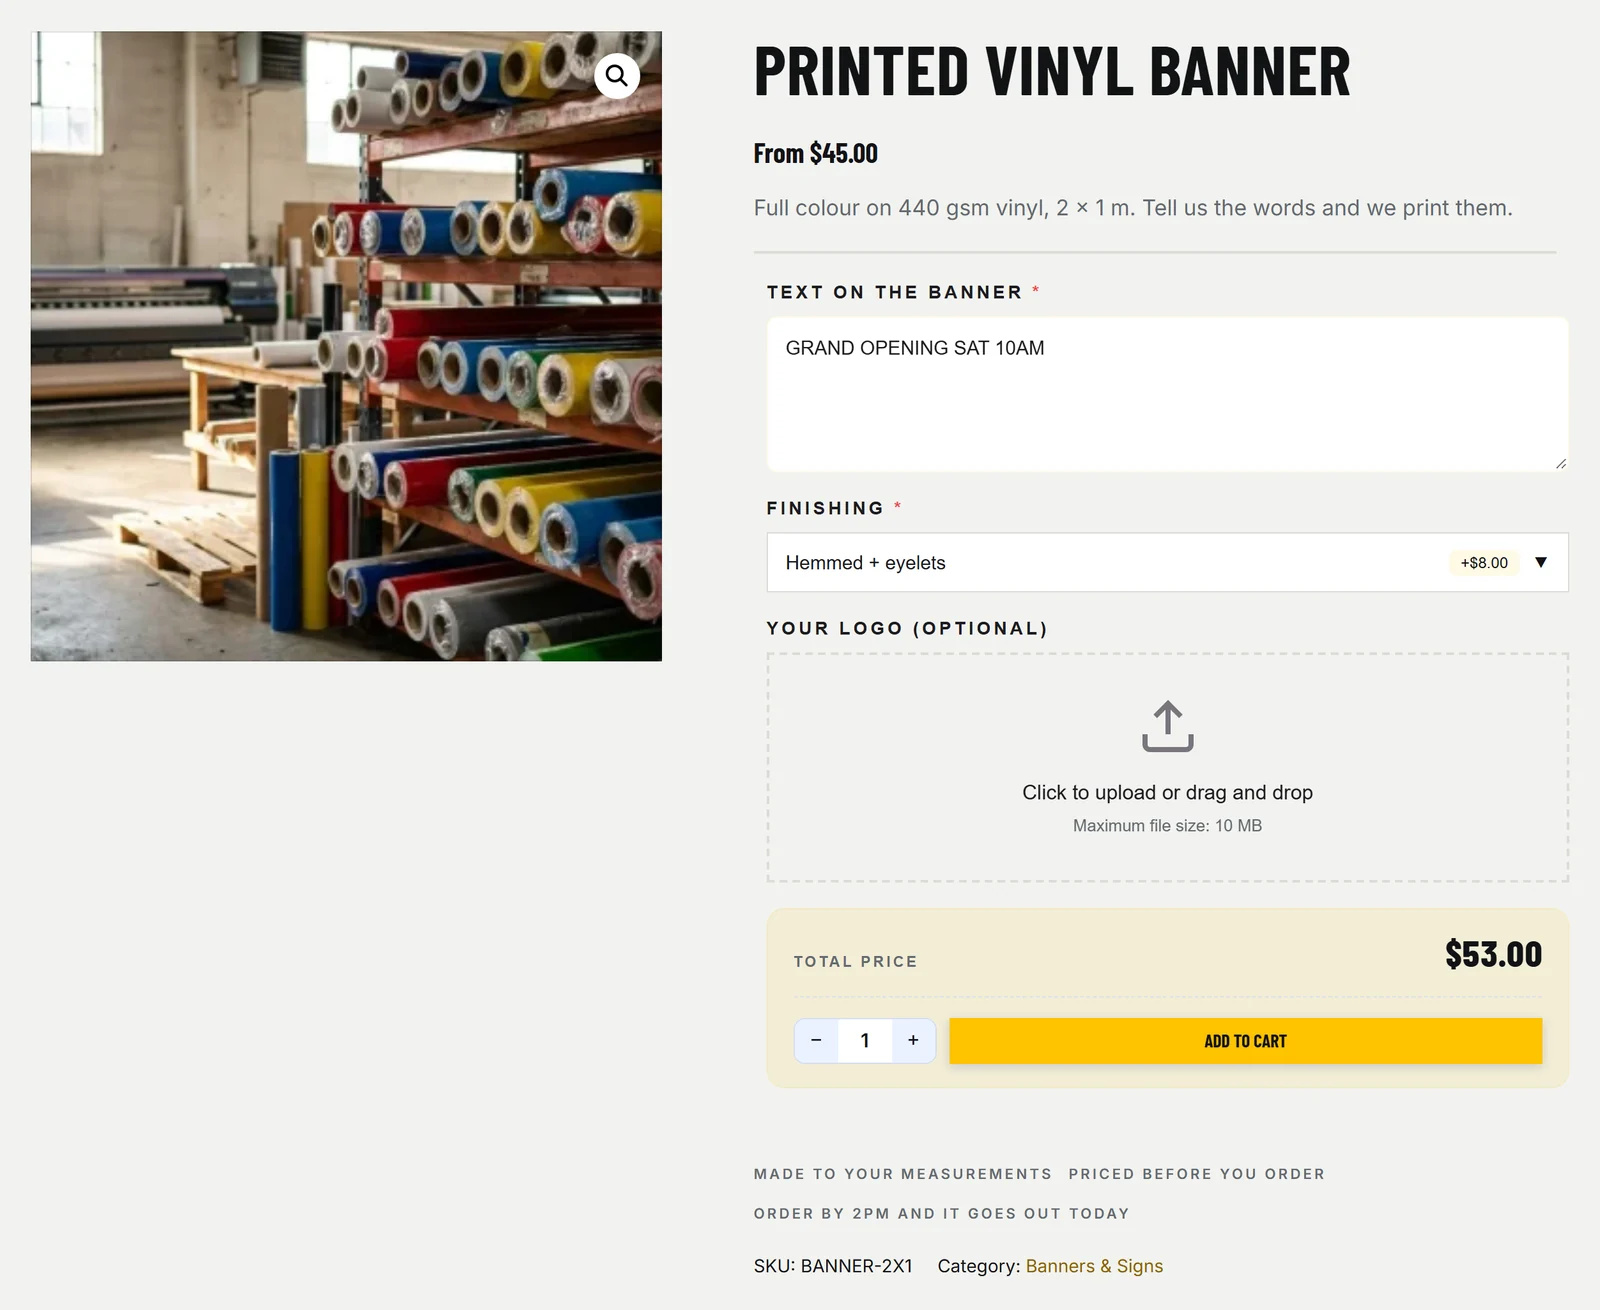
The colours are a setting too, under Calculator Pro, Settings, Design & Styling. Here they are the ones the StoreWise starter site sets, so the calculator looks like part of the theme.
You set it up in the calculator builder, not in code:
- Go to Calculator Pro, Add New. On the Basic Information tab, name it and pick Product Calculator for the products you choose, or Category Calculator for a whole category. Save it.
- On the Input Fields tab, click Add Field for each question: a Text field for the words, a Dropdown for the finishing with a price on each option, and a File Upload for the logo. Tick Required where you need an answer.
- On the Formula Editor tab, write how the price is worked out. For the banner it is
45 + finishing: the banner’s $45 plus whatever the chosen finish adds.
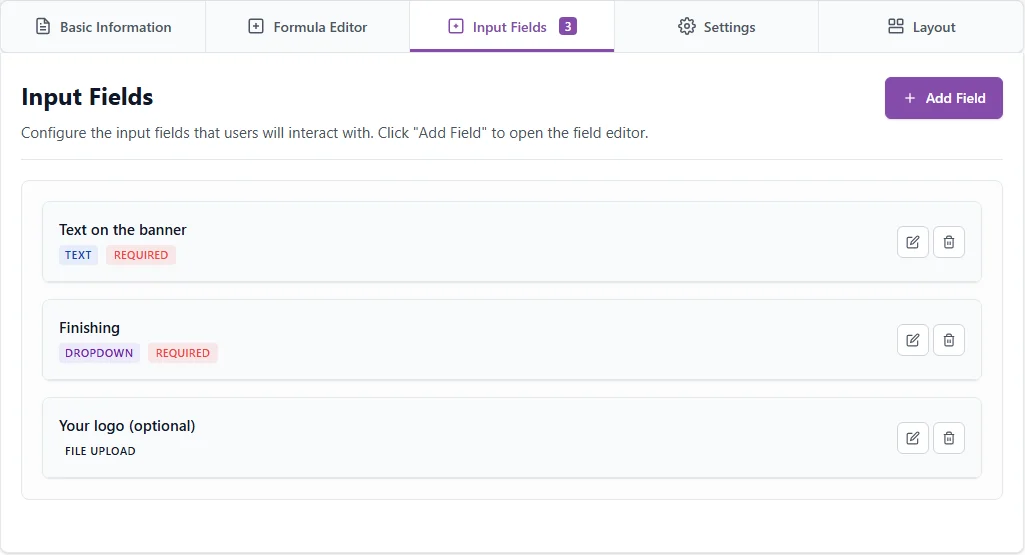
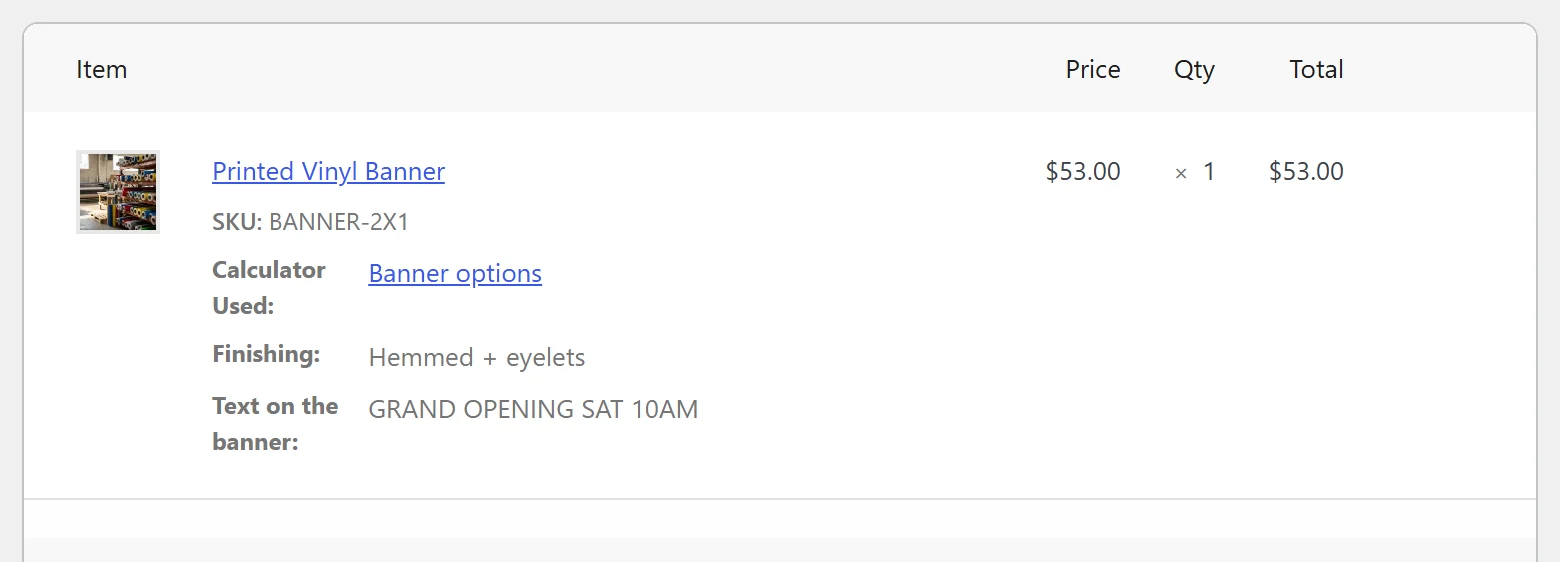
I put this banner through the same test as the snippet, on all three themes and both checkouts. Every time, the words and the finishing reached the cart, the checkout, the order and both order emails, and the order came to $53. An empty text box was refused, and so were the buy link and the Store API, because neither brought the answers with it.
What it does that the snippet can’t:
- 15 field types: text, number, dropdown, radio buttons, checkboxes, slider, file upload, date or booking, email, phone, measurement, price by size, price grid, add-ons, and a set of fields the customer can repeat.
- The price follows the answers. It is worked out again on your server when the item goes in the cart, so the total shown in the browser is never simply trusted.
- Customers can change their answers from the cart, with an Edit options link, instead of removing the item and starting again.
- A field can appear only when another answer needs it, and a text field can charge per letter or per word.
The free version of PriceWise has one field type: a number box with a live price. If you want the customer to enter a size or a quantity and see the price change, that part is free, and my guide to a custom price field from user input walks through it. Text, dropdowns, uploads and the rest are in Pro, from $49 a year or $99 once.
Worth a look before you decide: the demos are ordinary products in my own shop. Fill one in and watch the price move.
If you meant checkout fields
Fields at checkout, like a company VAT number or delivery instructions, belong to the whole order, not to one product. PriceWise does not do those.
On the block checkout, WooCommerce has its own function for them, woocommerce_register_additional_checkout_field(). The classic checkout uses the woocommerce_checkout_fields filter. They are separate, so if your shop might switch checkouts, check which one you are on first.
FAQ
Where do I put the code?
In a code snippets plugin, or in your child theme’s functions.php. Not in your main theme: the next theme update wipes it.
What is the difference between custom fields and attributes?
Attributes are WooCommerce’s own product details. They show in the Additional information tab, and the shared ones you set up under Products, Attributes can also filter the shop. Custom fields are WordPress’s free-form notes on a product. They show nowhere until you add code, which also means you decide exactly where they go.
Does the snippet work with variable products?
Yes. I tested it on a flag sold in two sizes, on all three themes. The customer picks a size, types the text, and the order line reads “Printed Flag – Large” with the text under it.
Does what the customer typed show in the order emails?
With step 5 of the snippet, yes. In my test it was in the new order email to the shop and in the order email to the customer. Without step 5 it was in neither.
Can the price change with what the customer picks?
Not with the snippet. That takes code that works the price out again when the item goes in the cart, which is what PriceWise does.
Does it work with the block cart and checkout?
Yes. I tested the snippet with the block cart and checkout and with the classic ones, on Twenty Twenty-Five, Storefront and StoreWise. The text showed in all of them.
My bottom line
Details you fill in: an attribute, or a custom field and a few lines of code.
One box the customer fills in: the six-part snippet. And if you copy code from anywhere else, check it saves the answer on the order, not just in the cart.
Several fields, choices, uploads, or a price that follows the answers: PriceWise Pro.