After installing, Sellsmith adds a top-level Sellsmith menu to your wp-admin sidebar and opens its settings page for you.
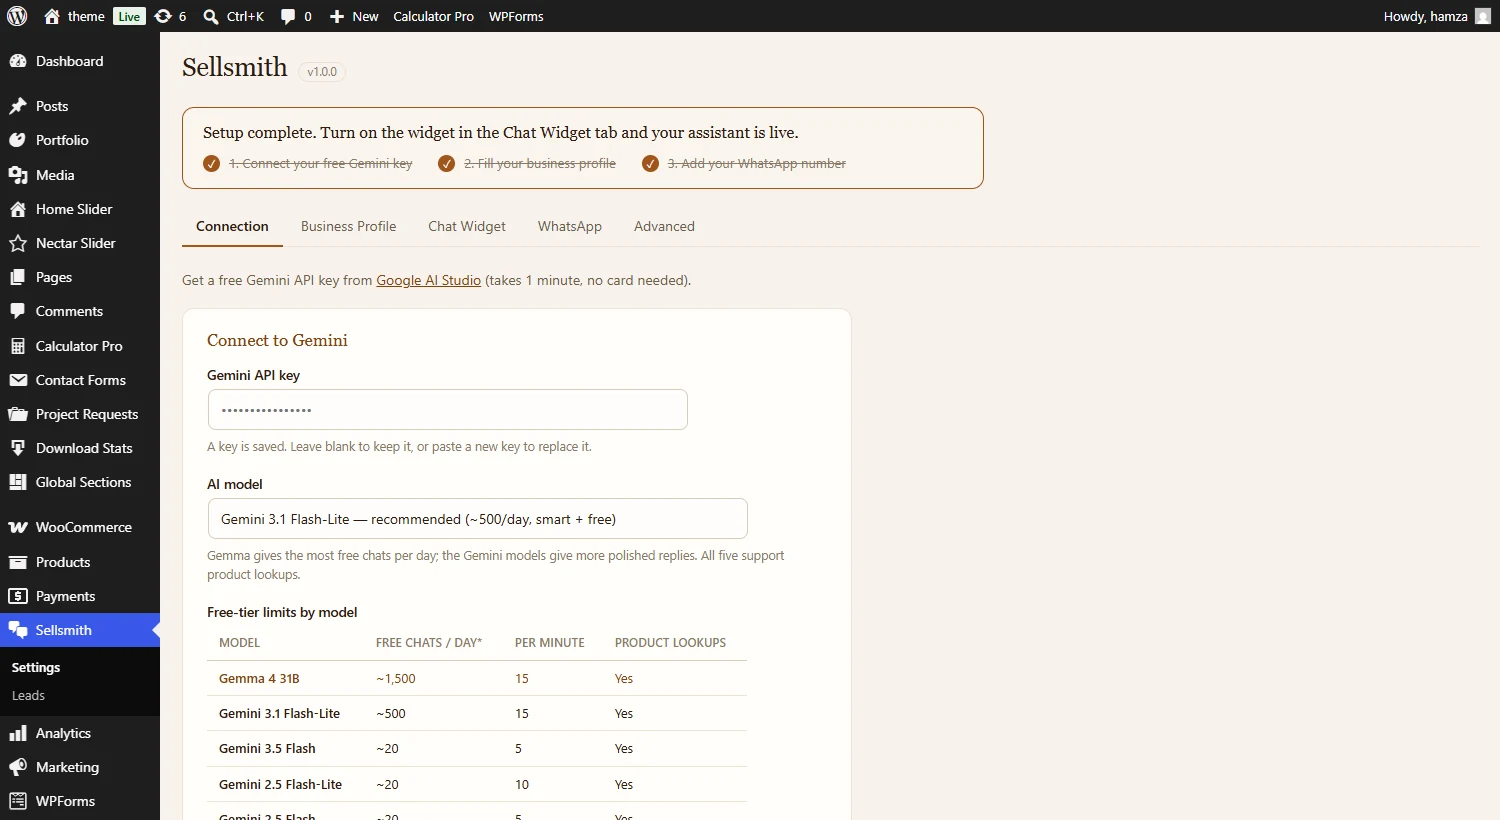
The Sellsmith settings page. Five tabs: Connection, Business Profile, Chat Widget, WhatsApp, and Advanced.
Install & Activate
In your WordPress admin go to Plugins, Add New, Upload Plugin. Choose the Sellsmith .zip file, click Install Now, then Activate. On activation it sets up its database and opens its settings page once.
Find the Sellsmith Menu
Look for the Sellsmith item (chat icon) in your admin sidebar. The settings page has five tabs: Connection, Business Profile, Chat Widget, WhatsApp, and Advanced.
Follow the 3-Step Checklist
The settings page shows a short setup checklist: connect your Gemini key, fill your business profile, and add your WhatsApp number. Each one links straight to the right tab. The steps below cover them in detail.
Turn the Widget On
The chat widget is off until you switch it on. On the Chat Widget tab, tick “Show the chat widget on my store” and save. Your assistant is now live.
- Sellsmith: Your settings, across the five tabs.
- Sellsmith, Leads: Every saved conversation, with stats and transcripts.
Was this page helpful?
Thanks for telling us.
Sorry it did not help. Tell us what you were looking for and we will add it.